Paint Wine Near Me: DIY Bottle Painting Guide
Learn to paint wine bottles and glass surfaces with a practical, home-friendly method. This PaintQuickGuide guide covers surface prep, paints, layering, drying, sealing, and local sourcing tips for 'paint wine near me' projects.

You will learn a practical, step-by-step method to paint wine bottles and related glass surfaces, focusing on safety, surface prep, coats, sealing, and local supply choices for 'paint wine near me' projects. This guide helps homeowners and DIY enthusiasts achieve durable, salon-quality results with common tools. It covers materials, masking, drying times, and tips to avoid common mistakes.
Surface prep and safety for glass surfaces
Surface preparation is the foundation of a durable glass finish. Start with clean, oil-free surfaces by washing bottles with warm, soapy water and rinsing thoroughly. For stubborn residues, wipe with isopropyl alcohol and dry completely before painting. If you’re pursuing local supplies after a search like 'paint wine near me', the process remains the same—prioritize clean glass over fancy techniques. According to PaintQuickGuide, proper surface prep is the single most important step for glass painting durability. Whether you’re working on a clear bottle, a frosted piece, or a decorative jar, the smoother the surface, the more even your color laydown will be. Plan a workspace with good lighting and a flat, stable surface. Keep a dedicated area for painting and curing to prevent dust contamination. If you see fingerprints or oils after washing, re-clean and re-dry; even small surface oils can cause fisheye or poor adhesion. For best results, choose glass-cleaning products labeled safe for artwork and avoid household cleaners with waxes. The reader should be comfortable with basic prep steps before moving forward with paints or primers.
Think of this as the blueprint stage: your bottles, jars, and glass decor will respond best to a clean canvas. Wear gloves when handling exposed surfaces to minimize oils from your hands. Ventilation matters: work in a well-ventilated area, especially if you’ll be using solvent-based products or sealants. If you’re painting multiple items, set up a dedicated drying rack and label each piece so you don’t mix projects by mistake. Remember that the goal is to create a stable foundation that accepts thin, even coats and yields long-lasting color. The PaintQuickGuide team emphasizes that patience in prep saves you time later. A quick test on a scrap piece can help you gauge how different cleaners interact with your chosen paint.
wordCountOnlyBySection
Tools & Materials
- Acrylic enamel or glass-specific paint(Choose paints labeled for glass or ceramic surfaces.)
- Primer for glass (optional but helpful)(Use a transparent or white bonding primer designed for glass.)
- Glass cleaner and lint-free wipes(For initial cleaning; avoid lint residues.)
- Isopropyl alcohol (70% or higher)(Used to degrease and prep if needed.)
- Painter’s tape and masking materials(Mask edges or create designs.)
- Soft synthetic brushes (various sizes)(For smooth color application and detail work.)
- Foam or sponge brushes(Great for texture or smooth gradients.)
- Clear sealant compatible with glass paint(Look for UV-resistant, dishwasher-safe if applicable.)
- Drop cloths or old newspapers(Protect surfaces and floor.)
- Ventilated area or mask/respirator(Use with solvent-based products; follow safety guidelines.)
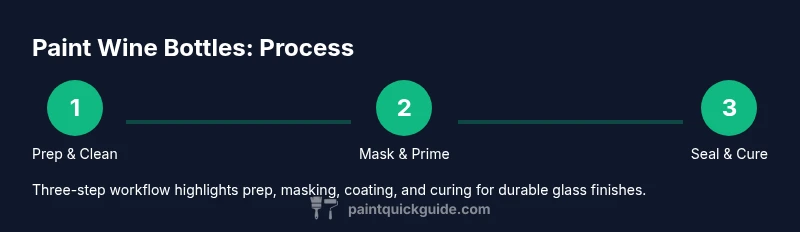
Steps
Estimated time: 2-4 hours
- 1
Set up workspace and gather materials
Clear a well-lit, flat area and lay down drop cloths. Arrange paints, brushes, tapes, and sealants within easy reach. This saves time and reduces the risk of spills. Pre-check by wiping bottles with alcohol to ensure a clean surface and verify you have all items.
Tip: Label containers and align colors from light to dark to minimize cleanup later. - 2
Clean and degrease the glass surface
Wipe each bottle with glass cleaner, then finish with a quick wipe of isopropyl alcohol. Allow to dry completely to prevent streaks. This step prevents adhesion problems and ensures an even base.
Tip: If you see any oily fingerprint, repeat cleaning before painting. - 3
Mask edges and plan your design
Use painter’s tape to mask rims, lips, or areas you want to keep clear. Sketch your design lightly with a pencil or use stencils for precision. Masking reduces mistakes and makes later touch-ups easier.
Tip: Test fit masking on a scrap surface to minimize adhesive residue. - 4
Apply a base coat if needed
For glass surfaces that are dark or highly reflective, apply a thin base coat to improve color vibrancy and coverage. Let it dry according to the paint’s guidelines before adding layers.
Tip: Choose a light base under bright colors to ensure true hue appearance. - 5
Layer colors in thin, even coats
Apply color in thin layers rather than one thick coat. Allow each coat to dry fully before the next to avoid peeling or cracking. This approach yields smoother results and reduces brush marks.
Tip: Keep a damp brush for blending edges to avoid harsh lines. - 6
Add texture and special effects
For gradients, use dry brushing or sponges to blend colors gently. For speckles, tap a dry brush lightly across the surface. Practice on a scrap piece first to dial in your technique.
Tip: Work from light to dark shades to maintain control over saturation. - 7
Seal the artwork and cure properly
Once color layers are dry, apply a clear sealant suitable for glass. Let the coating cure in a dust-free area for the recommended time. Do not rush curing, as improper sealing can cause smudges or cracking.
Tip: Avoid sealing with hot air or direct sunlight during curing. - 8
Final evaluation and cleanup
Inspect for uneven spots and touch up as needed. Clean brushes and remove masking carefully to avoid lifting paint. Store finished pieces upright to prevent smudges while sealing fully cures.
Tip: Take photos for your records and for future reference.
Your Questions Answered
Can I use Spray paint on glass bottles for this project?
Spray paints can be used on glass, but select products labeled for glass and follow ventilation guidelines. They often require longer dry times and a compatible sealant. Test a small area first to avoid drips or runs.
Spray paints can work on glass, but pick glass-safe formulas and test a small area before committing. Ensure good ventilation and use a compatible sealant after drying.
Is baking the painted wine bottle necessary to cure the paint?
Baking can accelerate curing for certain paints, but it’s not universally recommended for all glass paints. Always follow manufacturer instructions. When in doubt, air-dry fully in a dust-free area and cure with a sealant.
Some paints can be cured with gentle heat according to the product, but always read the label. If unsure, air-dry and seal as directed.
How long should the finished bottle cure before handling?
Cure times vary by product, but a typical glass paint sealant may require 24-72 hours. Avoid washing or heavy handling during this window. Check the sealant’s directions for exact timing.
Expect 1 to 3 days for full cure, depending on the product. Don’t rush—check the sealant directions.
What if the paint peels after drying?
Peeling usually means poor surface prep, incompatible paint, or insufficient curing. Scrape off the peeling area, re-clean, and reapply a compatible base and topcoat with proper curing time.
If peeling happens, remove the loose paint, clean again, and recoat with a compatible system after proper curing.
Can I dishwasher-clean painted glass?
Most painted glass isn’t dishwasher-safe unless the paint and sealant explicitly state it. Hand wash gently and dry immediately to prolong life.
Avoid dishwasher cleaning unless the product says it’s dishwasher-safe; hand wash and dry to preserve the finish.
Are there eco-friendly paints suitable for glass?
There are water-based glass paints and low-VOC enamel options that perform well on glass when sealed properly. Look for products labeled low VOC and compatible with glass.
Yes, there are water-based and low-VOC glass paints. Pair them with a compatible sealant for best results.
Watch Video
Quick Summary
- Prepare glass surfaces thoroughly for best adhesion.
- Use thin coats and allow full drying between layers.
- Masking helps protect edges and achieve clean designs.
- Seal and cure properly to maximize longevity.
- Practice on scraps to refine technique before final pieces.