Paint and Wine Night: A Practical Home-Painting Guide
Learn to host a safe, creative paint-and-wine night at home. This practical guide covers prep, materials, palette building, step-by-step workflow, and cleanup for a fun, finished project.

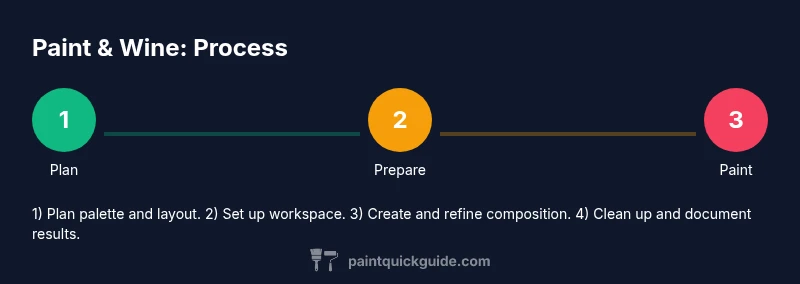
By following this guide, you’ll host a safe, enjoyable paint-and-wine night and finish a small art piece in one sitting. You’ll learn how to plan the event, select materials, build a cohesive palette, execute a simple painting with a step-by-step workflow, handle cleanup, and keep beverages safe and separate from tools.
Why 'paint and wine' works for DIY art
The phrase paint and wine captures a simple idea: create art in a social, low-pressure setting. For many homeowners and DIY enthusiasts, combining light beverages with guided painting reduces intimidation and encourages experimentation. In practice, a well-planned session blends clear steps, accessible materials, and a friendly pace so beginners can produce a finished piece in one sitting. According to PaintQuickGuide, success hinges on three pillars: space preparation, palette cohesion, and mindful workflow that respects safety with liquids and tools. The goal is not professional-grade mastery, but a usable, decorative piece and a positive experience. Expect short bursts of painting, periods of conversation, and occasional breaks to sip a beverage. When done well, participants leave with a sense of accomplishment, a photo of their finished canvas, and ideas for future projects. The PaintQuickGuide team emphasizes that clarity in the setup—visible supplies, labeled colors, and stepwise progress—keeps the session on track and enjoyable for everyone involved.
Planning the session: goals, budget, and safety
Before you begin, outline goals: what will participants leave with (a finished piece, confidence, a new technique), how long you expect the session to last, and how you’ll handle logistics like drinks and cleanup. Establish a budget that covers paints, canvases, brushes, and disposable items, but leaves room for extras like a simple snack or a viewing moment. Safety comes first: ensure good ventilation if using solvent-based products, keep beverages away from wet painting stations, and designate a clean-up zone with towels and water for rinsing brushes. A quick layout plan helps avoid chaos: set up a main painting area, a color-mixing station, a break area, and a dedicated cleanup corner. As you plan, invest in a simple, repeatable process so future sessions can be more efficient. PaintQuickGuide’s guidance emphasizes starting with a clear checklist, so you don’t overlook essential supplies or safety steps.
Surface prep and choosing materials
Surface prep is the backbone of a successful painting session. Start with primed surfaces or sturdy canvas boards designed for acrylics; avoid highly absorbent materials that soak up color unevenly. Lay down drop cloths to protect tables, and use painter’s tape to mask edges if you want crisp borders. Choose a cohesive color palette with 3-4 base colors and one or two neutrals for balance. Pre-label containers or cups to prevent color mix-ups, and keep a dedicated water jar for rinsing brushes. Tool choice matters: select brushes in a few sizes for broad areas and fine details, and have a palette knife handy for texture. Stock up on paper towels and wipes to manage spills quickly. By arranging materials logically, you create a smooth flow from setup to final piece. Remember: the goal is confidence-building, not perfection.
Color strategy and palette building
Color harmony is the heart of a successful paint-and-wine project. Start with a neutral base and build accents with a cohesive set of colors that work under your room’s lighting. A practical approach is to use a triad or analogous color scheme to ensure harmony without overthinking. Test mixes on a scrap surface before applying to the main piece; this helps you understand value (light to dark) and temperature (cool vs. warm). Keep notes on color ratios so you can reproduce effects in future sessions. If you’re decorating a room, pull inspiration from existing furnishings—pillows, art, and textiles—to guide your palette. In addition to the aesthetic layer, consider the mood you want to evoke: calmer blues for a tranquil scene, or vibrant yellows and corals for a lively centerpiece. PaintQuickGuide recommends writing down your palette before you start to avoid mid-session guesswork.
Tools and workspace setup
A well-organized workstation saves time and reduces mess. Lay out drop cloths, a clean table surface, and a dedicated space for color mixing. Place paints in a logical order: warm colors together, cool colors together, and neutrals in a separate area. Keep brushes upright in containers or laid out in a brush holder to prevent accidental drips. Have a separate cup for rinsing water, plus paper towels for any spills. Lighting should be bright and even to show true color values, and a viewing area away from the painting table helps participants assess progress without crowding. Consider music or a light background activity to enhance the social atmosphere, but avoid anything too distracting. Clear labeling, simple storage, and a calm workflow set the tone for a positive, repeatable experience.
Step-by-step project workflow: base to finish
Plan a simple project that can be completed in one sitting. A typical workflow includes establishing a background, blocking in shapes, adding mid-tones, applying highlights, and performing final refinements. Start with a broad base layer to establish the composition, then gradually add color areas rather than flood the canvas at once. Step back frequently to judge proportions and balance; use your brush strokes direction to guide the eye. Allow brief drying periods between layers to prevent color muddiness. As you progress, keep beverages out of the painting area and only enjoy them during designated breaks. This discipline helps maintain a clean, safe workspace while promoting social interaction and artistic growth.
Techniques for texture and depth
Texture adds interest and depth to a painting, even when you’re a beginner. Try dry brushing for subtle textures, scumbling to create hazy edges, and layering glazes for depth. Use a sponge for stippling effects in backgrounds, and switch to fine-tipped brushes for detail lines. Keep your edges soft where needed and sharpen them in focal areas to draw attention. If you’re painting a landscape or abstract, variety in brush size and stroke direction creates movement. Remember to step back often and compare values across the piece to avoid flat areas. Practice on scrap pieces first before applying the technique to the final piece, then incorporate the style into future sessions for quick improvements.
Hosting etiquette: wine, safety, and cleanup
Hosting a paint-and-wine night requires a balance between socializing and artistic focus. Encourage conversation but set gentle boundaries on alcohol consumption during the painting process to avoid accidents. Offer non-alcoholic beverages as an alternative, and ensure everyone has a safe path to the cleanup area. Use a spill mat and disposable napkins for easy cleanup, and remind participants to seal paint lids after use to prevent spills. At the end of the session, collect finished artwork for display or photos, rinse brushes promptly, and store paints in a cool, dry place. A tidy, organized space reinforces a professional vibe and makes future sessions faster to set up.
Common issues and quick fixes
Even with planning, some challenges arise. If colors look muddy, adjust with a cleaner neutral or a fresh white base and re-layer. If edges bleed, reassess masking tape and ensure paints are not over-applied near tape lines. If drying times stretch the session, switch to faster-drying acrylics or adjust your palette to thinner layers. For surface prep problems, re-prime a base surface or switch to a different substrate such as a canvas board designed for acrylics. Finally, keep a small repair kit handy (tape, cleaning solvent, spare brushes) to address minor smudges or mistakes quickly. Addressing issues calmly helps maintain momentum and enjoyment for all participants.
Extending the idea: capturing results and future projects
Document the evening by taking high-quality photos of each finished piece and the palette used. Create a simple gallery wall or online album to showcase participant work and inspire future sessions. Use the same workflow for subsequent projects, varying the color schemes or themes to keep things fresh. Consider creating a small instruction card with the basic steps for next time, so guests can recreate a similar project at home with minimal guidance. Finally, collect feedback from participants to refine your approach: what worked well, what felt rushed, and what new techniques they’d like to try. The goal is to turn a one-off night into a recurring, enjoyable creative habit.
AUTHORITY SOURCES
- https://www.epa.gov/iaq/what-volatile-organic-compounds-vocs
- https://www.osha.gov/chemical-safety
- https://www.cdc.gov/niosh/
Tools & Materials
- Drop cloths(Protect floors and furniture from spills)
- Painter's tape(For clean edges and masking)
- Paints (acrylic or chalk-based)(Choose a small palette of base colors)
- Brush set (assorted sizes)(Include flat and round brushes)
- Canvas boards or wood panels(Prepped or primed surfaces)
- Pallet or cups for color mixing(Label colors to prevent mix-ups)
- Water cup for rinsing brushes(Keep water fresh; change as needed)
- Paper towels or rags(For spills and cleanup)
- Wine glasses or non-alcoholic beverages(Optional for the paint-and-wine ambiance)
- Aprons or old shirts(Protect clothing)
- Good lighting and ventilation(Bright, steady light; avoid fumes)
Steps
Estimated time: 90-120 minutes
- 1
Prep workspace
Clear the table, lay down drop cloths, mask edges with painter’s tape, and arrange brushes and paints in order of use. This keeps the session tidy and reduces mid-project hesitations.
Tip: Arrange items in intended workflow order to keep momentum. - 2
Select color palette
Choose 3-4 base colors plus neutrals. Test mixes on a scrap piece to preview value and temperature under room lighting.
Tip: Label color jars to prevent cross-contamination. - 3
Sketch design outline
Lightly sketch the composition on the surface with pencil or chalk. A simple guide helps non-artists stay on track without overthinking.
Tip: Use a grid method if you prefer proportional accuracy. - 4
Lay base layer
Apply a broad background color with even strokes; keep layers thin to avoid cracking. Allow a brief dry time (5-10 minutes) before adding more color.
Tip: Work in sections to prevent color from drying unevenly. - 5
Block in shapes and mid-tones
Fill larger shapes with mid-tones to establish balance. Avoid overworking; multiple light passes yield smoother blends.
Tip: Reserve fine brushes for edges and detail areas. - 6
Add highlights and texture
Layer highlights and texture with small brushes. Build depth gradually; wipe excess paint from edges to maintain crisp lines.
Tip: Keep a damp brush to smooth transitions rather than forcing blends. - 7
Take a beverage break
Pause to sip a wine or non-alcoholic option. Reassess composition with fresh eyes before continuing.
Tip: Set a time limit for breaks to maintain flow. - 8
Final touches and seal
Refine lines and values; sign the piece. If you plan to varnish, apply after full drying per product directions.
Tip: Test varnish on a scrap area before full application. - 9
Cleanup and share
Rinse brushes, wipe surfaces, and photograph the final piece. Store paints properly for future sessions.
Tip: Have your camera ready before cleanup to capture the moment.
Your Questions Answered
What is paint and wine and why is it popular for DIY projects?
Paint and wine combines a guided painting activity with social drinking, making art creation approachable for beginners. It emphasizes planning, simple supplies, and a relaxed pace so participants can complete a finished piece in one sitting.
Paint and wine blends creativity with conversation, making DIY art feel accessible and fun.
Can I host a paint-and-wine night with kids or teens?
Yes, with non-alcoholic beverages and proper supervision. Keep the activity age-appropriate, select materials safe for younger participants, and ensure the workspace remains tidy and organized.
Yes, as long as you substitute non-alcoholic drinks and supervise closely.
What surfaces work best for a paint-and-wine project?
Canvas boards or primed wood panels work best for acrylic-based paints. Avoid extremely porous or unprimed surfaces that can cause uneven absorption and muddy colors.
Choose primed canvases or sturdy panels for clean application and easier cleanup.
What type of paint should I use?
Water-based acrylics are ideal for beginners due to easy cleanup and quick drying. Chalk paints offer texture and a matte finish, but consider drying times and surface compatibility.
Acrylics are great for beginners because they’re forgiving and easy to clean up.
How do I clean up after the session?
Rinse brushes with water, wipe surfaces, and store paints properly. Wash hands, dry tools, and photograph the finished piece. Have a dedicated space for cleanup to keep beverages and art areas separate.
Rinse brushes, wipe down surfaces, and store materials for the next session.
Watch Video
Quick Summary
- Plan a safe, social painting session with clear materials.
- Prepare surfaces and palette before painting begins.
- Balance color choices with lighting to avoid color shifts.
- Include a short break to enjoy the wine and reflect on composition.
- Document results for future projects.