Wine a n d paint: A Practical Home Guide
Learn how to host a safe, affordable wine a n d paint night at home with practical planning, step-by-step painting activity, cost-saving ideas, and cleanup tips.

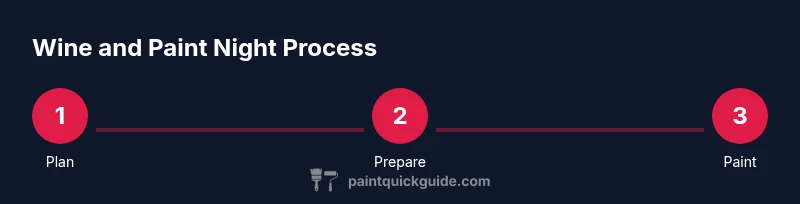
This guide shows you how to host a wine a n d paint night at home with practical planning, safe materials, and a simple step-by-step activity that suits beginners and seasoned crafters alike. You’ll learn how to manage costs, set up a friendly workspace, and keep cleanup quick and easy.
The concept behind wine a n d paint as a themed at‑home activity
The idea of a wine a n d paint night blends creativity with social relaxation. It isn’t about mastering fine art in one sitting, but about enjoying a guided painting project while savoring conversation and a glass of wine or a non-alcoholic alternative. According to PaintQuickGuide, framing the experience around simplicity and accessibility helps everyone feel included, from first-timers to seasoned hobbyists. Start with a small, clear objective—like a single vase silhouette or a wine glass study—and keep the color palette limited to 4–6 hues for a stress-free session. The key is to focus on enjoyment and learning rather than perfection; the process matters more than the result, especially for a home environment where comfort trumps prestige.
Planning the event: guest list, budget, and format
A successful wine a n d paint night starts with a practical plan. Decide whether you’ll host a private session for family and friends or open it to a broader group. Set a reasonable guest limit that fits your space and materials, and select a delivery format (in-person with a single artist-led lesson, or a relaxed, free-form session). Draft a light budget that accounts for canvases, paints, brushes, and the essential tools. Consider a bundled kit option to reduce costs and simplify setup. PaintQuickGuide’s approach emphasizes affordability and inclusivity—two core pillars that help keep the event enjoyable without breaking the bank.
Materials, workspace, and safety considerations
Create a dedicated painting area with a sturdy table, protective barriers (drop cloths or old sheets), and good lighting. Use non-toxic, water-based acrylic paints for easy cleanup, especially in homes with curious kids or pets. Have water cups on hand for rinsing brushes, paper towels for spills, and a small waste bin nearby. Ventilation matters; keep the room airy if you’re using any scented products or glazes. Always supervise alcohol-consuming participants and keep beverages away from the art supplies to prevent accidental stains or contamination.
A simple, enjoyable painting activity that ties to wine imagery
Choose a straightforward subject that translates well to a single-session project—think a wine glass, a bottle silhouette, or a vineyard landscape simplified to essential shapes. Demonstrate a few core techniques: flat background color, shape blocking, and light/dark contrast to suggest volume. The activity should be relaxed yet structured enough to provide a sense of achievement by the end. Encourage experimentation with brush sizes and layering, and remind everyone that practice leads to improvement, not perfection. When done, allow pieces to dry in a safe spot while participants chat and share tips.
Creative variations and color ideas to evoke wine aesthetics
Wine-inspired palettes lean on burgundy, rose, plum, and gold accents. Experiment with glazing to create translucent wine washes that mimic the depth of red wine. For a modern twist, pair metallic gold highlights with a deep burgundy background to evoke a festive feel. If you’re introducing younger painters or beginners, offer a simplified two-color exercise—one warm shade for the subject and one cool shade for the background—to build confidence while still capturing the wine theme.
Cleanup, storage, and future project ideas
A smooth cleanup process makes hosting a recurring event much easier. Rinse brushes thoroughly, wipe down surfaces, and store paints upright in a cool, dry place. If you have leftovers, label and seal containers to preserve color accuracy for future sessions. Consider turning the project into a mini-series—each session focuses on a different element of wine imagery (glasses, bottles, vineyard hills) to build a cohesive set over several weeks. This approach helps manage costs and sustains interest over time.
Tools & Materials
- Acrylic paint set (12 colors)(Non-toxic, water-based; include core tones like white, black, red, burgundy, and yellow)
- Canvases or painting panels(8x10 inches minimum; pre-stretched is ideal)
- Paint brushes set (assorted sizes)(Include flat and round brushes; sizes 2, 6, 10, 14 recommended)
- Palette or disposable paper plates(One plate per painter or a shared palette for small groups)
- Drop cloths or old sheets(Protect surfaces; consider vinyl table covers for easier cleaning)
- Water cups for rinsing brushes(One per painting station, plus an extra for rinsing thicker colors)
- Paper towels or cloths(Keep near the workspace for quick cleanups)
- Pencil and eraser (optional)(Light sketch guide before painting)
Steps
Estimated time: 2-3 hours
- 1
Set up workspace
Clear a dedicated painting area, lay down drop cloths, and arrange canvases and paints within easy reach. Ensure good lighting and ventilation, and designate a beverage station away from the art supplies. This setup reduces spills and keeps everyone comfortable from the start.
Tip: Place a small trash bin nearby to encourage quick cleanup between steps. - 2
Arrange color palette
Pre-s Place colors on palettes or plate sections. Group related tones (burgundy with pinks, greens with earth tones) to speed painting and reduce color mixing time.
Tip: Label colors with sticky notes if you’re hosting beginners. - 3
Sketch the subject
Lightly sketch your chosen wine-themed subject on the canvas with a pencil. Keep lines simple and compositional, focusing on major shapes rather than fine details.
Tip: Use a low-contrast pencil to avoid visible lines after painting. - 4
Paint base layers
Apply the background color first, then block in the main shapes with mid-tones. Let each layer dry before adding the next to prevent muddy colors.
Tip: Work from large shapes to smaller ones for better balance. - 5
Add depth with washes
Thin paint with water to create translucent washes that suggest depth—perfect for glass or liquid highlights. Build layers gradually to avoid cracking.
Tip: Test washes on a scrap surface before applying to the final piece. - 6
Finish and display
Add final highlights and shadows, sign your piece, and place it in a safe drying spot away from traffic. Consider framing or matting for a polished display.
Tip: Allow at least 24 hours for full cure before heavy handling.
Your Questions Answered
What is wine a n d paint?
Wine a n d paint is a home activity that combines a guided painting session with wine or a beverage of choice. It emphasizes learning simple painting techniques in a relaxed social setting, rather than perfect artistry. The idea is to enjoy the process and broth a sense of accomplishment with a themed outcome.
Wine a n d paint is a fun, beginner-friendly painting session paired with beverages; the focus is on the experience and learning rather than perfection.
Is it safe to use acrylic paint while drinking wine?
Acrylic paints are water-based and non-toxic when used as directed. Keep beverages away from the painting area to prevent spills on paints or canvases. Use protective barriers and supervise children closely if present.
Yes, but keep drinks away from the paints and brushes, and work in a well-ventilated space.
What materials do I need for a beginner wine a n d paint session?
A basic kit includes acrylic paints, canvases, brushes, palettes, water cups, paper towels, and drop cloths. You can simplify by using a small set of colors and pre-stretched canvases for faster setup.
You’ll need paints, canvases, brushes, water, and a clean workspace.
How long does a typical session last?
Most beginner sessions run 60–120 minutes for painting plus setup and cleanup. If hosting a larger group, plan for 2–3 hours to accommodate breaks and social time.
About one to two hours, plus time for setup and cleanup.
Can kids participate in wine a n d paint nights?
Yes, with non-alcoholic beverages and kid-friendly subjects. Adjust the palette to brighter colors and allow extra time for younger painters who may need more guidance.
Kids can join with supervision and a non-alcoholic setup.
How should I dispose of leftover paints and solvents?
Let unused paints dry in a well-ventilated area, then follow local guidelines for household hazardous waste. Do not pour paints down the drain in large quantities.
Let paints dry, then follow local disposal rules.
What if quality varies between participants’ paintings?
Emphasize progress over outcome. Encourage sharing tips and celebrate each participant’s unique result to keep the atmosphere positive.
Focus on fun and learning, not perfect results.
Watch Video
Quick Summary
- Plan a simple, theme-driven project
- Organize materials ahead to save time
- Protect surfaces and maintain clean-up routines
- Use wine-inspired palettes for cohesive results
- Experiment with washes and layering for depth