When to Paint Outside: A Practical Timing Guide
Learn the best times and weather windows for exterior painting, plus prep steps, drying times, and how to avoid rain setbacks. PaintQuickGuide explains how to plan, prep, and paint outside with confidence.

Plan exterior painting for a dry, mild-weather window of several days. The key requirements are dry surfaces, low humidity, and temps between roughly 50–85°F (10–29°C). Avoid painting if rain is forecast within 24–48 hours. Prepare surfaces, prime bare wood, and apply two coats for best durability. Also plan for shade during the hottest part of the day.
Understanding the best time window for exterior painting
Exterior painting hinges on a reliable weather window. In most moderate regions, the ideal window is a stretch of dry days with mild temperatures and low humidity. The PaintQuickGuide team suggests aiming for consecutive days where morning humidity is not excessive and surface temperature remains comfortable for the paint to cure. Plan ahead by watching a forecast for at least 48 hours and choosing a window that keeps you out of the path of sudden showers. Start by inspecting the current surface conditions: if wood has heavy moisture, if siding shows signs of rot, or if surfaces are dew-soaked, you should wait. Consistency matters: painting in cool, damp mornings followed by a hot, dry afternoon can create adhesion and finish issues. Also consider dew points; if you see morning dew, postpone painting until surfaces dry. This attention to timing reduces the risk of blistering, peeling, or other durability problems. According to PaintQuickGuide, the best outcomes come from predictable, multi-day windows rather than rushed weekend spurts.
Tools & Materials
- Drop cloths(Cover plants and sidewalks; secure edges against wind)
- Ladder or stable scaffold(Use proper safety gear; inspect for loose rungs)
- Painter’s tape(Protect trim, windows, and adjacent surfaces)
- Scraper and putty knife(Remove loose paint and fill small cracks)
- Wire brush or stiff-bristle brush(Clean rough surfaces and remove peeling edges)
- Bucket, detergent, and scrubber(Wash surfaces to remove dirt and mildew)
Steps
Estimated time: Estimated total time: about 1-3 days depending on weather
- 1
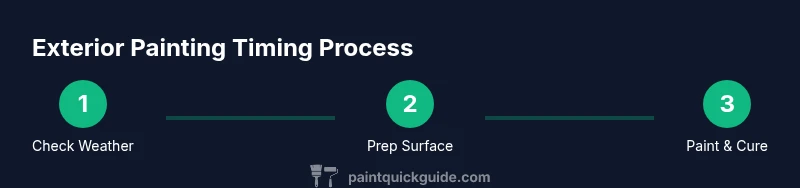
Check the weather window
Review the forecast for at least 48 hours and identify a dry spell long enough to complete preparatory work and two coats. Ensure temperatures remain within comfortable range and humidity stays moderate. Avoid days with strong winds that can blow dust and debris onto wet paint.
Tip: Check hourly updates during the window and watch for a quick shift in rain chances. - 2
Prepare exterior surfaces
Clean surfaces thoroughly, remove dirt and mildew, and repair cracks or damaged siding. If the surface is dry, lightly sand glossy areas to improve adhesion. Do not paint over damp wood or mold; moisture trapped under paint causes peeling.
Tip: Test moisture with a simple press test—wood should not feel cool or damp to the touch. - 3
Protect surrounding areas
Lay down drop cloths, tape off trim and plants, and cover outlets or vents. Move vehicles away if needed and keep pets indoors to prevent interference. Protect doors and windows from drips with painter’s tape or plastic sheeting.
Tip: Secure the drop cloths with weights or tape to prevent gusts from lifting them. - 4
Prime if needed
Prime bare wood, resinous surfaces, or stained areas to improve adhesion and color uniformity. Choose a primer compatible with your finish paint (latex or oil-based). Allow primer to dry fully per manufacturer recommendations before applying color coats.
Tip: Primer saves time and prevents stain bleed-through on lighter topcoats. - 5
Apply the first coat
Paint in long, even strokes, keeping a consistent distance from the surface. Maintain a wet edge to avoid lap marks. Work in shade when possible to reduce rapid solvent evaporation and flashing of the finish.
Tip: Use a quality exterior brush or roller; avoid cheap tools that shed bristles into the fresh coat. - 6
Apply a second coat and inspect
After the first coat cures to the manufacturer’s recommended touch-dry time, apply a second coat for full coverage and durability. Inspect for thin spots and touch up as needed before weather changes. Keep the area undisturbed to protect the finish.
Tip: Lighting from the side helps reveal thin areas you might miss from overhead.
Your Questions Answered
What is the best season to paint outside?
The best season varies by climate, but aim for dry, mild days with low humidity. In many regions, late spring through early fall offers favorable conditions. Always check local forecasts before starting.
Look for dry, mild days with low humidity and steady temperatures, then plan ahead.
How long should I wait between coats outdoors?
Wait for the first coat to reach its recommended dry-to-touch time per the product label before applying the second coat. Conditions like light wind or cool nights can extend drying.
Follow the product’s drying time and avoid rushing the second coat.
Can I paint outside when it’s humid or overcast?
High humidity and overcast conditions can slow drying and affect finish quality. If humidity is high, wait for a drier day or choose a breathable finish that’s designed for humid climates.
Avoid painting in very humid or damp conditions for best results.
Is primer required for exterior painting?
Primer is typically recommended over bare wood, stained surfaces, or when changing color dramatically. It improves adhesion, stain blocking, and color uniformity.
Primer helps the topcoat stick and look even across surfaces.
What if it starts raining during the project?
If rain begins, pause painting, cover or move tools and fresh paint, and allow surfaces to dry completely before resuming. Rushing in wet conditions can trap moisture.
Rain means stop painting, protect supplies, and resume only when dry.
Watch Video
Quick Summary
- Plan a dry weather window and avoid forecasted rain.
- Prepare surfaces thoroughly for best adhesion.
- Prime bare or stained surfaces before topcoats.
- Apply coats with a wet edge and inspect in good light.
- Follow product drying times and protect the area during cure.