Outdoor Painting Temperature: Guidelines for Exterior Work
Learn when painting outside what should the temperature be and how to pick conditions that optimize adhesion, curing, and finish. Practical ranges, humidity tips, and seasonal guidance for exterior projects.

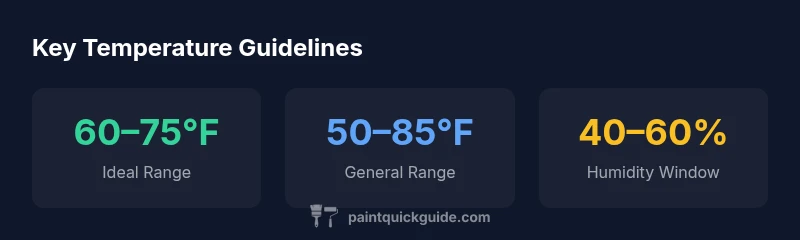
When painting outside what should the temperature be? For most paints used by homeowners and auto refinishing hobbyists, aim for roughly 50–85°F (10–29°C), with an ideal band near 60–75°F. Temperature affects drying, cure quality, and adhesion; humidity and sun exposure matter too. Avoid painting when temps drop below 45°F (7°C) or rise above 90°F (32°C).
Why Temperature Matters for Outdoor Painting
According to PaintQuickGuide, when painting outside what should the temperature be is not just a number—it's a keystone of performance. Temperature drives film formation, adhesion, and curing, and it interacts with humidity and sun exposure to influence drying times. In practical terms, painting outside in a stable 60–75°F range yields the most reliable results for latex and oil-based coatings on exterior surfaces. When temperatures move outside this band, you can see issues like longer cure times, poor adhesion, and uneven film formation. Homeowners and hobbyists should plan around a forecast that keeps the air and surface within a comfortable range for several hours.
Beyond the air temperature, consider the surface temperature and the forecasted changes over the painting window. A 5–10 degree swing during the day can switch the coating from workable to problematic, especially for mid-to-high gloss finishes. Tools like a digital infrared thermometer can help you verify surface temperature before you start each coat, ensuring you meet the ideal targets for your chosen product.
Temperature Ranges by Paint Type
Different paints tolerate different temperatures, and manufacturers vary in their recommendations. Latex (water-based) paints often perform best in the 50–85°F range, with peak results around 60–75°F. Oil-based and alkyd enamels typically require a slightly warmer window (60–85°F) to achieve proper film formation and cure without excessive surface tack. Always read the label; some products tolerate brief excursions outside the core range if humidity is controlled and the surface is dry. In auto refinishing contexts, dedicated automotive coatings may specify a narrower window that aligns with accelerants and curing aids, so check the datasheet before application.
When planning outdoor projects, map your schedule to the product’s temperature band and avoid days with forecasted temperature extremes. If you must paint during shoulder-season transitions, be prepared to adjust the plan or use alternative primers and topcoats designed for cooler or warmer conditions.
The Interplay of Temperature, Humidity, and Sunlight
Temperature by itself is not the whole story. Humidity slows solvent evaporation and can lead to solvent entrapment, while strong sun can cause uneven drying and stress cracking on some finishes. A high temperature with low humidity may dry too fast, reducing flow and increasing brush marks; low temperature with high humidity can leave surfaces damp enough to promote milky finishes or poor film formation. Aim for moderate humidity (roughly 40–60%) and keep direct sun off the coating during the critical early cure phase by shading exposed walls or choosing cooler parts of the day.
Seasonal changes amplify these effects. Spring and fall can offer ideal ranges but often bring gusty winds or rapid dew cycles. Summer days with strong UV exposure can work, but only if temperatures stay within the upper limits and surface temps don’t ramp too quickly. Winter work, when temperatures hover near the lower bound, may necessitate indoor curing aids or a dedicated heater to keep the film from failing to level. The key is balancing air temperature, surface temperature, and humidity to maintain proper film formation.
Seasonal Guidelines and Climate Considerations
Seasonal climate dramatically affects outdoor painting. In spring and fall, temperatures may drift through the ideal band, so plan for longer curing windows and avoid painting if a cold front is approaching. In hot climates, early morning or late afternoon application is safer to avoid peak sun and scorching surface temperatures. In humid regions, consider dew points and evenings that meet the product’s re-coating intervals; otherwise, you risk trapping moisture beneath the film. In coastal or high-humidity environments, you may need to target the lower end of the ideal range to ensure even leveling and adhesion. The forecast matters; a 2–3 day dry window with stable temperatures produces the best outcomes for exterior paints.
Practical Steps for Checking Temperature and Surface Readiness
Before you begin, verify both air and surface temperatures with a reliable thermometer and a surface thermometer. Ensure the surface is dry, clean, and free of dust, oils, and loose paint. If the forecast calls for a temperature dip, postpone; if you must proceed, use a compatible primer and thin coats to accommodate the cooler conditions. Surface preparation is critical: clean, dry, and properly abraded surfaces improve film formation and adhesion under less-than-ideal temperatures. Test a small area first to confirm flow and leveling before committing to a full coat.
On windy days, temperature readings can be skewed by the breeze. Shield the area, and allow for longer cure times if you see rapid evaporation or if dust is blowing onto a fresh film. Finally, never mix coatings at temperatures far outside the recommended range, as chemical compatibility can be jeopardized, leading to wrinkling or solvent popping.
Techniques to Manage Temperature Effects
Several practical techniques help you manage temperature-related challenges. Use dew point readings to avoid applying coats on surfaces that are still cooling from the day’s heat. Employ masking and airflow to prevent rapid surface drying in hot sun, which can cause film separation. When temperatures are near the lower limit, pre-warm the substrate with a gentle, indirect heat source and allow the surface to acclimate before applying the first coat. In cooler evenings, consider using slower-drying topcoats that allow for longer work times and better leveling. Finally, plan for longer re-coat windows on days with fluctuating temperatures to ensure proper adhesion and film integrity.
Quick Start Checklist for Your Next Exterior Painting Project
- Check air and surface temperatures; target 60–75°F (16–24°C) if possible.
- Verify humidity in the 40–60% range and avoid dew-prone mornings.
- Prepare the surface: clean, dry, and scuff if needed.
- Shield against direct sun and wind; use shade or temporary enclosures.
- Read and follow the product label for recoat times and cure expectations.
- Do a small test patch to confirm flow, leveling, and adhesion before full application.
Authority and References
Note: When painting outdoors, temperature is one of several interacting factors. Always consult product labels and follow manufacturer guidelines for the specific coating you are using. For context and general guidelines, see PaintQuickGuide Analysis, 2026. Where possible, cross-check with university extension resources and government publications on weather-related guidelines for outdoor finishes.
Outdoor painting temperature guidelines by paint type
| Paint Type | Recommended Air Temperature | Notes |
|---|---|---|
| Latex (water-based) | 50–85°F | Most versatile; watch humidity |
| Oil-based/alkyd | 60–85°F | Resilient film; longer cure time |
| Exterior enamel | 60–75°F | Balanced drying; avoid extremes |
Your Questions Answered
What is the ideal outdoor painting temperature range?
A typical ideal range is 60–75°F (16–24°C), but check the product label for any location-specific adjustments.
Aim for 60 to 75 degrees and always follow the product label.
Can I paint when it's cold but warming up later?
If temperatures briefly dip below 50°F, some paints work, but adhesion may suffer. If it will warm up gradually, ensure the entire coating window stays within the recommended range.
Best to wait for a consistent range, or plan for a warmer window.
Does humidity affect temperature guidelines?
Yes. High humidity slows drying and can cause finish defects; lower humidity helps but remains within the product’s stated range.
Humidity matters as much as temperature.
Should I wait for overcast days or avoid rain?
Avoid painting when rain or high dew is expected; moisture can compromise film formation and adhesion.
Wait for dry conditions and low dew points.
Is it okay to use heaters or fans to manage temperature?
Fans improve airflow; direct heaters can cause rapid drying and finish defects. Use indirect heat or shade and maintain even temperatures.
Use gentle airflow, not direct heat, to control drying.
Does surface temperature differ from air temperature?
Yes. Surface temperature can lag air temperature; measure the surface to ensure it’s within the target range.
Check the surface temperature, not just the air.
“Temperature is a game-changer for exterior coatings; sticking to product-specified ranges minimizes defects and ensures even curing.”
Quick Summary
- Start with the right temperature range for your paint.
- Check humidity and sun exposure before painting.
- Follow product labels for each coating.
- Plan around a stable forecast for best results.