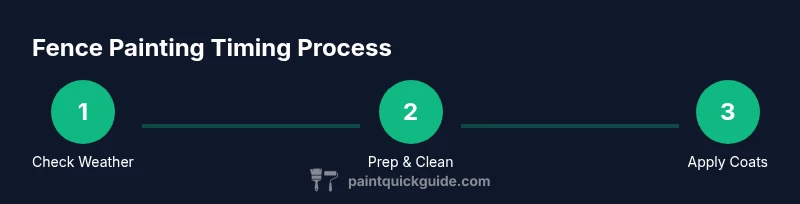
When to Paint Fence: Timing, Prep, and Best Windows
Discover the optimal timing for painting a wooden fence, covering weather windows, temperatures, humidity, and surface prep to ensure a durable outdoor finish.

To decide when to paint a fence, aim for a dry, mild day with low humidity and temperatures between 50°F and 85°F. Plan a weather window of several dry days, and prep the surface ahead of time. This guide from PaintQuickGuide outlines timing, prep, and best practices for durable outdoor wood finishes. Keep the surface out of direct sunlight to prevent flash-drying and uneven cure.
Why Timing Matters for Fence Painting
Timing is the foundation of a durable fence finish. The film-forming properties of exterior paints rely on steady ambient conditions during application and curing. If you start when a rain front is approaching or when humidity is high, you risk a cloudy film, poor adhesion, and longer cure times. The PaintQuickGuide team emphasizes that paint should cure in a stable environment, not a rush to finish before a storm. By planning around dry days with mild temperatures, you improve color uniformity and lifespan, reducing the likelihood of peeling, blistering, or mildew growth in the joints where boards meet. This is especially important for wide fence rails and vertical boards where coating thickness can vary. In short, the best time to begin is a window of consecutive dry days with moderate temperatures to allow proper drying and curing.
Pro tip: Check long-range forecasts for at least a 3–5 day dry period before you start and build your prep schedule around that window.
Weather and Temperature Guidelines
Exterior paints behave differently as temperatures shift. Most paints cure best in mild conditions, and extreme temperatures can cause rapid drying or poor film formation. As a general rule, avoid painting when temperatures dip below roughly 50°F (10°C) or rise above 90°F (32°C). Direct afternoon sun can cause quicker drying on the surface while the interior remains soft, leading to an uneven finish. Humidity matters too: high humidity slows evaporation and can lead to water spots or splotchy coatings. To maximize adhesion and color consistency, schedule painting on days with low to moderate humidity and consistent daytime temperatures. If your region experiences microclimates, observe the local trend rather than relying on a single thermometer reading. The PaintQuickGuide analysis shows that timing and surface prep are crucial for durable adhesion and long life.
Seasonal Windows by Region
Regional climate shapes your timing strategy. In temperate areas with four seasons, early spring or late summer during dry spells is ideal. In hot, dry regions, late fall or early winter when temperatures are milder and humidity moderate can work, provided you have sun protection and proper airflow. In northern climates, wait for the end of frost and the absence of rain in late spring, then give surfaces several dry days to cure before the first hard freeze. In coastal or humid zones, choose mid-spring or early autumn when sea breeze moisture has less impact on humidity. The goal is a multi-day window free of rain, with consistent warm but not scorching temperatures, and minimal dew in the morning.
Humidity and Drying Times
Humidity directly affects drying time and film formation. High humidity slows evaporation and can cause tackiness, while very low humidity can lead to rapid drying and edge-bleed or brush marks. When planning, prefer days with moderate humidity and lower dew points. If you’re in a humid climate, consider early morning applications followed by mid-day drying and late afternoon touch-ups to avoid foggy or milky films. Always follow the paint manufacturer’s recommended drying times for dew point or humidity restrictions. PaintQuickGuide’s qualitative assessment emphasizes that controlling humidity during the cure phase is as important as temperature control.
Surface Readiness and Prep Timing
Surface prep is inseparable from timing. If the wood is damp, you’ll trap moisture beneath the film, which can cause peeling or warping after curing. Begin prep on a dry day, and avoid washing the fence if rain is forecast within 24–48 hours. Give new wood at least 24–48 hours of dry weather after installation or after cleaning mildew. For older paint, a light sand helps to promote adhesion, but avoid over-sanding to prevent exposing bare wood in places where moisture can seep in. Primer timing matters too: oil-based primers can tolerate slightly cooler temps, while latex primers require warmer, drier conditions for best results.
Start-to-Finish Calendar: A Practical Year-Round Plan
A practical calendar pins down timing. In spring and fall, map out a window of at least 2–3 dry days with daytime temperatures between 50–85°F. In regions with unpredictable weather, build extra buffer days into your plan. Before painting, create a surface-clearing day, a cleaning day, and a priming day if needed. Then schedule two paint days separated by sufficient cure time, followed by a final inspection and touch-up. In all cases, start with prep weeks and maintain a clean workspace to reduce dust and debris that can spoil the finish. Adhering to a structured calendar minimizes weather surprises and ensures a uniform finish.
Common Mistakes That Ruin Timing
Rushing a project because you’re eager to finish almost always backfires. Painting in the rain or on a day with visible dew leads to streaks and peeling. Skipping prep, using old brushes, or applying too-thick coats also harms curing. Another frequent misstep is ignoring manufacturer guidelines for drying times between coats, which can produce a soft film that scratches easily. Finally, neglecting surface maintenance, such as cleaning mildew and sealing cracks before painting, invites moisture intrusion. By avoiding these mistakes and planning around forecasted dry periods, you’ll achieve better adhesion and a longer-lasting fence finish.
Maintenance Timing: Repainting vs Staining
Timing considerations differ for painting versus staining. Paint tends to offer a stronger, more uniform finish but requires proper surface preparation and a full cure between coats. Stains penetrate wood and can be more forgiving about application timing, but they may require more frequent maintenance. If you’re upgrading from stain to paint, ensure the surface is clean, dry, and free of loose finish. Regardless of the coating choice, factor in weather windows for each coat and avoid applying coatings in extreme heat or cold. The decision should reflect your local climate, fence age, and desired durability.
Authority Sources and Weather Planning
To inform timing decisions, consult environmental and extension resources. For weather planning, NOAA provides general climate guidance, while extension services offer region-specific prep and finishing recommendations. No single source is perfect for every fence, but combining weather planning with manufacturer guidelines yields the best results. The following sources can help you tailor timing to your area and paint type:
- NOAA Weather: https://www.noaa.gov
- EPA: https://www.epa.gov
- Penn State Extension: https://extension.psu.edu
- University of Illinois Extension: https://extension.illinois.edu
These references support practical timing decisions and surface prep strategies that lead to durable, attractive fences.
Authority Sources and Weather Planning (continued)
In practice, use these references to validate your chosen painting window. Keep a weather log during prep and painting to track trends and refine future timing. By pairing weather data with a disciplined prep routine, you maximize the chance of a smooth, even finish that lasts for years.
Tools & Materials
- Exterior wood fence paint (latex/acrylic)(Water-based formulas offer easier cleanup and flexible finish)
- Primer (oil-based or water-based)(Apply on bare wood or if previous finish is faded)
- Caulk or wood filler(Seal cracks and joints before painting)
- Sandpaper (120-180 grit)(Smooth weathered surfaces and edges)
- Putty knife(For applying filler and smoothing repairs)
- Drop cloths or plastic sheeting(Protect plants, soil, and hardscape)
- Painter's tape(Mask edges around boards and hardware)
- Paint brushes (2-3 inch angled) and rollers(Roll faces; brush edges and spindles)
- Paint tray and liners(Convenient, clean paint application)
- Ladder or stable step ladder(Safe reach for high boards)
- Soap, scrub brush, or low-pressure power washer(Clean surface thoroughly before painting)
- Bucket of clean water and mild detergent(Dilute detergent for washing and thinning if needed)
- Mask, safety glasses, and gloves(Protect skin, eyes, and lungs)
- Paint thinner or water for cleanup(Depends on paint type; follow local disposal rules)
- Protective clothing (old clothes or coveralls)(Keep paint off your good clothes)
Steps
Estimated time: 2-4 days
- 1
Assess weather window
Review a multi-day dry forecast and mark a window of at least two consecutive dry days. Confirm temperatures will stay in the mild range. This ensures proper adhesion and full cure between coats.
Tip: Check forecasts for 3–5 days ahead to avoid last-minute rain sneaking in. - 2
Clear the area and protect surroundings
Move furniture, plants, and vehicles away from the fence. Cover nearby plants and ground with drop cloths. Mask edges where boards meet hardware to prevent stray paint from creeping onto unwanted surfaces.
Tip: Use bright tape or a marker to remind you where masking is placed. - 3
Clean the fence surface
Wash dirt, mildew, and grime off using soapy water or a low-pressure wash. Allow the fence to dry completely before proceeding. Clean surfaces improve adhesion and even color.
Tip: Ensure moisture is fully gone before sanding or priming. - 4
Repair and smooth the wood
Fill cracks and holes with wood filler or caulk; sand raised fibers smooth. Wipe away dust after sanding. Repairing now prevents telegraphed flaws under the finished coat.
Tip: Wipe surfaces with a tack cloth to remove fine dust. - 5
Sand and prime bare wood
Lightly sand rough areas; wipe again. Apply primer to bare wood or heavily weathered areas. Allow primer to dry per label instructions before painting.
Tip: Choose a primer compatible with your topcoat for best adhesion. - 6
Mask edges and protect surroundings again
Recheck masking around edges, posts, and hardware. A clean line makes the final finish look professional. Re-apply masking if needed after prep.
Tip: Remove masking while the final coat is just tack-free to minimize peeling at edges. - 7
Apply the first coat
Apply the first coat using even strokes along the grain of the wood. Avoid heavy drips by maintaining a consistent distance from the surface. Work in manageable sections to maintain wet edge.
Tip: Use a roller for flat surfaces and a angled brush for edges. - 8
Let coat dry and inspect
Wait the recommended drying time per the product label. Inspect for thin spots or missed areas and plan a second coat if needed. Ensure proper ventilation if painting indoors or in covered spaces.
Tip: Touch up any thin areas promptly to avoid streaks. - 9
Apply second coat and finish
Apply the second coat per the manufacturer’s guidance. A second coat improves color depth and protection. Clean brushes and dispose of materials according to local guidelines.
Tip: Avoid applying a second coat too soon; wait until the first coat is fully cured.
Your Questions Answered
What is the best weather for painting a wooden fence?
Dry, mild days with low humidity are best. Avoid rain and extreme heat or cold to ensure proper curing.
Dry, mild days with low humidity are ideal for fence painting.
Do I need to prime bare wood before painting?
Yes. Priming improves adhesion and uniform color, especially on new or weathered wood.
Yes, primer helps the paint stick and look even.
How long should I wait between coats?
Follow the manufacturer’s drying times; latex usually requires several hours under normal conditions, but times vary with humidity.
Check the label for drying times between coats.
Can I paint in direct sun?
It's better to avoid direct sun if possible; it can cause uneven drying and brush marks.
Direct sun can cause uneven drying—choose milder conditions if you can.
Is staining a fence better than painting?
Staining can highlight wood grain and be longer-lasting in some climates, but may offer less color control and protection.
Stain lets the wood show through and can last a long time, but paint gives a solid color.
What if the paint peels after a few years?
Revisit surface prep: clean, sand, repair, prime, and recoat. Peeling usually signals moisture problems or poor prep.
If it peels, fix the prep and repaint with proper primers.
Watch Video
Quick Summary
- Plan around a dry weather window.
- Prep thoroughly for best adhesion.
- Apply two coats for durability and color richness.
- Protect nearby plants and surfaces throughout.
- Follow product-specific drying times for optimal cure.