Wall Interior Paint: A Practical Home Guide
A practical guide to choosing, prepping, and applying wall interior paint. Learn about latex paints, finishes, color palettes, ventilation, and cleanup for a durable, beautiful finish in every room.

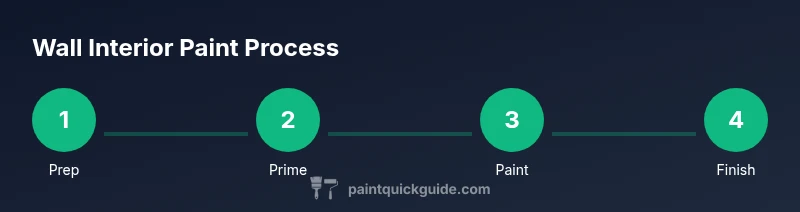
Choosing and applying wall interior paint can be straightforward with a plan. Start by selecting a latex (water-based) interior paint in a durable finish suited to the room, then prepare the walls, prime as needed, and apply even coats. This guide from PaintQuickGuide outlines step-by-step methods, color strategies, and safety tips to help you achieve a professional-looking result with confidence.
Why wall interior paint choice matters
Your choice of wall interior paint sets the tone for every room, influences maintenance needs, and affects indoor air quality. For most homes, a high-quality latex (water-based) paint offers easier cleanup, lower odor, and better color retention than oil-based options. Finishes range from flat/matte to eggshell, satin, semi-gloss, and gloss, each with trade-offs: lighter sheens hide imperfections but may be harder to clean, while glossier finishes resist stains but highlight wall flaws. When selecting paint, consider room function, lighting, and occupants. For example, kitchens and bathrooms benefit from washable finishes and moisture resistance, while living rooms can often use softer, low-sheen options. In addition, low-VOC formulas reduce volatile organic compound emissions, supporting healthier indoor air. The PaintQuickGuide team recommends evaluating in a real room lighting setup and testing swatches on larger plaster patches to ensure color accuracy under your lighting conditions.
Source considerations: VOC content, washability, and durability. With proper preparation and the right product selection, you can achieve a durable, beautiful finish that stands up to daily life.
Types and finishes explained
Interior paints come in several families, with latex/acrylic water-based formulations being the most common for walls. These paints cure through water evaporation and polymer coalescence, offering low odor and easy cleanup with soap and water. Oil-based paints (alkyds) provide excellent leveling and durability but have stronger odors and longer drying times, plus harder cleanup with mineral spirits. More modern options blend water-based binders with improved durability.
Sheen levels affect both appearance and maintenance:
- Flat/matte: hides flaws, minimal glare, easiest touch-ups but less washable.
- Eggshell: soft shine, good for living spaces and hallways, relatively washable.
- Satin: noticeable sheen, durable, forgiving in high-traffic areas.
- Semi-gloss/gloss: highly washable and moisture resistant, ideal for kitchens, bathrooms, and trim, but shows surface imperfections.
Choose a finish based on room function and cleaning needs. For children’s bedrooms and hallways, a satin finish provides balance between appearance and washability. For ceilings, use a stealthier flat finish. For kitchens, bathrooms, and laundry rooms, a semi-gloss is often best for scrubbing away residues. When shopping, read label specs for washability (sponge test performance) and mildew resistance in damp spaces.
Color performance depends on lighting (natural vs. artificial) and adjacent colors. Large color blocks can look different in various rooms; always test swatches in the actual room with the lighting that will remain most days. The PaintQuickGuide approach is to start with a neutral baseline and add pops of color through accent walls or accessories to avoid overwhelming a space.
Practical tip: consider adopting a low-VOC formula for all rooms to reduce smell and indoor air pollutant exposure. For spaces with ventilation limitations, look for products labeled as low or zero VOC and labeled “no odor.”
Surface prep and priming essentials
Surface preparation is the foundation of a long-lasting paint job. Begin by removing wall fixtures or covering them; move furniture away from walls and protect floors with drop cloths. Clean walls to remove dust, grease, and grime. A mild solution of dish soap and water works for most interiors; rinse with clean water and allow to dry completely. Lightly roughen glossy surfaces with a fine-grit sandpaper or a sanding block to create a key for the new paint to grip. Fill holes, cracks, and dents with a quality patch compound or spackle, then sand smooth once dry. Dust after sanding to ensure a clean bonding surface.
Priming is essential in several situations: when transitioning from a dark to a lighter color, when painting over glossy finishes, or when repairing patched areas. Bonding primers are ideal for slick surfaces; stain-blocking primers help prevent bleed-through from water stains or marker marks. If you’re painting new drywall, a primer helps even out porosity and improves color uniformity. Allow primer to dry fully as per manufacturer guidelines before applying color.
Another prep consideration is temperature and humidity. Most interior paints cure best at temperatures between 50–85°F (10–29°C) and relative humidity under 70%. High humidity can extend drying times and lead to film defects. Ventilate adequately during priming and painting, and avoid painting if rain is imminent when windows must stay closed for long periods. Dried dust from sanding should be removed with a microfiber cloth after priming to ensure a smooth final coat.
Safety: Wear a mask when sanding to avoid inhaling fine dust and use eye protection. If you’re sensitive to smells, consider scheduling painting during milder weather when you can keep the space well-ventilated. The goal is a clean, smooth surface that accepts paint evenly.
Color selection and palette strategies
Color is a powerful design tool. Start with a neutral base for large areas—oats, greige, and taupe provide timeless backdrops that adapt to furniture and textiles. Add color through accent walls, doors, or trim for contrast without overwhelming the space. When selecting colors, use coordinated swatches and test them on the wall. Natural light shifts color perception; a wall that looks beige in daylight may appear warm gray under incandescent lighting. Use large color chips or sample pots and paint swatches on an expansive drywall patch (at least 2–3 square feet) and observe for several days under different lighting.
To create harmony, choose a color palette derived from a single base color with variations in tint, shade, and tone. For cool rooms like bathrooms and kitchens, consider blue-based neutrals. Warmer rooms benefit from golden undertones and creamy off-whites. Remember to consider adjoining rooms so transitions feel intentional rather than abrupt. Accent walls can highlight architectural features or furniture pieces but should not clash with the overall palette. If you’re unsure, lean toward lighter shades; they read larger and more breathable, especially in small spaces.
Testing strategy: sample boards with 4–6 colors around your wall, then observe them at different times of day. PaintQuickGuide suggests photographing the patches and comparing them on-screen, which can help in selecting the final color. Also consider the color’s perceived warmth or coolness in relation to the room’s lighting and function.
Application techniques and tools
The actual painting process requires clean technique and steady speed. Gather the right tools: long-handled rollers for big surfaces, angled brushes for edges, painter’s tape for crisp lines, drop cloths, and a sturdy ladder. Start by cutting in around ceilings, trim, and corners with a 2–3 inch angled brush to create a neat border. Then roll the walls with a 3/8 inch to 1/2 inch nap roller for smooth to lightly textured walls.
Technique tips:
- Work in 3–4 foot sections, brushing along the edge and then rolling away from the edge to minimize lap marks.
- Maintain a wet edge by overlapping slightly with the previous stroke while the paint is still wet.
- Apply two thin coats rather than one thick coat for even color and better coverage.
- If you notice roller nap fibers shedding, switch rollers mid-project to avoid texture inconsistencies.
Drying times vary by product and conditions. Plan to wait at least 2–4 hours between coats in a typical room, and avoid heavy use of the space during this period. For high-traffic rooms, a third coat is rarely needed if color match was accurate; otherwise, apply a light second coat to even color and sheen. Clean brushes and rollers with mild soap and warm water after finishing; rinse until the water runs clear and let tools dry fully before storage.
Safety: keep a well-ventilated space during painting. If there are pets or children, limit access to the room until the paint is dry. Protect outlets and switch plates with painter’s tape to minimize touch-ups later.
Pro tip: label paint cans with room name, date opened, and finish to avoid cross-use of colors between rooms. This keeps you organized for future touch-ups or repaint cycles.
Maintenance, safety, and cleanup
Proper maintenance ensures your interior paint lasts longer. Regular dusting with a microfiber cloth helps prevent grime buildup, and wipe spills promptly to avoid staining. If walls get scuffed, a light touch-up with the same color can restore the surface; avoid aggressive scrubbing that can dull the finish. For kitchens and bathrooms, consider higher-sheen options or moisture-resistant coatings to ease cleaning. Periodically inspect for signs of moisture intrusion, as water damage can lead to bubbling or peeling that requires re-prep and repaint.
Safety considerations include good ventilation during painting and using low-VOC products to reduce odor and indoor air pollutants. When disposing of paint cans, seal the lid and follow local regulations for household hazardous waste. Never pour leftover paint down drains; store it for reuse or contact your local recycling center for disposal guidelines. Spare brushes, rollers, and trays should be thoroughly cleaned and dried before storage to extend their life. If you anticipate future renovations, consider leaving some primer in a spare can for quick touch-ups to maintain color consistency.
Environmental and budget factors matter. Choose durable finishes that minimize maintenance costs over time. For larger projects, allocate a modest budget for quality brushes and rollers—good tools save time and improve finish quality. PaintQuickGuide’s approach emphasizes planning, proper prep, and thoughtful color choices to maximize yield and satisfaction with interior wall paint projects.
AUTHORITY SOURCES
- Government resources on volatile organic compounds in paints and indoor air quality: https://www.epa.gov/indoor-air-quality-iaq/volatile-organic-compounds-paints
- Safety standards and protective equipment: https://www.cdc.gov/niosh/topics/paints/default.html
- General guidance on indoor air quality and coatings: https://www.epa.gov/lead
Tools & Materials
- Latex interior paint (your chosen color and finish)(Choose a washable satin or eggshell for most living spaces; consider semi-gloss for kitchens and bathrooms)
- Primer(Bonding or stain-blocking primer as needed for surfaces and color change)
- Angled paintbrush (2–3 inch)(For cutting-in around ceilings and trim)
- Paint rollers (9-inch) with 3/8 inch nap(Laminate with an extension pole for ceiling height walls)
- Roller tray and liners(For quick color loading and cleanup)
- Painter’s tape(Crips lines around edges and trim)
- Drop cloths or rosin paper(Protect floors and furniture)
- Putty knife and spackle(Fill holes and imperfections)
- Sandpaper or sanding block (120-150 grit)(Lightly scuff glossy surfaces to improve adhesion)
- Mixing stick(Stir paint to even color and consistency)
- Cleaning supplies (soap, water, sponge)(Clean walls before painting)
- Ladder or step stool(Access higher areas safely)
- Respirator or mask(For sensitive individuals and during priming in enclosed spaces)
- Ventilation fan or open windows(Improve airflow; essential for VOC-sensitive spaces)
- Gloves(Protect skin while handling chemicals)
Steps
Estimated time: 4-8 hours total
- 1
Prepare the room and protect surfaces
Move furniture out or to center, remove hardware if possible, and cover floors with drop cloths. Ventilate the space by opening windows or using a fan. This reduces dust and odors during painting and keeps surfaces clean for a smoother finish.
Tip: Lay down additional drop cloths under ladders and corners to prevent accidental spills. - 2
Repair and inspect walls
Fill holes and cracks with spackle using a putty knife. Allow to dry fully, then sand flush with the wall. This creates a uniform surface for primer and paint and minimizes texture differences after painting.
Tip: Use a damp cloth to wipe away dust after sanding to improve primer adhesion. - 3
Clean and sand glossy surfaces
Wash walls with a mild soap solution to remove dirt and oils. Lightly sand glossy areas to create a bonding surface. Dirt and oils can cause paint to peel later if not cleaned.
Tip: Test a small area to ensure sanding does not scratch sensitive finishes. - 4
Prime where needed
Apply primer to new drywall, patched areas, or surfaces previously painted with oil-based paints. Primer improves coverage, reduces stain bleed, and provides uniform color. Let primer dry completely as per label instructions.
Tip: Choose a bonding primer for slick surfaces and stain-blocking primer for watermarks. - 5
Cut in edges around ceilings and trim
Using an angled brush, paint a 2–3 inch border along ceilings, corners, and around trim. This creates a clean boundary before rolling; neat edges reduce the need for touch-ups later.
Tip: Work in long, steady strokes and maintain a wet edge to prevent lap marks. - 6
Roll paint on walls in sections
Load the roller evenly, apply in a W-shaped pattern, then fill in without lifting the roller. Maintain even pressure to avoid roller marks. Apply a first coat and let it dry according to product timing.
Tip: Avoid excessive rolling in one spot to prevent over-application and texture issues. - 7
Apply second coat if needed
Assess color and coverage after the first coat dries. Apply a second coat if color is uneven or if you’re changing from a dark to a light color. Two coats ensure uniform color and a durable finish.
Tip: Check for missed spots in natural light and touch up as needed. - 8
Finish, clean up, and evaluate
Remove painter’s tape, clean brushes and rollers, and inspect the walls for uniform sheen and color. Re-tape any crisp lines if changes are needed. Allow full cure time before moving furniture back.
Tip: Keep a small bottle of touch-up paint on hand for minor fixes.
Your Questions Answered
What interior paint finish should I choose for high-traffic areas?
For high-traffic spaces, a satin or semi-gloss finish provides better washability and stain resistance while still looking balanced. These finishes are easier to wipe clean than flat finishes. If wall texture or glare is a concern, test a small area first.
For busy rooms, satin or semi-gloss is usually best because it’s easy to wipe clean and resists grime.
Do I need primer for every interior painting project?
Primer is recommended whenever you’re changing color drastically, painting over glossy paints, or repairing damaged walls. It helps achieve true color and improves adhesion. Lightly sanding between primer and paint improves final results.
Primer is a good idea when you’re changing colors or going over glossy surfaces.
How many coats should I apply for even coverage?
Two coats are typically needed for most interior walls to ensure even color and a consistent finish. In some cases, one coat may suffice if you are painting a similar-color surface and using a high-quality paint. Always follow the manufacturer’s guidance on coverage and drying times.
Usually two coats do the job, but follow the paint label for exact guidance.
Can I paint over existing paint without sanding?
Yes, often you can, but it depends on the current finish. For glossy surfaces or dark colors, use a bonding primer to improve adhesion. Lightly scuff the surface to create a key for the new paint.
You can, but scuff the surface and use a bonding primer for best results.
What is the typical drying time between coats?
Most interior paints require 2–4 hours between coats under typical room conditions. High-humidity spaces or lower temperatures can extend this time. Always check the paint can for the specific guidance.
Most paints dry in 2 to 4 hours; environment can affect this, so follow the can labels.
Are low-VOC paints worth it for interior walls?
Low-VOC paints reduce odors and indoor air pollutants, making them a good choice for homes with kids, pets, or sensitivities. They generally dry faster and are available in a wide range of finishes. Look for labels like 'low VOC' or 'very low VOC'.
Low-VOC paints are a smart choice for homes with kids and pets, with less odor and safer air.
Watch Video
Quick Summary
- Plan room-by-room to avoid color conflicts.
- Prep surfaces thoroughly for lasting results.
- Test color samples in real lighting before committing.
- Use primer on problem surfaces for better coverage.
- Two coats are typically required for even color and durability.