Interior Paint: A Practical DIY Guide
Master interior paint selection, surface prep, coat application, and finishing tips for durable, even color in any room. A practical, step-by-step guide for homeowners and DIYers.

In this guide you will learn how to choose interior paint, prep walls, and apply coats for a durable, even finish. You’ll compare finishes, select color strategies, and execute a clean, professional-looking job with practical cost ranges. By the end, you’ll be ready to tackle rooms from living spaces to bedrooms with confidence.
Understanding interior paint: types, finishes, and why it matters
Interior paint is more than a color choice—it’s a protective system that guards walls from daily wear, moisture, and staining, while influencing room light and mood. Most DIY projects use water-based latex paints for ease of cleanup and low odor, though alkyd or oil-based finishes still have niches, especially where stain resistance matters. The finish you pick (sheen) determines how much light reflects and how forgiving the surface will be to scrapes and fingerprints. Common finishes include flat/matte for walls with imperfections, eggshell and satin for living areas, semi-gloss for kitchens and baths, and gloss for trim. When selecting interior paint, consider VOC content (low-VOC options are widely available), drying times, and color retention. A thoughtful choice now reduces touch-ups later and helps you stay on budget and schedule. According to PaintQuickGuide analyses, optimizing finish choice by room reduces repaint cycles and waste over a typical 5- to 7-year horizon.
Color strategy: how to pick colors that work with lighting
Color is about perception as much as pigment. Start by testing swatches under the room’s lighting at different times of day, and observe how walls look with natural light, lamps, and windows. Pair wall tones with ceiling whites or warm neutrals to avoid harsh contrasts. Undertones matter: gray rooms aren’t always cool; consider warm undertones to counteract overly cold lighting, and vice versa. Create a small palette of 3-5 options and paint swatch patches directly on the wall to see how they interact with furniture and fabrics. Your goal is harmony, not perfect color matching in a store. PaintQuickGuide’s approach emphasizes testing in situ, then narrowing to 2-3 finalists before committing to a full can.
Surface prep: cleaning, repairing, and priming
Preparation is the difference between a smooth, durable finish and a patchy result. Start by removing outlet covers and fixtures, laying drop cloths, and masking trim with painter’s tape. Clean walls with a mild detergent solution to remove dust, grime and cooking residues; rinse and let dry. Fill holes and cracks with spackle, then sand until smooth. For stubborn stains, use a stain-blocking primer or an alkyd-based primer as a baseline. Priming improves color consistency, enhances adhesion, and prevents stain bleed-through. If you’re changing from a dark to a very light color, a tinted primer can reduce the required number of coats and save time.
Finishes and sheens: choosing the right finish for each room
Sheen levels affect appearance and maintenance needs. Flat finishes hide wall flaws but can be harder to clean; eggshell and satin balance appearance with washability for living rooms and bedrooms. Semi-gloss excels in kitchens and baths where moisture resistance matters, while gloss is best for trim and doors. Consider the room’s function, cleaning frequency, and lighting when selecting the finish. In high-traffic areas, a satin finish often offers durability without a heavy glare. Remember to test finishes with your lighting to avoid surprise reflections on glossy surfaces.
Tools, materials, and budgeting for a DIY paint project
A successful interior paint project relies on the right tools and a realistic budget. Essential items include quality brushes for edges, a 9-inch roller with a medium nap for walls, painter’s tape, drop cloths, and a sturdy paint tray. Choose low-VOC interior paint for better indoor air quality, and consider the primer type you need. Quantities depend on room size; plan for 1 gallon per 350-400 square feet per coat in typical rooms, with extra for waste and multiple coats. Budget for 2 coats in most spaces and adjust for color changes. Keep a small amount of extra primer and paint on hand for touch-ups.
Application techniques: rolling, cutting in, and layering coats
Develop a steady technique to avoid lap marks and color inconsistencies. Start with cutting in along ceilings, corners, and trim using a high-quality angled brush. Then roll in a W pattern, filling in without lifting the roller at the ends. Maintain a wet edge and apply two even coats rather than one heavy coat. Allow adequate drying time between coats per the product’s label. For ceilings, use a lighter shade to reduce glare and ensure uniform coverage. Work methodically, keep your equipment clean, and avoid repainting in extreme heat or cold.
Troubleshooting and finishing touches
If you notice lap marks, apply a thin mid-coat or tweak your roller technique to maintain even pressure. Tapes and corners can lift if removed too soon—peel back at a 45-degree angle once the coat feels firm to the touch. Touch up with a small brush, using feathered strokes to blend edges. Keep a covered can of the original color for touch-ups, and label any mixed colors with the date and room. Finally, cure times vary; don’t rush the final inspection and avoid heavy traffic in the room until the finish has fully cured.
Tools & Materials
- Interior latex or oil-based paint(Choose low-VOC options; consider color depth and room usage)
- Primer (stain-blocking if needed)(Use tintable primer for drastic color changes)
- Painter's tape(3M or equivalent; 1-inch width for trim edges)
- Drop cloths or plastic sheeting(Protect floors and furniture)
- Drop cloth weights or spring clamps(Keep cloths in place to avoid slips)
- 9-inch roller frame and cover (3/8-1/2 inch nap)(Nylon/microfiber for smooth results)
- Angled brush set (2-inch)(Useful for corners and edges)
- Paint trays and liners(For even paint loading)
- Putty knife and spackle(For patching holes and cracks)
- Sandpaper or sanding block (120-220 grit)(Smooth patched areas)
- Mild detergent or TSP solution(Wall cleaning before painting)
- Ladder or stable step stool(Reach higher areas safely)
- Paint can opener and stir sticks(Mix evenly and open safely)
- Mask or respirator (if using strong primers)(Ensure proper ventilation)
- Tape measure and pencil(Plan cut-in lines precisely)
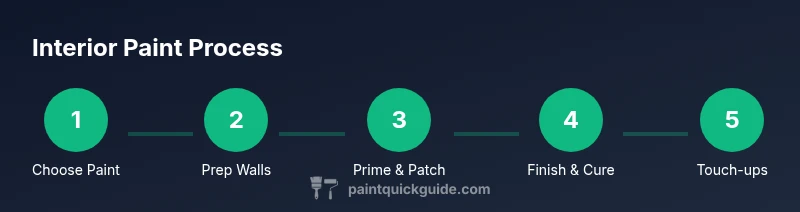
Steps
Estimated time: 6-8 hours
- 1
Move furniture and cover
Clear the room and relocate furniture. Block access with tape and drop cloths to protect surfaces. This step prevents damage and makes the project safer and cleaner.
Tip: Use large painter’s cloths and weight edges to avoid shifting. - 2
Remove hardware and protect outlets
Take down switch plates and outlet covers. Use masking tape to protect nearby hardware and trim edges. Keeps hardware pristine and minimizes cleanup.
Tip: Label removed parts to ensure correct reattachment. - 3
Mask edges and protect floors
Apply painter’s tape along ceilings, trim, and any edges you don’t want painted. Cover floors generously to catch drips and spills.
Tip: Press tape firmly to prevent bleed-through. - 4
Clean and repair the walls
Wipe walls with a mild detergent to remove grime. Patch holes with spackle and sand smooth once dry.
Tip: Wipe in sections and allow patches to fully cure. - 5
Prime patched or stained areas
Apply primer only where needed: patched panels or heavy stains. Let primer fully dry before painting.
Tip: Tint primer slightly toward your color to reduce coats. - 6
Cut in along ceilings and edges
Use an angled brush to paint a tight border around ceilings and trim. Work in steady strokes to create clean edges.
Tip: Maintain a wet edge for crisp lines. - 7
Roll the walls in sections
Load your roller evenly and roll in W-shaped patterns, filling gaps without overworking edges. Apply light-to-moderate pressure for uniform coverage.
Tip: Roll slowly and keep a consistent pace. - 8
Apply second coat after drying
If coverage is uneven or color shows through, apply a second coat. Wait the recommended dry time between coats.
Tip: Do not rush; this prevents peeling. - 9
Inspect and touch up
Check under different lighting for missed spots. Touch up with a small brush and feather edges.
Tip: Keep a small amount of leftover paint for quick fixes.
Your Questions Answered
Do I need primer before interior paint?
In most cases, yes. Primer improves adhesion, hides stains, and ensures even color when switching from a dark to light shade or covering repaired areas.
Yes. Primer helps the new paint stick and hide defects, especially when covering stains or drastic color changes.
What sheen is best for living rooms and bedrooms?
Eggshell or satin finishes are versatile for living rooms and bedrooms, offering a balance of appearance and cleanability. Reserve flat for ceilings or rooms with minimal traffic.
Eggshell or satin finishes work well in living rooms and bedrooms, balancing looks and washability.
How long should I wait between coats?
Follow the product label, but plan for at least 2-4 hours between coats in normal conditions. Humidity and temperature can extend drying times.
Typically wait 2 to 4 hours between coats, longer in humid conditions.
Can I paint over old oil-based paint with latex?
You generally should not directly apply latex over oil-based paint. Lightly sand and use a high-adhesion bonding primer designed for oil-to-water-based systems.
Usually you need a bonding primer before latex over oil-based paint.
How much paint do I need for a room?
Estimate about 1 gallon per 350-400 square feet per coat for typical walls, plus extra for touch-ups and doors. Rooms with high ceilings or dark colors may need more.
Plan roughly one gallon per 350-400 square feet per coat, more for big rooms or dark colors.
Is it worth hiring a pro for large rooms?
For large rooms or complex ceilings, a pro can save time and ensure flawless edges. DIY works well for small spaces or accent walls with proper prep.
For big spaces, a pro can be worth the cost for speed and a perfect finish.
Watch Video
Quick Summary
- Choose the right interior paint type and finish for each room.
- Prepare walls thoroughly to ensure adhesion and even color.
- Cut-in first, then roll for a smooth, durable finish.
- Inspect under different lighting and touch up as needed.