How to Fix Paint Chips on Wall
Learn a practical, homeowner-friendly method to repair chipped paint on interior walls, including prep, patching, color matching, and finishing for durable results.

Understanding why paint chips occur and when to repair
If you’re researching how to fix paint chips on wall, start by understanding the common causes: settled drywall or plaster, moisture exposure, temperature swings, and inadequate surface prep. Chips are often most visible near doors, windows, and high-traffic areas where impact or temperature shifts are frequent. The PaintQuickGuide approach emphasizes diagnosing the root cause before patching, because a failing substrate will undermine any repair. In this section we explore how to identify the scope of the damage, determine whether a simple patch suffices, and decide if a full repaint is warranted for even color and texture. A careful assessment sets expectations for prep time and final results, and helps you avoid repeated repairs. According to PaintQuickGuide, small, well-bonded chips can usually be fixed with a quick patch, provided the surrounding surface is sound. Color matching is key when the chip reveals primer or underlying coats. Check for moisture, cracks, or loose paint around the area so you don’t trap underlying problems.
Assessing the damage and choosing the right repair approach
The next step is a calm, systematic assessment. Measure the chip’s diameter, note whether the area is textured or smooth, and consider the surrounding color shade. If the damage exposes base coat and shows through after a patch, you may need to repaint a slightly larger area to ensure uniform texture and sheen. For small chips on flat walls, a simple patch with lightweight filler plus color-matched paint is usually sufficient. On textured surfaces, you’ll want to emulate the existing texture with brushing or sponging techniques after the patch dries. If your walls have multiple colors or a distinct texture, color matching becomes more critical and a test patch on an inconspicuous spot helps minimize color drift.
Materials and color-matching strategies
Preparation matters as much as the repair itself. Gather lightweight spackle or patching compound, a putty knife, fine-grit sandpaper, primer, matched interior paint, a small brush or mini roller, drop cloths, and a clean damp cloth. For color matching, start with a base color that is as close as possible to the wall shade and plan to tint or mix to achieve a near-perfect blend. If you’re blending two coats, using a slightly lighter patch color can help you feather edges more easily. Keep the original paint formula in mind: latex/acrylic paints are easier to work with and clean up with water, while oil-based paints provide durability but require stronger solvents. Our guidance also covers stain-blocking primers if your patch reveals wood or a deep stain under the chipped area.
Surface prep and priming for lasting repairs
Proper surface prep is the foundation of a durable patch. Start by cleaning the area with a mild soap solution to remove dust and oils. If there’s any moisture or mildew, address it before patching. Lightly sand the chipped edge to create a shallow bevel so the filler can grip. Wipe away dust after sanding, then apply a thin coat of primer over the patched area if you opened the surface to new material or if the underlying color is very different. For glossy or semi-gloss paints, use a bonding primer to improve adhesion. Allow the primer to dry fully according to manufacturer instructions before painting.
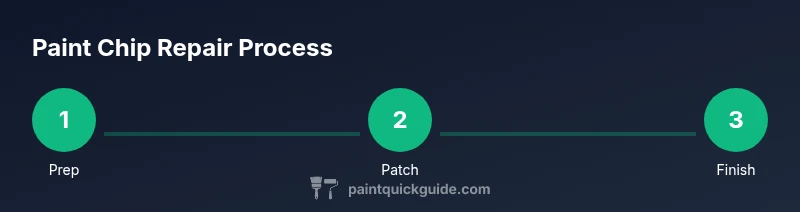
Step-by-step repair workflow (interior walls)
Repairing chips on interior walls follows a repeatable rhythm: prep, patch, sand, prime, and paint. Begin by laying down drop cloths and protecting nearby surfaces. Then clean the area, lightly sand the edge of the chip, and apply patching compound with a small putty knife, feathering the edges so the patch blends with the wall. Let the compound dry completely, then sand again for a flush finish. Apply primer if the patch exposes new material or if color blocking is visible. Finally, match the paint and apply a thin first coat, followed by a second coat if needed to reach full coverage. Allow each coat to dry and inspect from several angles under different lighting to ensure a seamless blend.
Finishing touches and color blending
Finishing touches bring the repair to life. After the paint dries, inspect for any edge lines and feather them with a clean brush to soften the boundary. If the texture of the wall is unique (orange peel, knockdown, or stipple), replicate the texture in the patched area using a matching technique before the final coat. For stubborn chips or slight color variation, a very light glaze or tinting of the patch color can help merge the repair with the surrounding finish. Always let the paint cure fully before evaluating the final result, as color can appear different when wet.
Common mistakes and how to avoid them
Common pitfalls include using too much filler, skipping primer, or painting over a dirty surface. Overfilling creates ridges that require additional sanding, while skipping primer can cause uneven color and poor adhesion. In textured walls, failing to imitate the existing texture causes patch edges to stand out. Ensure proper ventilation, follow safety precautions when sanding, and select paint with a finish that matches the surrounding area (eggshell vs. matte). By planning the repair with the same paint system and finishing technique, you reduce the risk of future chips showing through.
Authoritative sources and further reading
For safety and best practices, consult trusted sources on wall finishing and paint safety. The EPA provides guidance on lead paint safety for older homes, and OSHA offers general workplace safety guidelines for working with paints and solvents. University extension programs offer practical, project-focused advice on patching and color matching. These sources help you confirm best practices and stay up-to-date on product recommendations and safety standards.