How to Fix Paint Ripped Off Wall: Step-by-Step Repair Guide
Learn a proven, step-by-step method to fix paint ripped off walls, including patching, priming, and color matching for a seamless finish. Practical tips for homeowners and DIY enthusiasts.

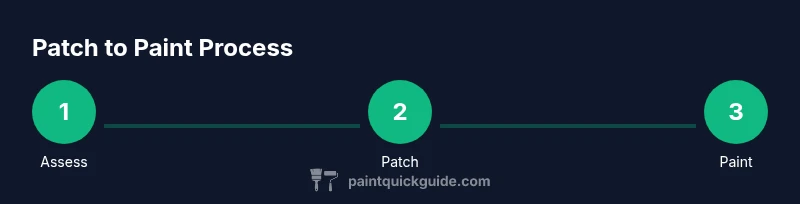
You can restore a wall where paint has ripped off by patching the damaged area, priming, and repainting to blend with surrounding color. This guide covers surface prep, patching options, color matching, and drying times using common tools, so you can achieve a seamless finish at home.
Why paint ripped off wall happens
Paint can tear or peel when the wall surface is not fully prepared, the paint age is old, or the substrate has moisture or adhesion issues. In many homes, minor damage occurs from everyday contact, furniture rubbing against the surface, or drywall joints flexing. Before you patch, it’s important to assess the extent of the damage: is it a small spot, a chip, or a larger patch exposing unpainted drywall or plaster? Understanding the cause helps you choose the right repair method and reduces the chance of re-dropping paint later. The PaintQuickGuide team notes that effective repairs start with a clean, dry surface and an accurate color match to your existing finish. This is crucial for interior walls in living rooms and hallways where light can reveal subtle inconsistencies.
In outdoor areas or garages, you may also face moisture-related peeling. For these surfaces, you’ll need to address moisture before painting and consider a primer suited for the exposure. In all cases, proper surface prep—removing loose material, cleaning dust, and ensuring dryness—will dramatically improve adhesion and final appearance. Paint is a thin film that requires a sound base to hold onto; skipping prep is the fastest way to see new patches fail or peel again over time.
Assessing damage and repair path
Begin by running your fingernail over the ripped area to see if the paint layer is loose or firmly bonded to the substrate. If the surface feels solid and the edges are stable, a light sanding and feathered edge may be enough. For larger or deeply damaged patches, you’ll need a patching compound and possibly joint tape or a skim coat. Consider the room’s function and lighting when deciding between spot repair, skim coat, or full panel repaint. If you notice moisture, musty odors, or staining, address those issues first; moisture problems can undermine adhesion and cause future peeling. Your goal is a flat, seamless surface that accepts primer evenly and shows no visible patch after the final coat.
Prep and surface readiness
Clear the area and lay down drop cloths to protect floors and furniture. Put on eye protection and a dust mask to reduce inhalation of paint particles and dust. Use a putty knife to gently remove any loose paint or crumbling plaster from the damaged zone. Wipe the area with a damp sponge and mild detergent, then rinse and let dry completely. If the wall is glossy, dull the surface with a quick pass of fine-grit sandpaper to improve adhesion. Finally, inspect for nails, screws, or texture irregularities that could show through after painting, and fix them before patching.
Patch repair options explained
For tiny chips or shallow nicks, a light layer of spackling paste or lightweight joint compound applied with a putty knife is usually enough. For larger damaged areas, consider using patching plaster or mesh fiberglass tape with joint compound to build a smooth surface. In some cases, a skim coat (a very thin layer of joint compound) helps create a uniform finish over a repaired area. Sand between coats to feather edges and remove ridges. Always choose products compatible with your wall material (drywall, plaster, or concrete) and paint type (latex or oil-based).
Priming, feathering, and smoothing edges
Once the patch is dry, sand with a fine sanding block until the surface is flush with the surrounding wall. Wipe away dust and apply a stain-blocking or wall-primer to seal the repair, especially if the patch is darker or you’re finishing with a lighter color. Feather the edges of the primer beyond the repaired area to minimize edge lines and create a smooth transition. If texture is part of the wall finish (orange peel, knockdown), reproduce the texture before painting to avoid a noticeable difference.
Repainting for blend and color matching
Mix your paint to match the existing wall color, starting with a small amount of paint from the original can or a color-matched sample. Apply thin coats using a brush or roller, working from the repaired area outward with light, even pressure to blend the edges into the surrounding finish. Allow each coat to dry fully before applying the next. If the color looks off in certain lighting, test a larger sample on a drywall patch or inconspicuous area and adjust the tint slightly before finishing.
Troubleshooting and long-term care
If the patch dries with a slight sheen or texture variance, apply an additional very light skim coat, then sand and re-prime before painting. For high-traffic areas, consider a low-sheen or matte finish to better hide any subtle imperfections. Maintain walls by cleaning with a soft, damp cloth and avoiding abrasive cleaners that can dull the finish. If peeling recurs after a month, there may be hidden moisture or adhesion issues; re-evaluate moisture sources and wall substrate before re-repair.
Tools & Materials
- Putty knife(Assorted widths; 1–2 inch works well for edges)
- Spackling compound or lightweight joint compound(Choose a compound suitable for drywall or plaster)
- Sandpaper (120-220 grit) or sanding block(Feather edges and smooth patch)
- Primer (stain-blocking if needed)(Latex-based primers are common for interior walls)
- Matching wall paint(Keep extra sample for batch consistency)
- Paint brushes and/or foam roller(Small brush for edges, roller for larger areas)
- Painter's tape(Protect adjacent surfaces)
- Drop cloths or plastic sheeting(Prevent floor/spill damage)
- Clean sponge and mild detergent(Clean before patching and after sanding)
- Dust mask and safety glasses(Protect from dust and fumes)
- Joint tape or mesh (optional for larger gaps)(Adds strength for big repairs)
Steps
Estimated time: 2-4 hours active work plus 24 hours drying time for primer/paint between coats
- 1
Inspect and gather materials
Survey the damaged area and collect all tools and materials listed above. Confirm you have enough paint to finish the repair, including a little extra for touch-ups. A well-prepared workspace reduces delays.
Tip: Have a drop cloth ready and layout items in order of use. - 2
Remove loose material
Gently scrape away peeling or loose paint with a putty knife. Do not aggressively pry, which can widen the patch. The goal is a solid edge for patching to adhere to.
Tip: Work from the outside edge toward the center to minimize further damage. - 3
Clean and dry the surface
Wipe the area with a damp sponge to remove dust, then dry completely. Moisture trapped under the patch can cause failure. Ensure the surface is dry to the touch before patching.
Tip: If there’s moisture, address it first; patching over moisture will fail. - 4
Apply patch material
Fill the damaged area with patch compound in thin layers, allowing each layer to dry before applying the next. Build up slightly above the level of the wall if needed. For larger gaps, use joint tape for reinforcement.
Tip: Avoid applying too thick a layer at once; multiple thin layers yield a smoother finish. - 5
Sand the patch flush
Once dry, sand the patched area with fine grit until it’s level with the surrounding surface. Remove all dust with a damp cloth and let dry. A flush patch prevents ridges from showing after painting.
Tip: Mask edges with tape to prevent sanding into the surrounding wall. - 6
Prime the repaired zone
Apply a light coat of primer over the patch to seal the repair and improve paint adhesion. If the patch is darker, use a stain-blocking primer to prevent bleed-through.
Tip: Let the primer dry completely and inspect for uniform coverage. - 7
Feather and texture match
If your wall has texture, mimic the texture in the patch area using a brush or sponge before the final coat. Feathery edges help hide the patch better than hard lines.
Tip: Test a small area with a sample brush stroke before proceeding. - 8
Apply base coat
Dip your brush/roller into the matched paint and apply in light, even strokes extending beyond the repair. Use a feathered motion to blend into the surrounding paint. Allow to dry fully between coats.
Tip: Apply multiple light coats rather than a single heavy coat. - 9
Finish with topcoat
After matching color, finish with a final coat to ensure uniform sheen. Lightly inspect under different lighting to confirm even coverage. Remove tape and clean edges.
Tip: If sheen differs, adjust with a slightly different sheens batch next time. - 10
Cure and inspect
Let the area cure per paint manufacturer guidelines before heavy use. Recheck after 24 hours and touch up if needed. A proper cure prevents premature wear.
Tip: Avoid heavy cleaning or scrubbing for at least 24–48 hours.
Your Questions Answered
How long does patching take to dry before painting?
Drying times vary by product and room temperature, but most spackle or joint compound dries in 30 minutes to a few hours. Check the product label and perform a gentle touch test before priming.
Patching compounds dry quickly, but always check the label and test with your finger before continuing.
Is primer always necessary after patching?
Yes. Priming the patched area ensures uniform paint adhesion and prevents patched spots from showing through the topcoat, especially on darker or stained patches.
Priming helps the color stick evenly and hides the repair completely.
What if the patch shows through after painting?
If the patch is visible, sand lightly, re-prime, and apply additional thin coats of paint. Ensure you’re using a compatible primer and the final coat matches the surrounding area.
You can fix it by re-sanding, priming again, and applying another thin coat of paint.
Can I reuse old patching compound on large repairs?
Avoid reusing old patching compounds for large repairs; they can crack or shrink. Use fresh patching material and mix as directed for best results.
Don’t reuse old patch compound for big areas; start fresh for stronger patches.
Should I hire a professional for large damaged walls?
For extensive damage, moisture intrusion, or textured walls, a professional can ensure durability and an even finish without trial and error.
If the patch is large or you’re unsure, it’s wise to call a pro.
What safety steps should I follow?
Wear a dust mask, eye protection, and work in a well-ventilated area. Keep kids and pets away from the work zone to prevent accidents.
Protect yourself with a mask and goggles and keep the area clear.
Watch Video
Quick Summary
- Prepare, patch, and prime for adhesion
- Feather edges to blend with surrounding wall
- Match color and sheen for a seamless finish
- Follow drying times between coats to avoid failures
- Address moisture issues before patching