What is Needed for Paint Correction: A Practical Guide
Explore what is needed for paint correction, including essential tools, prep steps, and a practical 8-step workflow to restore showroom gloss on your car.

Paint correction is the process of removing surface defects from automotive finishes through controlled cutting and polishing. To do it well, you need a clean, prepared surface, the right polishing compounds, quality pads, a variable-speed polisher, good lighting, and patience. Safety gear and a proper environment (clean booth or dust-free space) help prevent new scratches and achieve a balanced, high-gloss finish.
What paint correction is and what it fixes
Paint correction is the process of removing surface defects from an automotive finish through controlled cutting and polishing. It targets swirls, holograms, oxidation, and other micro-abrasions that dull shine. It does not restore the base color or fix deep factory defects; rather, it refines the clear coat to reveal a smoother, more reflective surface. The level of correction ranges from a light polish that removes hazing to aggressive defect removal that requires multiple passes and careful heat management. According to PaintQuickGuide, proper prep and safety are the foundation of successful paint correction. Achieving a showroom gloss demands not just the right gear but a patient, methodical approach. When done correctly, the result is a deeper, crystal-clear finish that reflects light more evenly and resists future damage better because contaminants are minimized.
Prep, safety, and environmental considerations
Preparation sets the stage for a durable correction. Begin with a thorough wash to remove loose dirt, followed by decontamination using a clay bar or clay mitt to pull embedded fallout from the surface. Wipe the panel with an IPA solution to remove oils and water spots, then dry with a clean microfiber towel. Work in a controlled environment—ideally a dust-free space with stable temperature and humidity. Always wear PPE: nitrile gloves, eye protection, and a respirator if you’re using solvent-rich compounds. PaintQuickGuide emphasizes that clean, controlled conditions reduce the risk of introducing new defects during correction.
The essential toolkit for paint correction
A successful correction relies on a focused toolkit. You’ll need a variable-speed dual-action polisher, a set of foam cutting pads for aggressive work and finishing pads for refining, and a range of polishing compounds from cutting to finishing grades. Keep microfiber towels, painter’s tape to protect edges, IPA wipe supplies, and a dedicated water source or lubrication spray. Proper lighting—ideally a bright, neutral LED inspection light—helps reveal flaws you might miss in dim conditions. Use a clay bar or clay mitt for decontamination, and have a suitable wax or sealant to protect the corrected finish afterward.
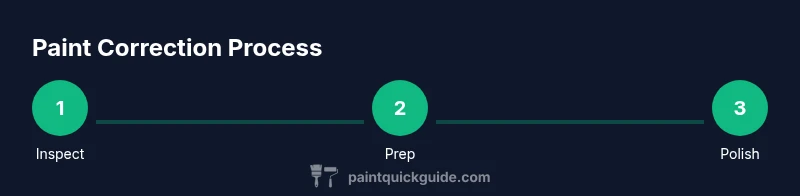
Step-by-step workflow overview
The overarching workflow for paint correction includes planning, surface prep, edge protection, a test spot to gauge aggressiveness, cutting, refining/polishing, wipe-down verification, and protection. Planning means identifying defect types (swirls, scratches, hazing) and choosing the right pad and compound. A test spot on an inconspicuous area confirms the chosen combination will achieve the desired results without burning the paint. After cutting, switch to a finishing polish to refine the look and reduce haze. Finish with a panel wipe, inspect under bright light, and seal or wax to protect the corrected finish. This approach minimizes risk while delivering consistent gloss.
Common mistakes and how to avoid them
Common errors include using too aggressive a compound on soft or aged clear coats, applying excessive pressure, and overheating the paint with the polisher. Cross-contamination between grades of compounds can leave hazy halos or micro-marring. Failing to mask edges or trim can lead to accidental damage. Always work in small sections, maintain a cool working temperature, and frequently wipe the surface with IPA to monitor progress. Patience beats rushing when achieving a flawless finish.
Additional tips for best results
- Work in a shaded, dust-free area with stable temperature; direct sun can heat and warp the clear coat.
- Keep pads clean and free of dried product to prevent deep scratches.
- Start with the least aggressive method and only increase aggression if needed, testing on a small area first.
- Use a dedicated panel wipe between steps to verify clarity and consistency.
- After correction, seal promptly to lock in the finish and protect against new contaminants.
- Consider practicing on a less-visible panel before tackling the full hood or trunk to build confidence.
Tools & Materials
- Variable-speed dual-action polisher(3-6 inch pads are ideal for most panels; balance and low vibration improve control)
- Cutting compound(Aggressive enough to remove defects without causing excessive haze)
- Finishing polish(Refines the surface to remove haze and blend defects)
- Foam cutting pads(Choose density suitable for the aggressiveness)
- Foam finishing pads(Soft density for refined polishing)
- Microfiber towels(Lint-free, high GSM for safe wipe and buff)
- Masking tape / edge guards(Protect trim, rubber seals, and emblems)
- Isopropyl alcohol (IPA) for panel wipe(70%+ concentration; use for final wipe between steps)
- Two-bucket wash supplies(Car wash soap, microfiber wash mitt, grit guards)
- Clay bar or clay mitt(Decontaminates the paint surface effectively)
- Detail spray / lubricant(Lubricates the surface for safe polishing)
- LED inspection light(Reveals fine defects and hazing)
- Protective gear(Safety glasses and gloves to protect skin and eyes)
- Paint gauge or gloss meter (optional)(Helpful for objective progress checks)
Steps
Estimated time: 2-6 hours
- 1
Inspect defects and plan
Begin with a thorough walk-around under bright lighting to identify swirls, holograms, oxidation, and deeper scratches. Document areas requiring heavier correction and plan a two-pass approach if needed. Decide on the initial pad and compound based on the defect severity and the paint's clarity.
Tip: Take photos and mark the most challenging spots to avoid missing areas during correction. - 2
Wash and decontaminate
Wash the vehicle using a two-bucket method to minimize marring. Use a clay bar or clay mitt with lubricant to remove embedded contaminants. Rinse, dry, and perform a quick IPA wipe to remove oils before correction.
Tip: Work in sections and keep the surface lubricated to prevent new scratches. - 3
Mask edges and trim
Apply masking tape around sensitive edges, trim, and plastics to prevent contact with polishes. Keep tape flat and avoid leaving adhesive on paint after removal. This protects areas that can be damaged by polish overspray.
Tip: Use low-tack tape to minimize risk of lift or residue. - 4
Test spot and choose aggression
Select a small test patch on an inconspicuous area to evaluate the aggressiveness of your chosen compound and pad. If the defect is not being removed within a few passes, consider a slightly more aggressive combination or adjust buffer speed.
Tip: Start with the least aggressive option to minimize risk of burn or haze. - 5
Cutting phase on test area
Apply the cutting compound with the cutting pad and use slow, overlapping passes. Maintain light-to-moderate pressure and keep the pad flat to avoid creating new scratches. Work within the recommended RPM range to prevent heat buildup.
Tip: Keep the polisher moving and avoid staying on one spot for too long. - 6
Polish to refine and blend
Switch to a finishing pad and a finishing polish to refine the corrected zones. Use shorter passes with lighter pressure to reduce haze and blend with surrounding panels. Inspect frequently under the LED light to ensure uniform gloss.
Tip: If hazing remains, try a lighter finishing polish on the same pad or swap to a softer pad. - 7
Wipe and inspect for clarity
Wipe the treated area with IPA to remove residual oils and check the corrected surface under bright light. Look for uniform gloss and the absence of halos or swirl marks. If needed, repeat polishing in localized areas until satisfied.
Tip: Use a gloss meter or a high-quality light to confirm even appearance. - 8
Seal and protect the finish
Apply a wax, sealant, or ceramic coating to protect the freshly corrected surface. Follow product instructions for cure times and cure conditions. Buff lightly after the sealant sets to achieve a glassy finish.
Tip: Apply in a cool, shaded area and avoid direct sun during curing.
Your Questions Answered
Do I need to hire a professional to do paint correction?
DIY paint correction is possible with the right tools and guidance, but it carries risk if you’re inexperienced. Start on an inconspicuous area and practice carefully before tackling larger panels. If damage or soft finishes are suspected, professional help may be the safer choice.
DIY correction is possible with the right tools, but practice first on a hidden area. Consider professional help if you’re unsure.
What is the difference between cutting and finishing polish?
Cutting compounds remove deeper defects and haze, while finishing polishes refine the surface to enhance clarity and gloss. You typically start with a cutting step and finish with polishing to blend the results.
Cutting removes deeper scratches; finishing polish refines and blends for a glassy look.
How long does paint correction take?
Time varies with defect severity and panel area. A full correction can take several hours, often 2-6 hours, depending on the condition and the experience of the technician.
Most corrections take a few hours, depending on defects and panel size.
Can I rush paint correction?
Rushing increases heat and the risk of micro-marring or burning the clear coat. Take your time, work methodically, and verify results at each stage.
Rushing can burn the paint; take your time and verify as you go.
Is paint correction safe on all finishes?
Not necessarily. Some older or very thin clear coats can be damaged by aggressive correction. Always test on a small area and adjust your approach accordingly.
Test first; some finishes may be sensitive to aggressive correction.
Watch Video
Quick Summary
- Define the goal before you start
- Prep the surface thoroughly to avoid scratches
- Choose the correct pad and compound for the task
- Monitor heat and environment for safe correction
- Inspect under bright light to confirm uniform gloss