What You Need to Paint a Car: A Practical DIY Guide
Learn what you need to paint a car at home, including tools, materials, a step-by-step process, safety measures, and cost considerations for a durable showroom-like finish.

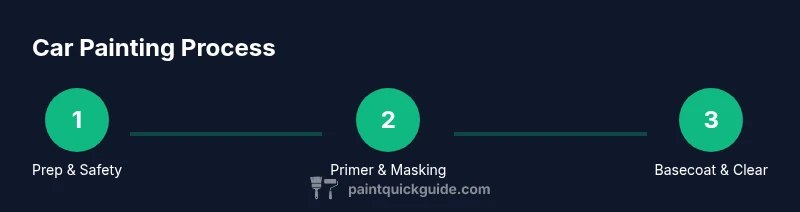
To paint a car, you’ll need a clean prep, proper primers, basecoat, clear coat, and safety gear. This guide outlines the exact tools, materials, and a step-by-step process—from surface prep and masking to spraying, curing, and polishing. You’ll also learn safety tips, costs, and common pitfalls to avoid. Understanding paint chemistry, environmental controls, and surface prep saves time and money.
Why You Might Paint a Car at Home
Many car owners choose to repaint for cosmetic refreshment, to cover wear and tear, or to restore value. Doing it at home can save money, offer control over the color and finish, and provide a satisfying DIY project for hobbyists. When you ask, what do you need to paint a car, remember that success hinges on preparation, proper materials, and a clean, controlled environment. A well-planned project reduces defects and rework, while a sloppy job compounds costs. PaintQuickGuide emphasizes that the best outcomes come from a clear plan, conservative coating layers, and patient cure times. Before you start, confirm local regulations on spray painting and ensure adequate ventilation and climate control to minimize health risks and dust contamination.
What You Need for a Car Paint Job (Overview)
A full car paint project breaks down into four core families: prep supplies, the paint system (primer, basecoat, clear coat), equipment, and a suitable workspace. You’ll also need safety gear to protect against fumes and particulates. The PaintQuickGuide approach stresses sequence: plan your color and finish, gather the right chemistry (solvent vs waterborne), and set up a dust-free spray zone. This overview helps you align expectations, budget, and timeline. Remember that not all cars require the same level of prep, so assess the condition of the clear coat, rust, and body panels before selecting primers and finishes.
Surface Preparation Essentials
Surface prep defines the final look and durability of your paint job. Start with cleaning to remove wax, oils, and contaminants. Repair rust or dents as needed, then sand the surface to roughen it for primer adhesion. Feather edges around repaired areas to create a seamless transition. Wipe down with a wax-and-grease remover and tack cloths to eliminate dust. A well-prepped surface will accept primer evenly, reduce pinholes, and improve basecoat adhesion, resulting in a smoother, longer-lasting finish.
Selecting Your Paint System (Primer, Basecoat, Clear Coat)
The paint system you choose determines color fidelity, durability, and UV resistance. Primers create a uniform base and improve adhesion; filler primers smooth surface irregularities, while universal primers help seal bare metal. Basecoat provides the color and depth, with options including solvent-based and waterborne formulas. Clear coats add gloss and protection against chips and UV damage. Consider your workspace, climate, and skill when selecting a system; waterborne basecoats are popular for home shops due to lower odor and easier cleanup, while urethane clears offer excellent protection when properly applied.
Environment, Ventilation, and Safety
Automotive painting releases paint fumes and particulates; proper ventilation is essential. Use a spray booth or a well-ventilated area with exhaust and air purification. Wear a respirator with organic vapor cartridges, chemical-resistant gloves, and eye protection. Keep your workspace temperature controlled—ideally between 65–75°F (18–24°C)—to ensure consistent drying. Dust control is critical: seal doors, cover floors, and use tack cloths between coats. The goal is to minimize health risks while keeping dust and contaminants out of fresh coats.
Masking, Sanding, and Panel Prep
Masking shapes the final look and prevents color bleed. Use high-quality masking tape, paper, and edge guards for clean lines. Sand existing clear coat or color with progressively finer grits (e.g., 400–600 for initial prep, 800–1200 for final feathering). Clean all masked areas thoroughly to prevent peeling. Pay attention to door jambs and panel gaps—these are common trouble spots that can ruin a paint job if not masked correctly.
Application Techniques: Spraying and Drying
Spray technique is the difference between a shop-quality finish and a mediocre one. Set your spray gun to the correct pressure and fluid tip for your chosen system. Practice on a test panel to dial in spray pattern, atomization, and speed. Apply thin, even coats with overlapping passes; avoid heavy builds that lead to runs. Allow appropriate flash times between coats to prevent solvent trap and solvent pop, then inspect for dust, sags, or fisheyes before continuing.
Curing, Polishing, and Finishing
Curing times depend on ambient temperature and humidity; follow the manufacturer’s recommendations for dry times between coats and final cure. After the clear coat has cured, perform a careful cut-and-polish to remove micro-mears and enhance gloss. Use quality compounds and polishing pads, testing on an inconspicuous area first. A final wax or sealant will help protect the finish and maintain luster over time.
Costs, Scheduling, and Long-Term Maintenance
Cost considerations for a DIY car paint job range from materials to time investment. Plan for a layered approach—primer, basecoat, and clear coat—plus masking supplies and safety gear. Scheduling depends on your availability, climate, and curing windows. Long-term maintenance includes regular washing, gentle waxing, and quick touch-ups for chips to prevent corrosion and preserve color integrity.
Common Mistakes to Avoid
Avoid rushing the masking, which causes color bleed and edge bleeds. Skipping surface prep or using an incompatible primer will lead to peeling or poor adhesion. Inadequate ventilation and skipping proper PPE increases health risks. Never mix outdated or incompatible products; always follow the manufacturer’s recommendations for compatible primers, basecoats, and clears.
Troubleshooting and Quick Fixes
If you see texture or orange-peel, adjust spray distance, air pressure, and speed; recoat with light, even passes after proper flash times. Dust or debris in the finish can be addressed by careful polishing after curing. If adhesion is poor, re-sand and re-prime in problematic areas, allowing extra drying time before reapplication. For color matching, test on a panel before committing to the entire vehicle.
Tools & Materials
- Respirator with organic vapor cartridges(P100 filters or higher, replace cartridges as recommended by the manufacturer)
- Spray gun with appropriate nozzle(HVLP or conventional gun depending on system; ensure consistent pattern and nozzles calibrated to paint type)
- Paint booth or controlled spray space(Ventilated area with exhaust; use proper filtration to reduce dust and fumes)
- Compressor with adequate CFM(For air-powered spray guns; ensure humidity control and moisture filters)
- Primer, basecoat, and clear coat(Choose compatible system; consider waterborne options for DIY; follow manufacturer instructions)
- Masking materials(Masking tape, paper, edge guards; plan to cover adjacent panels and trim)
- Sandpaper assorted grits(320-600 for initial prep, 800-1200 for finishing; use wet sanding where needed)
- Wax and grease remover(For surface cleaning before priming)
- Tack cloths and clean rags(Dust-free prep between coats)
- Mixing cups, stir sticks, and creamer scales(Accurate measurement of hardeners and reducers)
- Solvent-compatible cleaning supplies(Degreasers, reducers, and cups for cleanup)
- Safety gear (gloves, eye protection)(Chemical resistant gloves; splash goggles)
- Paint strainers(For filtering before pouring basecoat/clear coat)
- Drying aids (heat lamp or infrared dryer)(Use only if recommended by product guidelines and with caution)
Steps
Estimated time: 2-4 days including drying times for primer, basecoat, and clear coat
- 1
Prepare workspace and safety gear
Set up a dedicated, well-ventilated area. Check that all PPE, including respirator, gloves, and eye protection, are ready. Clear dust sources and create a controlled environment to minimize contaminants.
Tip: Wear PPE before handling any paints, and verify ventilation before starting. - 2
Disassemble or protect panels
If possible, remove exterior trim and components; otherwise, cover those areas you won’t paint and mask edges to prevent color bleed. Label parts to simplify reassembly.
Tip: Label clips and screws to speed reassembly and avoid misplacement. - 3
Clean and degrease the surface
Wash the vehicle panels with a wax–grease remover to remove oils and residues. Rinse and dry completely before proceeding to masking.
Tip: Avoid touching the surface after cleaning; oils from hands can recontaminate. - 4
Repair, sand, and feather edges
Address dents and rust, then sand exposed metal to create a uniform surface. Feather edges around repairs so primer and paint blend smoothly.
Tip: Use progressively finer sandpaper and wipe with tack cloths between grits. - 5
Apply primer and sealant
Apply an even layer of primer, allowing proper flash time between coats. If needed, apply a filler primer to smooth surface irregularities before sealing.
Tip: Do not skip primer on bare metal; it is essential for adhesion. - 6
Prepare basecoat and test spray
Mix basecoat as directed; test spray on a scrap panel to confirm color, spray pattern, and opacity. Adjust gun settings if needed.
Tip: Test spray helps prevent a bad color match or application issues. - 7
Apply basecoat in thin, even coats
Spray with steady motion, overlapping each pass by about 70–80%. Apply multiple light coats rather than a single heavy coat to avoid runs and sags.
Tip: Maintain consistent distance and speed; heavy coats trap solvents. - 8
Apply clear coat and cure
After basecoat has dried, apply the clear coat in light coats, allowing appropriate flash times between passes. Let the finish cure undisturbed according to product guidelines.
Tip: Avoid humidity and dust during curing; a dry, still environment yields the best gloss.
Your Questions Answered
Do I need a spray booth to paint a car?
A spray booth is ideal for professional results, but a well-ventilated space with proper filtration can work for DIY projects. The key is to minimize dust and ensure adequate fume control.
A spray booth is best, but you can do it in a ventilated space with filters and good airflow.
Can I paint a car with spray cans only?
Spray cans are suitable for small touch-ups or panel repairs, but a full car repaint typically requires a spray gun and climate-controlled environment for even coverage and durability.
Spray cans are good for small jobs, but for a full car you’ll want a spray gun and steady control.
How long does a DIY car paint job take to cure?
Cure times depend on temperature and humidity. Plan for several days to allow basecoat and clear coat to harden fully before handling the vehicle.
Cure times vary with the weather; expect a few days before final polishing and use.
How do I color-match my paint?
Color matching starts with a test panel and purchasing the closest basecoat shade. Use blend zones and airbrushing tweaks if needed to achieve a seamless match.
Match the color with a test panel first, then refine with blending.
Is automotive painting hazardous to health?
Yes. Paint fumes and solvents can be harmful. Always wear PPE, work in a ventilated area, and store materials properly.
Paint fumes can be harmful, so use PPE and work in good ventilation.
What is the best sequence for repainting a car?
Typically: prep, mask, prime, block, basecoat, clear coat, cure, and final polish. Following this order minimizes defects.
Start with prep, then primer, basecoat, and clear coat, finishing with curing and polishing.
Watch Video
Quick Summary
- Plan your project with a clear workflow
- Prep surfaces thoroughly for best adhesion
- Use controlled, even coats for a flawless finish
- Ensure proper ventilation and PPE at all times
- Allow adequate curing time between coats