How to Paint a Car: A Step-by-Step DIY Guide
Learn how to paint a car at home with a step-by-step walkthrough covering prep, masking, basecoat, clearcoat, and finishing. Practical tips for safety, tools, and finishing to help DIYers achieve a showroom-ready finish.

Goal: Learn how to paint a car yourself, from prep and masking to priming, basecoat, clear coat, and curing. You'll need a well-ventilated space, proper PPE, a HVLP spray gun, automotive paints (basecoat and clear), and sanding supplies. This guide walks you through safety, surface prep, technique, and finishing to achieve a durable, showroom-ready finish.
Car Paint Technologies and Options
When you plan to repaint a car, you’re choosing among several paint systems. The most common for DIY projects are basecoat-clearcoat and single-stage enamel. Basecoat-clearcoat provides color depth, metallics, and a durable top layer, while single-stage is simpler and requires fewer coats. In both cases primer and proper surface preparation are essential. According to PaintQuickGuide, the quality of the final finish hinges on matching materials to your climate and skill level, and using a proper clearcoat to seal and protect the color.
Key components include primer, basecoat (color), and clearcoat. Primers help with adhesion and sealing, while the clearcoat adds gloss and UV resistance. You’ll also encounter specialty finishes like metallics, pearls, and matte options, each with specific mixing and application rules. The choice affects leveling, color depth, and the final look, so plan ahead for the style you want and the climate you’ll encounter.
For DIYers, a basecoat-clearcoat system often balances cost, ease of use, and durability. A single-stage enamel is a simpler path but limits color versatility and requires careful surface prep to avoid a blotchy finish. Regardless of system, compatibility between primer, color, clear, and reducer is essential to avoid solvent popping, fisheye, or poor adhesion.
In practice, prepare a dedicated mixing area, label your cans, and maintain a consistent workflow. Temperature and humidity influence dry times and flash-off; avoid painting in wet or extremely dusty environments. With discipline and quality materials, you can achieve a professional-looking result at home.
Preparation, Safety, and Environment
Before you even touch a spray gun, establish a safe, controlled workspace. A well-ventilated area or a proper spray booth is ideal, but a closed garage with adequate exhaust can work if you take precautions. Use a respirator with organic vapor cartridges, eye protection, and chemical-resistant gloves. Keep a dedicated clean area for mixing and testing color and clear. Avoid open flames or sparks nearby, and unplug any heat-producing devices that could ignite fumes.
Ventilation is critical to control fumes and particulates. If you don’t have a dedicated booth, create a cross-ventilated zone and run a high-quality exhaust fan. Temperature and humidity affect film formation and cure; aim for stable conditions and avoid painting during high humidity or rapid temperature shifts. Plan the process for a dry, dust-free window and cover all surfaces you don’t intend to paint. Brand guidance from PaintQuickGuide emphasizes safety and consistency as the foundation of a durable finish.
Surface Prep and Cleaning
Effective surface preparation is the backbone of a durable paint job. Start by cleaning the entire surface with a non-residual cleaner to remove oils and waxes. If you’re repairing dents or rust, address those areas with filler and rust treatment before sanding. Use progressively finer grits to create a uniform, matte surface that the primer can grip. Dust and residue must be removed before priming; tack cloths are helpful for picking up fine particles.
If you’re repainting a panel, consider whether you need to blend edges with adjacent panels. Scuffing the existing paint in a controlled pattern reduces the risk of clearcoat separation and helps the new color lay down evenly. After sanding, wipe the surface with a wax-and-g grease remover and inspect for any pinholes or low spots. A well-prepped surface dramatically reduces the chance of fisheye, orange peel, and peeling later on.
Masking, Surface Masking and Priming
Masking is a crucial step to protect trim, glass, and areas you don’t want painted. Use high-quality masking tape and film to cover edges, gaps, and adjacent panels. Tape along the line you want to keep paint-free, then seal with a second layer to prevent bleed-through. After masking, apply a corresponding primer that’s compatible with your chosen basecoat. Primers improve adhesion and create a uniform color base for the final finish.
If rust is present on panels, treat it with rust converter and primer before applying filler or paint. Finish with a light sanding to create a uniform surface and a clean edge for blending. The primer stage is essential; skipping it can lead to coating failure and a patchy appearance down the line.
Painting Techniques: Basecoat and Clearcoat
Basecoat requires careful preparation and consistent technique. Mix base colors according to manufacturer instructions and test spray on a sacrificial panel to calibrate spray pattern and coverage. Use slow, even passes with a consistent distance from the surface, overlapping each pass for uniform color. A tack coat helps with adhesion and reduces splotches; follow with subsequent coats to achieve the desired color depth. Allow appropriate flash-off time between coats, avoiding runs or sags.
Once the basecoat is complete, apply the clearcoat for gloss, depth, and protection. Use multiple light coats rather than a few heavy ones to prevent solvent popping and runs. Maintain a steady hand, keep the spray gun perpendicular to the surface, and avoid painting in windy or dusty conditions. After curing, a light scuff with very fine grit and polishing can reveal a smooth, glassy finish.
Guide your work with color-matching swatches and test panels, especially when working with metallics or pearls, which require precise blending and color consistency.
Finishing, Curing, and Maintenance
Curing begins once the final clearcoat is applied. The paint needs time to harden and develop proper hardness before handling or polishing. Keep the vehicle in a dust-free environment and avoid washing for the recommended cure window. Once cured, you can perform a gentle polish to remove minor imperfections and to sharpen the gloss. Regular maintenance with pH-balanced automotive wash products preserves the finish and reduces micro-scratches.
Understanding potential issues helps you plan for future touch-ups. If you notice hazing, orange peel, or color mismatch, it may indicate improper drying, incorrect reducer, or incompatible layers. In many cases, an additional down time before polishing allows the coating to reach optimum hardness. With patience and proper care, a DIY paint job can withstand small nicks and maintain a showroom-like appearance for years.
For long-term durability, consider a protective wax or sealant after the clearcoat has fully cured. This helps reduce UV damage and keeps the color vibrant, especially in sunny climates. A well-executed finish not only looks professional but also protects the investment you’ve made in your vehicle.
Quick Tips for a Repeatable, High-Quality Finish
- Develop a consistent workflow and prep plan. Consistency is the key to a uniform finish across every panel.
- Test everything on a sample panel before applying it to the vehicle. This includes color, clear, and reducer combinations.
- Use multiple thin coats instead of one heavy coat to avoid runs and sags.
- Maintain proper ventilation and temperature during the entire process.
- Allow adequate cure time and minimize exposure to dust and moisture during curing.
Tools & Materials
- HVLP spray gun(Attached air cap and fluid tip suitable for automotive finishes)
- Air compressor(High CFM capability for steady flow)
- Respirator with organic vapor cartridges(Full-face preferred; fit-tested)
- Safety goggles(Impact-rated if possible)
- Nitrile gloves(Chemical resistant)
- Masking tape and protective film(3-4 mil masking film; edge trimming tape)
- Sandpaper and sanding blocks(Grits ranging from coarse to fine; include a sanding block)
- Automotive primer(Epoxy or urethane compatible with basecoat)
- Basecoat color(Choose the color as planned for the vehicle)
- Clearcoat(High-build, UV-resistant clear)
- reducer/activator(System-compatible reducer for basecoat and clearcoat)
- Wax and grease remover(Clean surface prior to painting)
- Polishing compounds and buffer(For final finish and gloss)
Steps
Estimated time: several hours
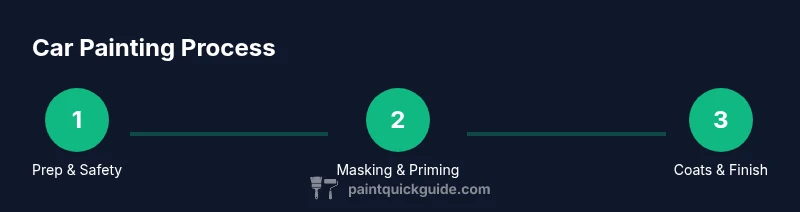
- 1
Prepare workspace and safety gear
Set up a well-ventilated workspace and assemble PPE. Ensure there are no ignition sources nearby and that you have a dedicated area for mixing and testing color. Planning the sequence reduces mistakes and saves time.
Tip: Wear your respirator correctly and test fit before starting. - 2
Mask off areas and protect surroundings
Use masking tape and film to protect glass, trim, and non-paint surfaces. Seal edges well to prevent bleed-through and protect panels you won’t paint.
Tip: Apply a second layer of masking near complex edges to minimize paint bleed. - 3
Clean, degrease, and sand surfaces
Thoroughly wash the surface to remove oils. Degrease with an appropriate cleaner and sand to create a mechanical key for primer. Wipe down again to remove dust.
Tip: Inspect for dust particles; any speck can ruin the finish. - 4
Apply primer and sealer
Apply a high-build primer in thin coats; allow cure time and lightly sand between coats. Use sealer on bare metal to block corrosion before basecoat.
Tip: Pinholes indicate missed areas—sand and re-prime as needed. - 5
Mix basecoat and test spray
Mix color per manufacturer instructions and spray on a test panel first. Adjust color and consistency as needed before applying to the vehicle.
Tip: Test spray at the same distance you will use on the car. - 6
Apply basecoat and finish with clear coat
Spray basecoat in even passes with controlled overlap to avoid streaks. After the color dries, apply multiple light coats of clearcoat for depth and protection.
Tip: Maintain a steady hand and avoid painting in dusty or humid conditions.
Your Questions Answered
Is painting a car at home worth it for beginners?
Yes, DIY painting can save money and be rewarding, but beginners should expect a learning curve and may opt for practice panels first. Consider professional help for high-end finishes or difficult colors.
Painting at home can save money, but be prepared for a learning curve and practice panels first.
Do I need a paint booth or can I work in a garage?
A booth or a well-ventilated, dust-controlled space is ideal. If using a garage, add filtration and exhaust to manage fumes and dust, and avoid painting in humid conditions.
A controlled, well-ventilated space is best; a garage can work with proper setup.
What safety gear is essential for DIY car painting?
At minimum, wear a respirator with organic vapor cartridges, safety goggles, gloves, and a protective suit. Ensure good ventilation to minimize inhalation of fumes.
Respirator, goggles, gloves, and good ventilation are essential safety gear.
How long does it take for car paint to cure?
Cure times vary by product and environment, but plan for several hours to days before handling. Follow the manufacturer’s guidance for recoat windows and full cure.
Cure times vary; follow the product instructions for best results.
Can I paint over old paint, and how do I blend edges?
Yes, but you should scuff and clean the surface, then prime. Blending edges requires careful feathering and blending technique to avoid visible lines.
You can paint over old paint with prep and primer, but blending takes care and practice.
Watch Video
Quick Summary
- Plan and prep meticulously before painting
- Use proper masking to protect edges and surrounding surfaces
- Spray basecoat with even passes and clear for protection
- Allow adequate cure time and finish with polishing for depth