Red Candy Paint: Step-by-Step Guide for a Candy-Red Finish
Learn how to achieve a deep, glassy red candy paint finish—from surface prep and base coat to candy layers and a durable clear coat. Practical, step-by-step guidance with tools, costs, and safety tips for homeowners, DIY enthusiasts, and auto refinishing hobbyists.

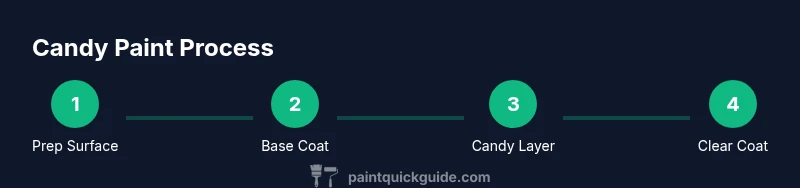
By the end of this guide you will learn how to achieve a true red candy paint finish on autos or craft projects. You’ll prepare the surface, apply a transparent candy layer over a suitable base, and seal with a durable clear coat. Expect careful color matching, controlled environment, and multiple thin coats for depth and gloss. Tools and safety gear are covered below.
What red candy paint is and where it’s used
According to PaintQuickGuide, red candy paint is a translucent color layer laid over a metallic or solid base to create depth and a luminous, jewel-like finish. The effect is achieved by stacking a clear topcoat with a tinted candy layer that interacts with the underlying base color. Candy finishes are most common in automotive refinishing—where showroom quality is the goal—but they also appear on custom motorcycle parts, high-end cabinetry and decorative surfaces. The color you see comes not from an opaque pigment, but from light passing through the translucent layer and reflecting off the metallic base. This chemistry delivers depth, brilliance, and a sense of three-dimensional color that traditional solid paints cannot provide. The red candy shade ranges from deep ruby to bright cherry depending on the base coat, pigment density, and the number of candy layers applied. For DIYers, the journey to a true red candy finish demands patience, a controlled environment, and reliable topcoats, but the payoff is a striking, glassy look that enhances the perception of depth and curvature.
Candy vs. traditional solid paint: differences
Candy finishes differ from standard solid paints in layering, color depth, and durability. With candy, color comes from a translucent layer placed over a base, whereas solid colors rely on opaque pigment. The candy layer is usually quite thin—sometimes as little as 0.1–0.2 mil—so you rely on the underlying base to define the hue and brightness. The total gloss and depth are a result of how evenly the candy is built and how well the clear topcoat is cured. Because candy layers are more sensitive to dust, humidity, and temperature, shop conditions and ventilation matter more than with regular paints. In practice, red candy can look dramatically different under various lighting, finishing angles, and base colors, which makes color matching and test panels essential. For legitimacy and repeatability, use a consistent base and a well-calibrated spray setup, and document each coat's number and thickness so future touch-ups reproduce the same depth and shade. PaintQuickGuide’s research shows that most DIY candy projects fail due to inconsistent candy thickness and poor curing, not a faulty base color.
Surface prep for candy finishes
Candy finishes demand a pristine canvas. Start with removing all contaminants—oil, wax, old coatings—with a dedicated cleaner and a final wipe with isopropyl alcohol. Lightly scuff the surface with a fine abrasive (e.g., 400–600 grit) to give the primer a tooth, then re-clean. Any dust, pinholes, or unevenness will telegraph through the candy layer as visual defects. Metal surfaces require a corrosion-inhibiting primer, while plastics demand compatible primers to avoid lifting. Once the primer dries, inspect for runs, sags, or orange-peel and sand again with progressively finer grits (800–1200) to a uniform finish. In controlled environments, masking off edges and sensitive areas is essential to protect the base or adjacent panels. Finally, verify the surface is dust-free and temperature-stable before applying any color. Poor surface prep is the leading cause of candy failures, so invest time here and you will save headaches later.
Base coat compatibility and color matching
Red candy paint relies on a base that provides depth and contrast. Common practice is a dark metallic or black base that the candy layer can tint through. The base color influences the final hue, brightness, and perceived depth; a very bright base may wash out the candy, while a deep black base can yield a lush, wine-like red. When choosing pigments, aim for consistency across panels and lighting. Test panels are critical: apply the same candy and base combination on a sample panel, then view under daylight, showroom, and LED lighting. If you’re matching to a vehicle, sample on a curved panel at eye level to predict reflections accurately. If you’re aiming for dramatic depth, darker bases achieve richer candy results; lighter bases yield brighter, more translucent effects. Document the base color formula and the candy shade used so you can reproduce it in future refinishing projects.
Application considerations: consistency, temperature, humidity
Candy application is a high-precision process. Maintain a dust-free spray booth or equivalent; outdoor work should be avoided in windy or humid conditions. Temperature shifts affect solvent evaporation and candy clarity, so maintain a steady ambient temperature and use a dew point meter if possible. Maintain a consistent spray distance (about 6–8 inches) and a smooth, overlapping pattern to prevent bands or mottling. Apply several very light coats rather than a few heavy coats to avoid runs and sags; typical practice is 3–5 candy coats, allowing 5–15 minutes between coats for flash-off in moderate climates. After the candy passes, apply a clear coat with proper ventilation and cure time. If you see orange-peel, adjust your spray technique or thinner viscosity and reflow with light passes. Patience here is essential to depth and clarity.
Cost planning and budgeting a candy finish
Budgeting for a red candy paint job involves materials, equipment, and technician time. Expect to pay for a base coat, candy layer, activator, reducer, and a durable clear topcoat, plus primers and sealers as needed. The total material cost can vary widely depending on the size of the project, color depth, and the number of coats; typical DIY budgets fall into a mid-range where quality products are chosen over discount alternatives. Expect to invest in a quality spray gun, a controlled spray booth or hood, a respirator, and proper protective gear, which add to the upfront cost. For a typical mid-sized panel, PaintQuickGuide analysis shows most hobbyists plan for a multi-day process, including cure times; always allocate extra budget for rework if a coat sags or dust gets into the finish. If working on a project vehicle, consider potential booth rental or shop time costs, and reach out to suppliers for sample or test-panel pricing to refine your final amount.
Troubleshooting and common mistakes
Orange peel, fisheyes, or mottling are common candy finish issues that usually trace back to surface prep, humidity, or solvent balance. Orange peel happens when the coating dries too fast or the film thickens unevenly; fix with light sanding (1500–2000 grit) and a careful recoat. Fisheyes indicate contamination—wipe thoroughly and use improved clean practices or a new batch of reducers. Mottling can result from incorrect candy thickness or inadequate flash-off; ensure coats are consistent and allow compounds to level between passes. Dust specks and insects create permanent flaws that will show through the candy; shield the workspace, wear good PPE, and wipe surfaces with a tack cloth between coats. If you observe blotching, adjust the tinting strength or your base depth. The key to success is consistent film thickness and meticulous cleanliness from sanding through final cure.
Maintenance and longevity tips
After curing, your red candy finish benefits from dedicated maintenance. Regular washing with non-abrasive cleaners and soft towels helps preserve depth and gloss. Use a protective wax or sealant compatible with candy coatings to maintain luster without clouding the finish. Avoid aggressive polishing on the candy layer; use mild compounds and light pressure when addressing scratches. UV exposure can gradually dull depth, so park in shade or use UV-blocking clear coats for extended life. When reconditioning, start with a light polish and a test area to ensure you do not strip the candy layer; a professional repaint may be necessary for deeper wear. By following care guidelines, you’ll maximize the candy gloss and ensure the finish remains vibrant for years.
Tools & Materials
- Primer (etch or compatible primer)(Suitable for metal or plastic substrates; ensure compatibility with base and candy system.)
- Base coat (dark metallic or black)(Creates depth; choose a consistent, high-quality color for uniform candy results.)
- Candy color layer(Translucent tint; multiple thin coats yield depth and brightness.)
- Clear topcoat (urethane/polyurethane)(Durable gloss protection; select a reducer compatible with candy and base.)
- Candy activator/reducer(Controls cure rate; follow manufacturer guidelines for pot-life and flash-off.)
- Masking tape/paper(Protects edges and adjacent panels from overspray.)
- Spray gun with appropriate nozzle(Maintain even spray pattern; a 1.3–1.8 mm nozzle is common for candy jobs.)
- Nitrile gloves, respirator with organic vapor cartridges(Personal protection against isocyanates and solvents.)
- Degreaser/cleaner and isopropyl alcohol(Ensure surface is contaminant-free before coating.)
- Sandpaper and polishing compounds(Progressive grits 400–2000; final polish for depth.)
- Clean workspace equipment (tack cloths, lint-free rags)(Dust-free environment is critical for candy finishes.)
- Air compressor with steady pressure(Consistent airflow helps achieve even coats.)
Steps
Estimated time: 6-10 hours
- 1
Prepare the surface
Clean the project thoroughly with degreaser, then wipe with isopropyl alcohol. Lightly sand with 400–600 grit to create tooth for the primer, then re-clean to remove residue. Inspect for defects or remaining contaminants before moving on.
Tip: Use a tack cloth between sanding and cleaning to capture dust. - 2
Mask and protect surroundings
Mask edges and areas not receiving candy; protect the floor and nearby panels. Confirm masking adheres properly and remains intact during the entire process. Allow masking to settle for a few minutes to minimize edge lift before applying coatings.
Tip: Use vinyl masks near curves to minimize edge bleed. - 3
Apply primer and base coat
Spray a compatible primer, let dry per product guidelines, then apply the base color (dark metallic or black). Allow sufficient cure time and inspect for uniform coverage; perform a light sanding if you see nibs or texture before applying candy.
Tip: Maintain steady hand motion and keep a consistent distance (around 6–8 inches). - 4
Apply candy color layer
Apply several very light candy coats, allowing flash-off between coats. Build depth gradually rather than attempting dense coats. Check angle and lighting to ensure even tint and avoid pooling.
Tip: Always aim for translucent builds; heavy coats increase run risk. - 5
Apply clear topcoat
Spray a clear coat with proper ventilation and allow adequate cure time between layers. Ensure the final coat covers edges and seals the candy properly to protect from UV and wear.
Tip: Follow the manufacturer recoat window to prevent solvent interlayer issues. - 6
Finish and evaluate
Perform a careful cure check; if needed, wet-sand lightly (1500–2000 grit) and buff to restore gloss. Inspect for orange peel, dust, or saturation differences and address with targeted touch-ups on test panels first.
Tip: Document coat counts and curing times for future projects.
Your Questions Answered
What is red candy paint?
Red candy paint refers to a translucent color layer laid over a base coat to create depth and a jewel-like red finish. The final look depends on base color, candy density, and clear topcoat.
Candy paint is a translucent red layer over a base that creates depth and shine when finished with a clear coat.
Can I apply red candy paint over any base color?
Candy generally looks best over a dark base to maximize depth. Light bases can yield brighter, more translucent results. Always test on panels to confirm how the base and candy interact under different lighting.
Candy works best over dark bases, but you should test on panels to ensure the final look matches your goal.
What equipment do I need?
A spray gun with an appropriate nozzle, a compatible compressor, a respirator, gloves, masking supplies, primers, base coat, candy color, activator/reducer, and a clear topcoat.
You’ll need a spray gun, a compressor, protective gear, and the full candy system including base, candy, activator, and clear coat.
How long does curing take?
Cure times vary with temperature and product lines; plan for at least 24–48 hours before handling or polishing, with longer times for full hardening.
Cure time depends on products and temperature—expect at least a day before heavy handling.
Is red candy paint durable for daily use?
With proper clear coating and maintenance, candy finishes can be durable. Durability depends on exposure, shade depth, and protection from UV and road debris.
Yes, candy finishes can be durable if you use the right topcoat and protect them from sun and wear.
How much does a red candy paint job cost for a car panel?
Costs vary by project size and materials; expect a mid-range budget with differences based on base color, candy depth, and the number of coats. Check with suppliers for test-patch pricing.
Prices vary; it’s best to get quotes for test panels to estimate the project cost.
Watch Video
Quick Summary
- Build depth with multiple translucent candy coats
- Do thorough surface prep and masking to avoid flaws
- Control temperature and humidity for consistent results
- Test patches are essential for color accuracy
- Document coat steps for repeatability