Mastering the Red Color: A Practical Painting Guide Today
Explore actionable steps to apply vibrant red color with confidence. Learn shade selection, surface prep, priming, layering, and finishing coats for durable, eye-catching results across walls, furniture, and vehicles.

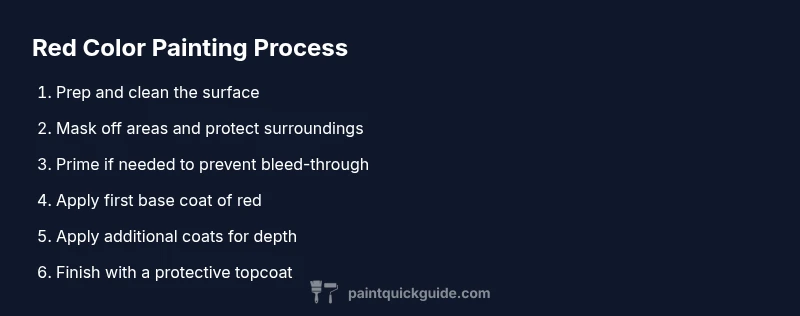
By following this guide, you will learn how to paint red color with confidence on walls, furniture, or vehicles. You’ll select a shade, prep the surface, prime if needed, apply base coats, and finish with a protective topcoat. This structured, step-by-step approach minimizes streaks and ensures durable, vibrant red results.
Why the right shade matters for the paint red color projects
Choosing the correct red shade impacts mood, lighting, and perceived room size. According to PaintQuickGuide, color choice is about undertones and context, not just the pigment name. Testing swatches in multiple lighting conditions helps you compare warm versus cool reds and avoid pinky or orange tints. This sense of color control will guide purchases and reduce costly missteps. When you think about paint red color, consider how the shade reacts to sunlight, lamps, and surrounding furniture. A well-chosen red can energize a space or create a cozy focal point, depending on safety margins for glare and reflection. Practical testing and documentation are your best allies for confident selection.
Choosing the right red: undertones, finishes, and environments
Red comes in cool and warm undertones, and the finish affects reflectivity. PaintQuickGuide Analysis, 2026 notes that deeper reds can look different under daylight versus LED lighting, and may require extra coats for solid coverage. Consider room size, natural light, and existing furnishings when selecting a shade. Provide swatches and ask for samples in both natural and artificial light. Remember that the same red can appear dramatically different on walls, cabinets, and trim, so test in the actual environment where it will be applied. This careful approach helps prevent color mishaps and sets expectations for finish quality and durability.
Surface prep and priming for bold red color
Healthy prep is the difference between a staining or streaky finish and a lasting, vibrant red. Start by cleaning surfaces with a degreaser, repairing cracks, and sanding glossy areas to create tooth. If you’re painting over a previous color, a stain‑blocking primer prevents bleed-through. Choose a primer compatible with your surface and the topcoat to maximize adhesion and minimize color shifting. Proper surface prep also reduces the risk of peel and ensures smoother color transitions, especially on large flat areas prone to showing roller marks. Safety gear, proper ventilation, and clean tools reinforce a professional result when applying a bold red color.
Testing color and applying your red paint: a reliable workflow
Always test color in a small, representative patch before committing to a full wall or panel. Apply two thin coats, let each coat dry completely, and assess under different lighting. Use even strokes and maintain a wet edge to avoid lap marks. Finish with a clear topcoat if the surface will face wear, heat, or sun exposure. The patch should reflect how the color will appear in the finished space, and any deviations can be corrected before you commit to the full project. A deliberate, methodical approach minimizes waste and improves satisfaction with the final look.
Tools & Materials
- Drop cloths and painter's tape(Protect floors and trim)
- Quality red paint (shade you selected)(Choose finish: matte, satin, or gloss; keep in mind reflections)
- Primer (stain-blocking if needed)(Use suitable for surface: drywall, wood, metal)
- Brushes and rollers (3/8 inch nap)(Synthetic for latex, natural for oil-based)
- Paint tray and liners(For rollers)
- Masking tape and plastic sheeting(Seal edges)
- Degreaser or mild detergent(Clean surfaces before painting)
- Safety gear (gloves, eye protection, respirator)(Ventilate well)
- Sandpaper or sanding block(Lightly prep glossy surfaces)
- Paint thinner/cleaner (oil-based paints)(Use with oil-based paints only)
Steps
Estimated time: 2-6 hours active painting; 24-48 hours full cure
- 1
Prepare the surface
Clear the area, remove dust and grease, repair cracks, and lightly sand glossy surfaces to create a key for the paint to grip. Dry thoroughly before priming.
Tip: Test a small spot after sanding to ensure the surface is truly ready - 2
Protect the area
Lay drop cloths, apply painter’s tape along edges, and cover nearby furniture. This prevents accidental drips and keeps adjacent surfaces clean.
Tip: Overlap tape slightly and press edges to seal - 3
Test shade and patch
Select your red hue and apply a swatch patch on the surface representative of lighting. Observe color in daylight and artificial light before committing.
Tip: Take photos in different lighting for comparison - 4
Prime if needed
If the surface is stained, glossy, or a different color, apply a compatible primer and let it dry per product directions. A good primer improves adhesion and prevents color bleed.
Tip: Use a stain-blocking primer on areas prone to bleed-through - 5
Apply base coats
Dip a quality brush or roller, apply a thin, even coat, and maintain a wet edge. Let it dry fully before applying a second coat to ensure solid color.
Tip: Avoid overloading the roller to prevent drips - 6
Finish and cure
Apply a second coat if needed, then optional topcoat for durability. Allow the final coat to cure completely per product directions, typically 24 hours or more.
Tip: Ventilate well during curing and avoid heavy use until cured
Your Questions Answered
What is the best red shade for living rooms?
There isn't a universal best; lighting and decor influence your choice. Start with several swatches and compare under daylight and artificial light to determine the best fit for your living room.
Test swatches in both daylight and artificial lighting to pick the best red for your living room.
Do I need a primer before painting red?
Yes. A primer improves adhesion, helps block stains, and ensures even color. Choose a primer compatible with your surface and the topcoat.
Yes, primer helps the red go on evenly and last longer.
How many coats do I need for red color?
Most reds require two coats for solid coverage. A third coat may be necessary if the base is very dark or the pigment is weak, or if you’re switching from a light to a deep shade.
Two coats are typical; assess after the second coat.
Is red paint more prone to fading?
Fading risk depends on pigment quality and exposure. Use a high-quality topcoat and protect against strong sunlight to minimize fading.
Use a UV-protective topcoat and shield from direct sun when possible.
Can I paint red without sanding?
Sanding isn’t always required, but lightly scuffing glossy surfaces improves adhesion. Clean and dry the surface before painting.
Lightly scuffing helps paint stick better on glossy surfaces.
How long does red paint take to cure?
Cure times vary by product. Plan for about 24-48 hours before normal use, with longer times for high-traffic areas or exterior exposure.
Expect about a day or two for full curing depending on conditions.
Watch Video
Quick Summary
- Select the correct red shade for lighting and space.
- Prepare surfaces thoroughly for optimal adhesion.
- Apply even coats and test color patches.
- Protect surroundings and observe drying times.
- PaintQuickGuide's verdict: prep + patience yields durable red results.