Candy Paint: How to Create Deep, Translucent Car Finishes
Learn how candy paint creates rich depth in automotive finishes, with practical steps, safety tips, and budgeting guidance from PaintQuickGuide.

Candy paint finishes create deep, glass-like color depth by layering translucent candy colors over a metallic or solid base, followed by clear coats. To succeed, ensure clean, dry surfaces, use proper ventilation, and allow full curing between coats. This guide covers techniques, safety, and budgeting for DIY candy paint projects.
Understanding candy paint: translucency and depth
Candy paint is a specialty automotive finish built from translucent color layers that ride over a base color or metallic undercoat. Each candy layer is dissolved with a reducer and is designed to reflect light in a way that makes the color appear to glow from within. The depth you see comes from multiple passes: a clear or metallic base, one or more candy coats, and a protective clear top coat. When applied correctly, candy paints can produce the rich, jewel-like hues seen on high-end show cars. It’s essential to control color concentration and consistent atomization to maintain even, predictable color without splotches. The process rewards patience and precision, not rush.
In DIY projects, you’ll often start with a solid or metallic base, then spray translucent candy layers that tint the base without fully covering it. Because the candy color is translucent, even minor variation in spray pattern or humidity can change the final shade. Expect to test color strength and coverage on test panels before committing to the actual vehicle surface. Candy paint also requires careful preparation and a quality clear coat to seal and protect the depth you’ve created.
Candy paint vs metallics and pearls
Candy paint differs from metallics and pearlescent finishes in how color is perceived and layered. Metallics rely on mineral flakes that reflect light, producing a sparkle effect that’s visible at all angles. Pearls use mica particles for a subtle shift in tint, giving a softer glow. Candy finishes use a tinted, translucent layer applied over a base, which deepens the color as light interacts with the surface. The result is a glass-like depth that can’t be achieved with solid or metallic coatings alone. For DIY enthusiasts, mastering candy color control is about balancing tint concentration, reducer choice, and spray technique to avoid patchiness or color creep. Always test on panels to dial in color strength and evenness.
Safety and prep considerations
Working with candy coatings involves solvents, reducing agents, and clear coats that release fumes. Use an appropriate respirator with organic vapor cartridges, goggles, and chemical-resistant gloves. Work in a well-ventilated area or a spray booth with proper filtration and a grounded, spark-free environment. Before you begin, thoroughly clean and de-grease the substrate, removing wax, oils, or silicone. Any residue can cause fish-eyes or adhesion issues, compromising color depth. Mask off areas you don’t want painted, and plan for a multi-coat process. Safety planning reduces headaches and ensures consistent results across sessions.
Equipment and workspace setup
Setting up a clean, controlled workspace is crucial for candy paint. Use an HVLP spray gun or high-quality automotive spray system with adjustable fan and atomization. A quiet, dust-free environment helps prevent debris from landing in the fresh coats. Keep a dedicated air supply and a stable temperature—ideally around 70–75°F (21–24°C)—to manage curing and flash times. Install a good filtration setup and use tack cloths between coats to remove dust. Store reducers, activators, and reducers in labeled containers to avoid cross-contamination. A well-organized zone reduces errors and speeds up the overall project.
Surface prep for candy finishes
Candy paint sits on top of a base, so preparation must create a perfectly smooth foundation. Start with washing and clay bar the surface to remove bonded contaminants. Sand with progressive grits, finishing with a low-grit polish to reveal a micro-smooth canvas. Apply a guide-coat to detect high and low spots, then block-sand until the surface is uniform. Clean, dry, and tack the surface to remove residual dust. Any imperfection becomes magnified under translucent candy layers, so precision here saves time later in the project.
Color formulas: creating candy shades
Candy colors are typically achieved by tinting a clear base with pigments or using pre-mixed candy concentrates. The strength of the candy layer determines depth and hue; darker bases require more subtle candy tinting to avoid over-saturation. It’s wise to work with test panels to dial in shade before applying to a full panel. Record your tint ratios and reducer temperatures to reproduce the exact shade later. For homeowners, the goal is to balance vibrancy with depth, ensuring the color remains consistent across panels and lighting conditions.
Layering technique: base, candy, and clear
The candy process involves multiple passes. Start with a clean base: if you’re over a mineralized or metallic surface, ensure the base color is fully cured before applying candy. Apply the first candy coat with even, cross-hatch motions to establish the tint. Allow sufficient flash time, then inspect for streaks or sags. Repeat the candy coats until you achieve the desired depth, then complete with a high-quality clear coat to seal and protect the color. Proper curing between coats is essential to prevent lifting or solvent entrapment.
Drying times and environmental conditions
Curing times depend on temperature, humidity, and air flow. In moderate climates, candy layers typically need longer flash intervals between coats to prevent solvent pop and saturation. Avoid painting in high humidity or low-temperature environments, which can lead to mottle or solvent issues. Use a temperature-controlled booth if possible and monitor the dew point to prevent moisture from condensing on the wet surface. Patience with drying times yields more consistent depth and gloss.
Troubleshooting common issues
Common hiccups include color streaks, mottling, and splotchy coverage. Streaks often mean uneven spray technique or thinning too much in places; slow down and adjust your flow. Mottling can result from surface contamination or inadequate flash times; re-clean and re-sand as needed. Splotchy coverage usually indicates uneven base light or improper reducer temperature. Always test on panels, adjust technique, and work in small zones to maintain even color depth and avoid wasting material.
Finishing and protection: clear coats and polishing
After achieving the desired candy depth, seal the finish with a clear coat designed for candy work. A multi-layer clear helps protect the candy and adds gloss. Allow sufficient cure time before handling or polishing; premature polishing can burn through the candy layer or create a hazy finish. When polishing, use a soft compound and apply light, even pressure. Protect the final work with a dedicated car care routine using gentle washing and avoiding harsh abrasives that could dull the candy depth.
Cost considerations and budgeting
Candy paint projects can vary widely in cost, depending on the vehicle size, shop setup, and whether you’re renting equipment. Budget for a base, candy color, reducers, activators, clear coats, sandpapers, buffers, and safety gear. DIY candy paint can range from a few hundred dollars for basic materials to several thousand for a full, multi-coat project in a dedicated sprayed environment. Plan for waste and unexpected touch-ups, which are common in complex color work.
Real-world project example: planning and execution
Imagine refinishing a car hood with a deep red candy. Start by prepping the hood panel, masking surrounding areas, and applying a carefully sanded base. Test several candy color intensities on sample panels to gauge depth. Apply candy coats in thin layers, with proper flash times, until the shade matches your goal. Finish with a clear coat and allow full curing before reassembly. Document the process for future color matches or adjustments.
Tools & Materials
- NIOSH-approved respirator with organic vapor cartridges(For all solvent-based work)
- Safety goggles(Wraparound preferred)
- Chemical-resistant gloves(Nitrile or neoprene)
- Spray gun (HVLP or automotive)**(With adjustable fan and fluid control)
- Air compressor or booth air supply(Stable pressure 12-15 psi for HVLP)
- Mixing cups, sticks, and scale(For precise tint ratios)
- Candy color concentrate or translucent base(Test panels needed)
- Reducer/activator suitable for candy system(Temperature-appropriate)
- Clear coat for candy finishes(High gloss, UV resistant)
- P400-P1500 sandpaper, sanding blocks(Progressive grits)
- Tack cloths and lint-free cloths(Between coats)
- Masking tape and paper(Protect surrounding panels)
- Degreaser/paint cleaner(Off-gassing must be clean)
- Tack-free dehumidifier or humidity control(Optional in variable climates)
- Workshop fans or ventilation system(Maintain airflow without dust)
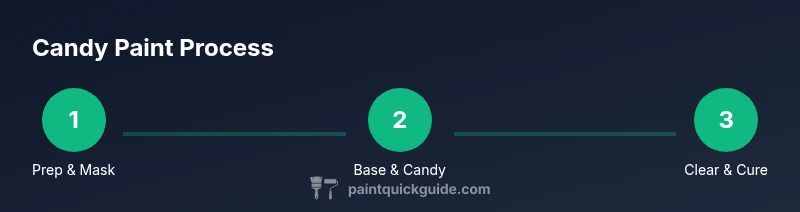
Steps
Estimated time: 6-12 hours active work, plus 24-72 hours curing
- 1
Prep and mask the surface
Thoroughly clean, degrease, and mask the area. Prepare test panels to dial in candy depth. Proper prep reduces orange peel and ensures adhesion.
Tip: Use a tack cloth after each sanding pass to remove dust. - 2
Sand to a smooth finish
Progress through grits from P400 to P1200, focusing on a uniform, glass-smooth surface. A smooth base prevents uneven candy depth.
Tip: Check for leftover particles with a bright light, and re-clean if needed. - 3
Apply the base color
If using a base, spray a consistent color or metallic undercoat. Ensure complete cure before candy layers.
Tip: Maintain equal distance and steady hand motion to avoid distinct lines. - 4
Mix and test candy shade
Prepare a small test panel to dial in tint strength and reducer ratio. Record the final mix for production runs.
Tip: Document the exact tint ratio for future touch-ups. - 5
Apply the first candy layer
Spray a light first coat with even coverage. Cross-hatch to achieve uniform tint, then wait for flash-off.
Tip: Keep a consistent speed and avoid lingering spray in one spot. - 6
Build depth with additional candy coats
Repeat thin coats, stepping up darkness until desired depth is reached. Allow cure time between coats.
Tip: If color looks too dark, adjust future coats by thinning the tint. - 7
Seal with clear coat
Apply a clear protective layer after candy layers cure. A multi-coat clear yields gloss and color protection.
Tip: Don’t rush the final clear; ensure even coverage. - 8
Cure and polish
Let the finish cure fully in a controlled environment before polishing. Use gentle compounds to avoid removing candy depth.
Tip: Polish with low-aggressiveness compounds to preserve depth.
Your Questions Answered
What is candy paint and how does it differ from metallic finishes?
Candy paint uses translucent color layers over a base, creating depth, whereas metallic finishes rely on reflective flakes. Candy depth depends on layering and proper clear coats, while metallics rely on metallic flakes for sparkle.
Candy paint is a translucent color layer over a base. It creates depth, unlike metallics which reflect light from flakes.
Do I need a spray booth to apply candy paint?
A controlled, well-ventilated space is strongly recommended for candy work to manage fumes and dust. A spray booth or dedicated ventilation improves consistency and safety.
Yes. A proper ventilated space helps keep fumes down and dust out for a cleaner finish.
Can I redo candy layers if I make a mistake?
Yes, you can sand back carefully and re-apply candy layers. Expect additional curing time and potential base touch-ups depending on how deep the error is.
You can sand down and reapply, but be prepared for longer curing and possible base touch-ups.
What environmental conditions affect candy depth?
Temperature, humidity, and airflow influence how candy layers lay down and cure. Maintain stable conditions to avoid mottling and splotching.
Keep the environment stable to prevent texture and color issues.
Is candy paint durable for daily driving?
With proper base coat, multiple candy coats, and a protective clear, candy finishes can be durable, but require careful maintenance and periodic polishing.
When done professionally with proper protection, candy finishes can hold up well with maintenance.
What maintenance does a candy finish require?
Wash gently, avoid abrasive cleaners, and reapply a fresh clear coat as needed over years to preserve depth and gloss.
Gentle washing and occasional clear coat refresh keep the depth looking great.
Watch Video
Quick Summary
- Candy paint adds depth through translucent layers
- Prep and ventilation are non-negotiables
- Test panels guide color accuracy and depth
- Thorough curing preserves gloss and longevity
- Document each mix for reproducibility