Purple Paint Cars: A Practical DIY Guide
Learn to choose purple shades, prep surfaces, and apply a durable purple finish on your car with practical tips, safety, and budgeting guidance from PaintQuickGuide.

By the end of this guide, you’ll be able to repaint a car with a vivid purple finish, including shade selection, surface prep, masking, spray technique, curing, and top-coat care. You’ll need a well-ventilated workspace, proper PPE, and an automotive spray setup. This will help you achieve durable, salon-like results.
Purple car color overview and why it matters
Purple is not a one-size-fits-all color for cars; it can read as vibrant, luxurious, or subtle depending on shade and finish. A well-chosen purple can highlight a car's lines and curves more effectively than many standard colors, because light interaction across a pearlescent or metallic base creates depth and shimmer. According to PaintQuickGuide, purple paint cars require careful shade selection and surface preparation to look intentional rather than gimmicky. The right shade under different lighting will reveal violet, plum, or amethyst hues that shift with the sun. In this section, we lay out how to choose a purple that complements your vehicle's shape, the environment where it’s driven, and your maintenance routine. We also cover how finishes—from gloss to pearlescent—affect durability, ease of application, and wash maintenance. Getting this foundation right saves you time later in the project and helps you avoid costly mistakes.
The PaintQuickGuide team notes that starting with a clear plan reduces rework and helps you meet your color goals more efficiently. If you’re new to automotive color, begin with a small scale experiment on a spare panel before committing to the full car.
Color psychology and popular shades of purple
Purple is associated with sophistication, creativity, and boldness. For cars, lighter purples such as lavender or lilac feel playful and modern, while deeper purples—amethyst, plum, or eggplant—read as luxurious and authoritative. The shade you pick should harmonize with the car's lines and the owner’s personality, as color communicates first. When selecting a purple, consider how it will look in daylight versus street lighting, and how it will pair with trim, wheels, and interior accents. If you plan to resell, choose a shade with broad appeal and avoid overly niche purples that may deter potential buyers. For multi-tone effects, you can pair a base purple with lighter or darker gradient accents for depth.
Types of purple automotive finishes
Most purple finishes fall into common families: solid, metallic, pearl/pearl-essent, and candy or chameleon-type effects. A solid purple provides a uniform hue with fewer costs and simpler color matching. Metallic and pearl finishes include metal flakes or pearlescent pigments that shift with light, producing depth and sparkle. Candy finishes are translucent color layers that require a dark base to achieve intense depth; chameleon or flip finishes can shift color with viewing angle. Each finish type requires specific primers and clear coats to maximize adhesion and durability. The choice will influence application steps, curing time, and maintenance needs. For durability and color depth, a high-quality clear coat is essential.
How to select the right purple shade for your car and color matching
Start by testing several sample panels or paint chips under different lighting. Compare options on a neutral surface and observe color shifts in sunlight, shade, and artificial light. Consider the vehicle’s original color and how purple will interact with it—placing purple panels next to chrome, wood, or black trim can affect perceived brightness. For color matching on panels like doors or bumpers, you may want to blend across adjacent areas to avoid abrupt transitions. Finally, ensure the color database you use includes a finish compatible with your chosen base coat. This reduces the risk of coverage gaps or color mismatches during the top-coat stage.
Prep work before painting a car purple
Thorough prep is the difference between a showroom-like finish and a blotchy result. Begin with a deep wash and decontaminate the surface, followed by careful sanding to create a uniform key for primer. Mask off windows, trim, and areas not intended to receive color. Repair dents and rust, then apply a suitable primer; for purple finishes, a mid-gray or neutral base can help the pigment read true. Wet-sand between coats to remove dust nibs, and ensure the shop is dust-controlled to minimize imperfections. Finally, wipe with a clean, tack-free cloth to remove any residue before applying base coats.
Application methods: spray guns, rollers, and touch-up
Spray application, using a quality automotive spray gun, delivers the most uniform finish for purple paints, especially metallic or pearl types. Practice your pattern, fan width, and shooting angle on a test panel before committing to the car. If you’re repairing only a small area, a brush or roller may suffice, but consistency is harder to achieve than with spray. Use even passes and avoid heavy coats to prevent runs and solvent blush. Manage your shop temperature and humidity to optimize curing. Finish with multiple, thin base coats, followed by a clear coat of adequate hardness and UV resistance.
Curing, buffing, and caring for a purple finish
After the final clear coat, allow adequate cure time in a controlled environment before washing or polishing. Gentle washing with pH-balanced soap and a soft microfiber cloth helps preserve the finish. If you notice swirl marks, use a mild polish and a non-abrasive pad in a circular motion. For long-term protection, apply a high-quality sealant or wax designed for dark or colored cars, and consider a color-safe paint conditioner. Regular touch-ups help maintain uniform color and gloss, particularly on panels exposed to sun.
Authoritative sources
Below are respected sources for automotive painting safety and best practices:
- OSHA (occupational safety) https://www.osha.gov
- EPA (environment and coatings) https://www.epa.gov
- NIST (materials and surface prep) https://www.nist.gov
Maintenance and long-term care tips
Keep your purple finish looking sharp by using a dedicated wash regimen and avoiding abrasive cleaners. Park in shaded spots and use a UV-protective spray designed for colored cars. Inspect for stone chips and address them promptly to prevent moisture intrusion. Schedule periodic professional polishing to restore gloss and color depth, especially on aging finishes. A gentle approach to maintenance preserves color vibrancy over years of sun, salt, and road wear.
Safety considerations and environmental considerations
Always work in a well-ventilated area with proper PPE, including respirator, gloves, and eye protection. Keep solvents away from heat sources and flames, and store paints and thinners according to local regulations. Minimize dust and dispose of waste following local environmental guidelines. When using metallic or pearl finishes, work in a controlled environment to prevent particle contamination that can ruin an otherwise perfect finish.
Cost considerations and budgeting for purple car painting
Costs vary based on scale, finish, and labor. A DIY approach reduces labor but requires equipment and time; professional services deliver consistent results with color matching but at higher price. Consider the cost of base coat, clear coat, primers, and any special pigments for purple finishes, plus masking materials and safety gear. Plan for contingencies in case of surface repairs and curing issues. For most hobbyists, a well-planned DIY job can be a satisfying option, while a pro-grade finish offers the best color depth and durability.
Tools & Materials
- Automotive spray gun with variable fan control(HVLP or conventional; 1.4-1.8 mm nozzle for base, 1.0-1.4 mm for clears depending on material)
- Air compressor(Adequate CFM for spray gun; moisture trap recommended)
- Respirator mask and disposable filters(Organic vapor cartridge + P95 or HEPA cartridge)
- Automotive masking tape and paper/film(Fine line masking for edges; vented masks for paper edges)
- Sandpaper assortment (grits 320–2000)(Progressive sanding for body prep and wet-sand between coats)
- Body filler/primer appropriate for vehicle metal(High-build primer for even base; tack cloths handy)
- Base purple paint (auto-grade)(Check compatibility with base/primer; metallic pearls or candy colors require specific kits)
- Clear coat with UV protection(3- to 4-layer type or 2K clear; allow adequate cure between coats)
- Detailing solvents and tack cloths(For final cleanup and dust removal)
- Polish or buffing compounds(For final gloss enhancement and swirl removal)
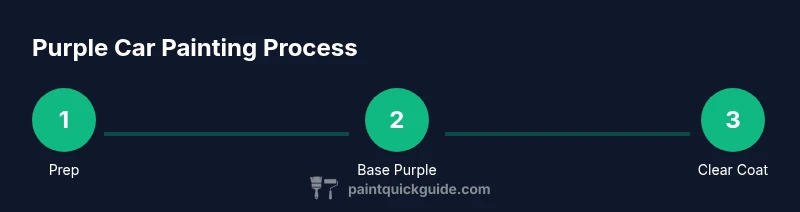
Steps
Estimated time: 6-14 days total including cure time and final detailing
- 1
Assess and prep the vehicle surface
Inspect for rust, dents, and previous coatings. Wash thoroughly, decontaminate, and sand to create a uniform key for primer. Mask all areas not to be painted and protect interior surfaces.
Tip: Test a small area first to confirm adhesion and color response. - 2
Apply primer and block-sand
Apply a high-build gray or neutral primer to create a consistent base. Allow to cure, then wet-sand with fine grit to smooth any texture before base color. Clean with tack cloth before base coat.
Tip: Keep primer dust under control to prevent blemishes in color coats. - 3
Mix base purple and spray test
Prepare the purple base according to product guidelines and test spray on a spare panel. Adjust pressure, nozzle, and speed to achieve even coverage and color depth.
Tip: Practice spray patterns with a test panel before committing to the car. - 4
Apply base coats in thin passes
Apply multiple light coats rather than a single heavy coat. Allow tack time between coats to minimize runs and solvent blush. Aim for uniform coverage and color depth.
Tip: Keep coats at consistent distance and speed for even color. - 5
Finish with a clear coat
Once the base is uniform, apply several thin coats of clear. Use a gradual build schedule and allow proper cure time between coats. Inspect for dust nibs before final cure.
Tip: Avoid rushing cure times; proper hardening ensures durability. - 6
Final cure, buff, and seal
Let the finished panel cure fully in a dust-controlled area. Lightly buff to remove minor imperfections, then apply a color-safe wax or sealant to protect the finish.
Tip: Use approved color-safe products to avoid dulling the purple hue.
Your Questions Answered
Is purple car paint durable enough for daily drivers?
Durability depends on finish choice and prep quality. Proper primers, controlled environment, and a good clear coat significantly improve wear resistance and color longevity.
Purple paint can be durable with the right prep, finish, and care, especially if you choose a high-quality clear coat.
What finish works best for purple cars?
For bold depth, metallic, pearl, or candy finishes offer the most visual impact. Solid colors are simpler and cheaper but lack the depth of metallic or pearlescent options.
Metallic or pearl purple finishes deliver the best color depth and shimmer.
Can I DIY repaint a full car with purple paint?
Yes, a trained DIYer can complete a full repaint with proper tools and a controlled workspace. Expect longer timelines and potential need for refinishing if the surface is not perfectly prepped.
DIY is doable with careful prep and proper equipment, but professional work offers the most consistent color match.
Will purple paint affect resale value?
Bold purples can be polarizing; ensure the shade has broad appeal or can be easily repainted to standard colors if resale is a priority.
Resale value may be influenced by the color choice; consider a shade with broad market appeal.
Do I need special tools for metallic or candy purples?
Yes, metallic and candy purples often require specific catalysts, pigments, and clear coats to achieve depth and durability. Using a compatible system helps prevent color drift.
Special pigments and compatible clears are important for depth and longevity.
How long should purple paint cure before washing?
Cure times vary by product; typically, avoid washing or waxing for at least 24–48 hours in a controlled environment to let the finish harden.
Give the finish a full cure window before washing or polishing.
Watch Video
Quick Summary
- Plan shade and finish before starting.
- Prep is foundational for color depth and adhesion.
- Thin coats and proper curing yield the best purple finish.
- Protect and maintain color with quality clear coat and regular care.