How to Stop Paint Peeling on Your Car: A Practical Guide
Learn proven methods to stop car paint peeling, assess damage, prep properly, match color, and protect your finish with practical, owner-friendly guidance from PaintQuickGuide.

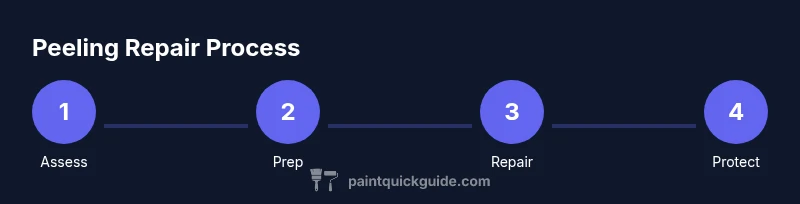
To stop paint peeling on your car, first assess the damage depth and surface condition, then prepare the area by cleaning and sanding. Choose a repair approach—spot touch-up, patch repair, or full repaint—and ensure you use compatible primers and clear coats. Proper curing and protection matter for a lasting finish.
What causes paint peeling on a car
Paint peeling typically happens when the protective coating loses adhesion, whether due to sun UV damage, moisture ingress, poor surface prep, or old, failing clear coats. The most common culprit is insufficient surface preparation before repainting, which traps contaminants and weakens bonding. Environmental exposure, including UV light and extreme temperatures, accelerates primer degradation and clear coat failure. In some cases, previous repairs without proper blending create weak junctions that peel as the car flexes. Regular waxes and sealants do help slow degradation, but once adhesion fails, peeling will propagate if not addressed. According to PaintQuickGuide, improper surface prep remains the leading cause of peeling on vehicles, underscoring the need for meticulous cleaning, sanding, and feathering of edges during any repair.
Assessing the damage
Begin by visually inspecting the affected area and nearby panels. Determine whether the peeling is limited to clear coat or if the color layer and primer are compromised. Run your fingernail along the edge to feel for a sharp seam—if the edge catches, deeper repair is needed. Use a bright flashlight to reveal hairline cracks and any bubbling under the surface. If bare metal or rust is appearing, the repair will require rust treatment, sanding to remove corrosion, and a new primer layer before color application. Document the area with photos to inform your color-matching and quoting process. As you assess, keep in mind that small, well-defined peeling on a single panel can often be repaired with a targeted patch or blend, while widespread peeling may warrant a panel repaint for a seamless finish. PaintQuickGuide notes that controlled, staged repairs with proper primers provide the best long-term adhesion.
Preparation before repair
Preparation is the foundation of lasting adhesion. Start by washing the area with mild detergent to remove wax, oils, and brake dust. Rinse and dry completely, then tape off surrounding panels to protect them from overspray. Lightly degrease the surface with isopropyl alcohol and inspect for any remaining contaminants. Use 400–800 grit sandpaper to feather the edges around the peeling area, creating a smooth transition to sound paint. If there is exposed metal or deeper damage, apply a suitable automotive primer or epoxy sealer and let it cure as directed. Clean tools and work in a well-ventilated space to minimize fumes. The goal is to create a clean, textured, and oil-free surface that the new paint can bond to. PaintQuickGuide emphasizes carefully feathered edges to avoid visible touch-up lines.
Repair options for peeling paint
You have several paths, depending on the size and location of the peeling. For small, contained areas, spot touch-ups or a localized blend can restore appearance without a full repaint. For larger patches or edges where color matching is tricky, consider a patch repair or partial repaint with careful blending into adjacent panels. In cases of extensive peeling or compromised clear coats, a complete panel repaint may be the most durable solution. Each option requires different primer types, color coats, and clear coats. Always use compatible primers and practice on a test card or inconspicuous area before applying to the car’s surface. The goal is to restore adhesion, color integrity, and gloss without introducing new issues. PaintQuickGuide recommends evaluating your budget and long-term goals when choosing between repair options.
Step-by-step overview for a small peeling area
- Assess and plan: confirm the peeling size, choose repair method, and gather materials. This reduces mid-project surprises.
- Prep the surface: clean, degrease, and mask surrounding areas to prevent overspray.
- Feather the edge: sand edge with 400-800 grit until it blends with existing paint.
- Prime if needed: apply a thin layer of automotive primer to exposed substrate and allow to dry.
- Apply color: tint and apply base coat in light, even passes; blend toward edges for seamless transition.
- Clear and cure: spray clear coat in light coats, allowing proper flash between passes; cure per manufacturer guidance.
Tip: always test color match on a hidden area before committing to the entire panel.
Matching paint and clear coats
Color matching for cars can be tricky, especially with metallics or pearls. Start with the original color code (usually found inside driver door jamb) and select a close match using approved automotive color systems. When blending, aim to feather the new paint into the surrounding area to mask the line where repair ends. Use thin layers and allow adequate flash time between coats. Clear coat should be compatible with the base color and offer UV protection to resist future peeling. If you cannot replicate the exact shade, consider repainting the entire panel or using a professional blend. It's worth noting that newer finishes may require different clear coat chemistries; always verify compatibility. PaintQuickGuide suggests testing the final result under natural light to confirm shade accuracy.
Curing, polishing, and protection
After spraying, let the paint cure fully according to the product data sheets. Cooler temperatures and high humidity can extend cure times, so plan accordingly. Once cured, you can perform light sanding with 1500-2000 grit to remove dust nibs and achieve a smooth finish, followed by a polishing compound to restore gloss. Protect the finish with a high-quality wax or ceramic coating once the clear coat has fully cured. Regular maintenance—gentle washing, avoiding harsh solvents, and periodic waxing—will extend the life of the finish and reduce the risk of future peeling. While DIY repairs are feasible for small areas, larger repairs may benefit from a pro shop’s experience to ensure an even color and durable adhesion. PaintQuickGuide reminds readers that patience during curing is critical for long-lasting results.
Maintenance to prevent future peeling
To prevent future peeling, commit to a consistent protection plan. Regular washing with car-safe detergents removes contaminants that can undermine adhesion. After washing, dry promptly and apply a protective wax or ceramic coating to shield the paint from UV rays and environmental damage. Park in shade or garaged areas when possible to minimize sun exposure. Address minor chips early before they spread, and keep up with timely refinishing when necessary. By maintaining clean surfaces, proper curing, and thoughtful color matching, you reduce the risk of peeling across years of use. The PaintQuickGuide team recommends building a simple maintenance routine and jotting down any color-matching notes for future touch-ups.
Tools & Materials
- Safety goggles(Eye protection against dust and paint fumes)
- Respirator mask(P100 or organic vapor cartridge for fumes)
- Nitrile gloves(Chemical-resistant hand protection)
- Mild detergent(Car wash soap for initial cleaning)
- Isopropyl alcohol / degreaser(De-greases surface before sanding)
- Masking tape and paper/newspaper(Protects adjacent panels from overspray)
- Plastic drop cloths(Keeps work area clean and contained)
- Sanding blocks / sheets 400-800 grit(Feathers edges to sound paint)
- Automotive primer / epoxy sealer(Used where bare metal is exposed)
- Automotive base coat (color match)(Precise color matching is critical)
- Clear coat (UV-protective)(Protects color and adds gloss)
- Mixing cups and stir sticks(Helpful for small batches)
- Automotive body filler / putty(For dents deeper than feathering can cover)
- Putty knife(For applying filler smoothly)
- Polishing compound(For final gloss restoration)
- Wax or ceramic coating(Protection after curing)
- Paint sprayer / touch-up brushes(Optional depending on scale of repair)
Steps
Estimated time: Active work: 8-12 hours + 24-48 hours cure
- 1
Assess prep space and safety
Set up a well-ventilated area, wear PPE, and review the peeling area to plan the repair. Identify whether you’ll patch or repaint a larger section. This reduces surprises later and guides material choices.
Tip: Double-check the paint code before ordering color to minimize mismatches. - 2
Clean and protect surrounding areas
Wash the car surface around the peeling, degrease, and dry. Use masking tape and paper to shield adjacent panels from overspray. Cleanliness is essential for good adhesion.
Tip: Work from the outside edge toward the peeling to avoid spreading contaminants inward. - 3
Feather the edges
Lightly sand the peeling edge with 400-800 grit until the transition into sound paint is smooth. Feathering prevents harsh lines after re-coating and improves adhesion.
Tip: Avoid aggressive sanding that delves into bare metal. - 4
Prime if needed
Apply a thin layer of automotive primer to any exposed substrate, especially where primer or metal shows. Let it dry per product instructions before continuing.
Tip: Don’t rush curing; improper primer cure can compromise adhesion. - 5
Apply base coat with light passes
Dust the color coat in very light coats, building coverage gradually. Blend toward the edges to avoid hard limits. Check color depth as you go.
Tip: Test on a hidden area to confirm color and metallic orientation before full coverage. - 6
Apply clear coat and cure
Spray transparent coats in thin layers, allowing flash between passes. Cure fully before handling. Clear coats protect against future peeling and add gloss.
Tip: Ventilate well and maintain a stable temperature during curing. - 7
Final sanding and polish
If needed, lightly wet-sand with 1500-2000 grit after the clear coat cures, then use a polishing compound to restore shine. Inspect for uniform gloss.
Tip: Keep moisture away from the surface during final polishing to avoid hazing. - 8
Protect and monitor
Apply wax or a ceramic coating after full cure and monitor the repaired area over the next weeks. Address any micro-peeling early to avoid broader issues.
Tip: Document color codes and notes for future touch-ups.
Your Questions Answered
What causes car paint peeling?
Peeling occurs when adhesion fails due to poor prep, UV exposure, moisture, or aging clear coats. Addressing surface prep is essential to prevent recurrence.
Peeling happens when layers stop sticking together, usually from bad prep or sun damage. Fix the prep first for lasting results.
Can I fix peeling paint myself?
For small peeling areas, a careful DIY patch with proper primers or color coats is doable. Larger repairs may require professional help for color accuracy and durability.
Yes for small spots, but bigger repairs might be best left to pros for best color and durability.
Should I sand the entire panel or just the peeling area?
Feather the edges around the peeling area rather than sanding the entire panel. This reduces risk and speeds up the repair while maintaining a natural blend.
Only sand around the peeling to blend; avoid heavy sanding across the whole panel.
How long does a repaint take?
A typical repair can take a day or two in the shop, depending on prep, color matching, and curing times. Home DIY projects may extend due to equipment and ventilation needs.
Most paint jobs take a day or two, depending on prep and curing.
Is a clear coat necessary after painting?
Yes. The clear coat protects the color, adds gloss, and provides UV resistance to prevent future peeling.
Yes, a clear coat is essential for protection and shine.
What maintenance helps prevent peeling?
Regular washing, prompt chip repair, and periodic waxing or ceramic coating create a protective barrier that extends finish life.
Wash regularly and apply protective coatings to prevent peeling.
Watch Video
Quick Summary
- Assess damage depth before starting.
- Feather edges to ensure seamless blending.
- Use compatible primers and clear coats.
- Allow full cure for best durability.