Auto Car Spray Paint: A Practical DIY Guide
Learn to spray paint a car panel safely and effectively with practical tips, from prep to finish. This guide covers tools, technique, safety, and common pitfalls for DIY auto refinishing.

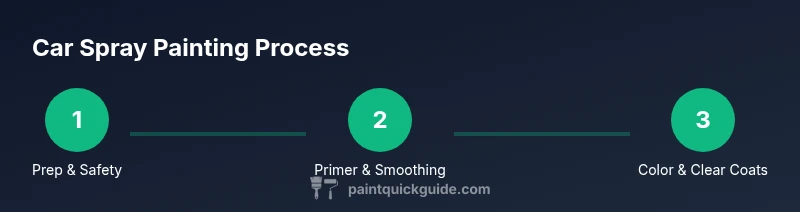
You will learn how to spray paint an auto panel safely, including prep, masking, priming, color application, and finishing. This guide covers tool choices, technique tips, and curing times for DIY and auto refinishing. According to PaintQuickGuide, proper surface prep yields durable, showroom-like results. We also discuss test panels, ventilation, and choosing compatible clear coats for a lasting finish.
Preparation and Safety
Before any spray painting project on an auto car spray paint surface, set up a safe, well-ventilated workspace. Work outdoors or in a dedicated spray booth with exhaust, and ensure kids and pets are away from the area. Put on a proper respirator rated for organic vapors, safety goggles, and nitrile gloves. Use drop cloths or plastic sheeting to protect the floor and surrounding panels. The goal is to minimize inhalation risks, prevent dust contamination, and keep your painted surface free of debris. PaintQuickGuide emphasizes that thorough preparation and PPE are the foundation of a durable, high-quality finish. In addition, check local regulations on spray painting indoors, and ensure you have a means to control overspray and VOC emissions.
Tools and Materials Overview
Choosing the right spray system is critical for auto car spray paint success. You can work with spray cans for small panels or an HVLP (high-volume, low-pressure) gun for larger areas. A compressor or turbine system must provide steady, clean air at the correct pressure. Keep a dedicated work area free of dust, and have a dedicated cleanup station. For safety, consider a dedicated respirator with organic vapor cartridges, disposable covers, and weather-appropriate clothing. Plan for weather changes if you’re painting outside, and have a plan for drying times and curing windows. PaintQuickGuide’s guidance highlights that testing your spray on a scrap panel helps dial in pressure and nozzle size before hitting the car surface.
Surface Preparation and Repairs
A flawless finish starts with a clean, repaired surface. Wash the panel with wax-and-grease remover, then dry completely. If you notice dents or scratches, use body filler and hardener as needed, followed by sanding with progressively finer grits (start around 320–400 for filler, then 600–800, then 1200–1500 for scratch-free primed surfaces). Remove any rust with a rust converter if present, then rewash. A clean, smooth surface ensures better adhesion for primer and color layers, reducing the chance of peeling or micro-blistering later on. Avoid moisture during sanding and watch for dust that can trap under the primer.
Primers, Filler, and Sealing
Apply a compatible automotive primer suited to the chosen base color and panel type. Epoxy primers offer strong adhesion, while polyester primers help fill minor imperfections. Allow the primer to cure as directed, then sand with fine grit to create a uniform base. If you used filler, re-wipe the surface to remove any dust, and apply a sealing coat to improve adhesion for the base color. The primer layer is crucial for color accuracy and bond strength, so don’t rush this step. Always feather edges to avoid visible ridges after color application.
Color Application Techniques
Base coats should be applied in multiple very thin layers rather than a few heavy coats. Maintain a consistent distance from the panel (usually 6–8 inches for spray cans or the manufacturer’s recommended nozzle distance for guns), and use smooth, overlapping passes. Start with light mist coats to establish color, then progressively build to a mid coat. Let each coat flash off before applying the next to prevent sagging. If color matching is needed, perform a test spray on a sacrificial panel and adjust the color mix as required. A light tack between coats can reduce dust inclusions.
Clear Coat, Buffing, and Curing
After the color layers have dried, apply a clear coat to protect the finish and deepen color depth. Use 2–3 light, uniform coats, allowing adequate flash-off time between passes. If you aim for a showroom sheen, consider a dedicated final polishing step after full cure. Curing times vary with temperature and humidity; plan for 24–72 hours before handling the panel heavily. Once cured, gentle buffing with a suitable compound can remove minor dust and orange-peel, producing a smooth, reflective surface. The clear coat is essential for UV protection and resistance to environmental damage.
Troubleshooting Common Issues
If you notice orange peel, reduce air pressure or adjust the spray distance and ensure the surface wasn’t too hot or too cold. Runs or sags indicate too much coating or poor shake cadence; apply lighter coats and allow longer flash times. Dust nibs come from dust in the air or on the surface; wipe with a tack cloth and re-spray. If solvent popping occurs, verify surface dryness and correct ambient humidity. Addressing issues promptly prevents rust and adhesion problems down the line.
Safety, Ventilation, and Legal Considerations
Always spray paint in a well-ventilated area to minimize exposure to VOCs. Use an appropriate respirator, keep fire safety equipment on hand, and store materials according to local regulations. If you’re painting a car you use for daily transportation, check whether local rules require a dedicated spray space or permit for automotive refinishing. Using proper protective gear reduces health risks, and following safety standards improves the overall quality and longevity of your auto car spray paint job.
Authority Sources and Further Reading
For safety and best practices, consult credible sources such as the U.S. EPA’s paint and VOC guidelines, OSHA’s occupational safety resources for painting, and CDC/NIOSH information on respirator use. These references help you understand exposure limits, ventilation requirements, and proper PPE selection. See sources below for more detail and context on safe painting practices.
Tools & Materials
- Protective respirator with organic vapor cartridges(Fit-tested and rated for paint solvents (e.g., NIOSH approval))
- Safety goggles(ANSI-rated splash protection)
- Nitrile gloves(Chemical-resistant; change if torn)
- Drop cloths or plastic sheeting(Protect floors and adjacent panels)
- Painter's tape and masking film(Mask off areas not to be painted)
- Sanding blocks and varied grit sandpapers(320–400 for body filler; 600–1500 for finish prep)
- Body filler and hardener(Use as needed for dents; sand smooth)
- Automotive primer (epoxy or polyester)(Choose based on base color and panel type)
- Basecoat automotive paint (color)(Ensure color match and compatibility)
- Clear coat (urethane or poly), compatible with basecoat(Provides UV protection and gloss)
- Paint sprayer or spray cans(HVLP gun preferred for even spray)
- Air compressor or turbine with moisture trap(Needed for spray gun system)
- Mixing cups, stir sticks, and measuring tools(Accurate color and reducer ratios)
- Tack cloths and clean lint-free rags(Remove dust before spraying)
- Ventilation fan or exhaust setup(Improve indoor air quality)
Steps
Estimated time: 6-12 hours active work; 24-72 hours cure
- 1
Set up workspace and safety gear
Choose a well-ventilated area, ideally a spray booth or outdoors with wind protection. Put on respirator, goggles, and gloves. Cover surrounding areas with drop cloths and seal off nearby doors and vents to minimize overspray.
Tip: Test your PPE fit and practice a few light sprays on a scrap panel. - 2
Choose spray system and test spray
Decide between spray cans for small panels or an HVLP gun for larger surfaces. Set air pressure to manufacturer specs and perform a test spray on a panel to dial in distance, overlap, and flow.
Tip: Always use a test panel to avoid surprises on the car surface. - 3
Prep the surface and repairs
Wash and degrease the panel, then sand to create a mechanical key. Repair dents with filler, let cure, and re-sand until smooth. Wipe with a tack cloth to remove dust.
Tip: Avoid moisture during sanding; it can cause sags and dull finish. - 4
Mask off areas and protect edges
Apply masking tape and film to trim, glass, and adjacent panels. Burnish edges to prevent bleed-through and repeated masking can reduce time later in the job.
Tip: Mask up to a few millimeters beyond the edge for clean lines. - 5
Apply primer and let cure
Spray an even coat of primer; avoid heavy builds. Allow proper flash-off and cure per product spec, then lightly sand with 600–800 grit.
Tip: Primer must be fully cured before color coat to prevent adhesion issues. - 6
Base color application
Shake or agitate basecoat color; apply thin coats with steady, overlapping passes. Build color gradually, allowing each coat to flash off before the next.
Tip: Keep a consistent distance and move at a steady pace to minimize runs. - 7
Clear coat and protection
Apply 2–3 light coats of clear, allowing sufficient flash time. Inspect for defects, then cure in a dust-free environment. If orange peel appears, plan a careful final polish after full cure.
Tip: Do not rush curing; temperature and humidity influence gloss and hardness. - 8
Final cure and inspection
Let the painted panel cure fully before handling. Inspect color uniformity, gloss, and edge sharpness. If needed, perform a light polish to enhance depth.
Tip: Use a dedicated polishing compound and soft cloth to avoid introducing scratches. - 9
Cleanup and disposal
Clean tools per solvent guidelines, dispose of waste according to local regulations, and seal paint cans. Store PPE and flammable materials safely away from ignition sources.
Tip: Label leftover paint and date it for future touch-ups.
Your Questions Answered
Can I spray paint a car with ordinary spray paint or household enamel?
Household paints are not designed for automotive exposure. Use automotive base coats and clear coats formulated for durability, adhesion, and UV resistance. Proper adhesion and clear protection matter for long-term results.
No. Household paints aren’t built for automotive surfaces. Use automotive base coats and clear coats for durability and UV protection.
What type of base coat should I choose for auto car spray paint?
Choose a base coat compatible with your panel and primer. Urethane-based bases are common for their chemical resistance and color depth. Ensure the color match with a test panel.
Pick a urethane-based automotive base coat compatible with your primer, and test the color on a panel first.
Is it safe to paint indoors?
Indoor painting is possible with a proper spray booth or exhaust setup and adequate ventilation. Always follow local regulations for VOCs and hazardous materials.
Indoor painting is okay with a proper ventilated setup and the right safety equipment.
How long does curing take after applying the clear coat?
Clear coats typically cure within 24–72 hours under proper conditions. Full hardening may take longer; avoid washing or heavy use during this period.
Most clear coats cure in about a day or two, but full hardening can take longer.
What causes orange peel and how can I fix it?
Orange peel results from overspray, incorrect air pressure, or excessive back-and-forth motion. Adjust spray distance, reduce coat thickness, and refine technique. A light polish after curing can reduce visible texture.
Orange peel happens when layers aren’t smooth. Adjust distance and coats, then polish after curing.
Do I need to clear coat for every job?
Unless you’re aiming for a matte finish or a specialized product, a clear coat is recommended to protect color and match automotive gloss. Choose a clear that’s compatible with your base coat.
A clear coat is usually recommended for protection and gloss, unless you’re doing a special finish.
Watch Video
Quick Summary
- Prepare thoroughly before painting
- Mask precisely to prevent color bleed
- Apply light, even coats for best results
- Allow adequate cure time before handling
- Test everything on a scrap panel first