Why Is Paint Not Sticking to the Ceiling? Practical Fixes
Discover why paint isn’t sticking to ceilings and how to fix it with proper prep, primer, and technique. Learn causes, fixes, and prevention for durable ceilings.

The most likely causes are moisture intrusion, poor surface prep, and using the wrong primer or paint type for ceilings. Start with a clean, dry surface, fix leaks or humidity problems, seal any stains, then apply a compatible primer followed by ceiling-grade paint. If adhesion remains poor, reassess finish and product compatibility.
Why is paint not sticking to the ceiling
Ceiling adhesion problems often stem from a mix of surface conditions, product choices, and environmental factors. The question "why is paint not sticking to the ceiling" is not about a single culprit but about how well the substrate accepts a coating. According to PaintQuickGuide, adhesion failures on ceilings are frequently triggered by moisture intrusion, inadequate surface preparation, or using a primer or topcoat that isn’t compatible with the ceiling material. Fixes begin with a clean, dry substrate, a compatible primer, and thin coats of ceiling-grade paint. When the surface is prepped correctly and the right paint is selected, adhesion improves dramatically and the finish lasts longer.
Common causes of ceiling paint adhesion failure
There are several common culprits that reduce adhesion on ceilings. Understanding them helps you diagnose and fix the problem quickly:
- Moisture intrusion from leaks or high humidity can soften or lift paint.
- Inadequate surface prep, including dust, grease, or smoke film, prevents proper bonding.
- Using the wrong primer or topcoat that isn’t compatible with the ceiling substrate.
- A glossy or existing oil-based layer that wasn’t properly sanded or primed.
- Inadequate curing time or applying paint over a damp surface can trap moisture and cause peeling.
When you identify these factors, you can choose the right fix rather than continuing to repaint over the same problem.
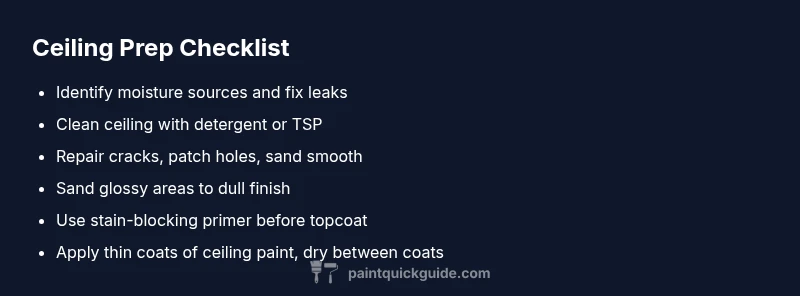
Prep work: cleaning, repairing, and priming the ceiling
Successful adhesion starts with meticulous surface preparation. Begin by inspecting for damp spots, stains, and cracks. Clean the ceiling with a mild detergent solution or TSP to remove dust, oil, and smoke residues, then rinse and allow thorough drying. Patch cracks or holes with joint compound, sand smooth, and remove sanding dust. Lightly sand glossy surfaces to dull the finish, then wipe again. Finally, apply a stain-blocking primer if there are water stains or smoke marks. A proper primer creates a uniform bonding surface that improves topcoat adhesion and color uniformity, which is essential when addressing the question, "why is paint not sticking to the ceiling?"
Choosing the right primer and paint for ceilings
Most ceilings benefit from a high-quality ceiling primer designed to block stains and create a uniform base. For rooms with moisture concerns, a shellac-based primer or a latex primer with stain-blocking properties often delivers the best adhesion. When selecting topcoat, pick a latex or acrylic ceiling paint labeled for interior ceilings and a matte or flat finish to minimize visible imperfections and prevent peeling. Avoid enamel or high-gloss paints on ceilings, as they tend to reveal flaws and may not adhere well to underlayers if the substrate wasn’t prepped properly. Label reading is key to ensuring compatibility and addressing the root causes behind the question, "why is paint not sticking to the ceiling?"
Step-by-step application tips to maximize adhesion
Apply thin, even coats rather than a single heavy layer. Work in small sections to maintain a wet edge and avoid lap marks. Maintain room temperature around 65–75°F (18–24°C) and low humidity during application and curing. Use a high-quality roller with a nap appropriate for your ceiling texture, or a brush for tight spots. Allow each coat to dry fully before applying the next, and don’t rush to a second coat if the first hasn’t cured. Finally, inspect the entire ceiling for missed spots or texture issues and touch up as needed.
Troubleshooting common symptoms and when to call a pro
If peeling, bubbling, or shimmering occurs after curing, reassess moisture sources, prep quality, and primer/topcoat compatibility. For persistent adhesion issues, consult a painting professional to evaluate substrate condition (e.g., damaged drywall or hidden leaks) and to perform a formal test patch with an approved primer and topcoat sequence. Early intervention can prevent costly repaints and long-term damage. Remember, if you detect mold, persistent leaks, or structural moisture, professional evaluation is essential for safety and long-term durability.
Prevention and maintenance for long-lasting ceiling adhesion
Preventing future adhesion problems starts with ongoing maintenance and mindful environmental control. Repair any roof or plumbing leaks promptly, control indoor humidity with vents or dehumidifiers, and reseal around light fixtures or vents where moisture can accumulate. Regularly inspect ceilings for stains, cracks, or softness and address issues promptly. When it’s time to repaint, repeat the prep steps, choose compatible primers, and apply light coats with sufficient drying time. With proper prep and materials, you’ll reduce the likelihood of repeating the problem implied by the question, "why is paint not sticking to the ceiling?"
Steps
Estimated time: 2-4 hours
- 1
Prepare the room and protect surfaces
Clear the area, cover floors with drop cloths, and remove or mask light fixtures. By protecting non-target surfaces, you prevent dust and paint transfer that could compromise adhesion. Ensure proper ventilation but avoid strong drafts that could dry the paint unevenly.
Tip: Use painter's tape on clean, dry surfaces to create sharp lines and protect nearby walls. - 2
Address moisture and surface repairs
Inspect for leaks or damp spots. Repair leaks, install dehumidification if needed, and allow the ceiling to dry completely before proceeding. Patch cracks or holes with joint compound and sand smooth.
Tip: Moisture control is crucial; do not rush this step. - 3
Clean and prepare the ceiling surface
Wash away dust, oils, and smoke residue using a mild detergent solution or TSP. Rinse and dry thoroughly. Lightly sand chalky or glossy patches to create a good bonding surface.
Tip: Always wear a mask when sanding to avoid inhaling fine particles. - 4
Prime with a compatible primer
Apply a stain-blocking primer if there are water stains, smoke marks, or repairs. Use a primer compatible with your ceiling paint and substrate. Allow adequate drying time per product instructions before painting.
Tip: For moisture-prone rooms, prefer a shellac-based primer for better sealing. - 5
Apply ceiling paint in thin coats
Dip the roller lightly and apply in even, overlapping strokes. Work in manageable sections to keep a wet edge. Allow each coat to dry fully before applying the next.
Tip: Keep your roller evenly loaded to avoid heavy drips and texture issues. - 6
Final inspection and cure
Check for missed spots, texture inconsistencies, or adhesion problems. Touch up as needed and let the final coat cure completely before exposing to humidity or heat.
Tip: Patience during curing yields a longer-lasting finish.
Diagnosis: Ceiling paint peels, bubbles, or fails to adhere after application
Possible Causes
- highMoisture intrusion (roof leak, high humidity)
- highUnclean or dusty ceiling surface
- highWrong primer for ceiling or incompatible topcoat
- mediumIncompatible substrate (glossy surface, previously oil-based paint)
- lowPaint applied too thick or drying conditions poor
Fixes
- easyAddress moisture sources and allow the ceiling to dry completely
- easyClean surface thoroughly and remove contaminants
- easySand glossy areas and apply a compatible primer before repainting
- mediumChoose a primer/topcoat compatible with ceiling substrate and humidity level
- easyRepaint in thin coats with proper drying time
Your Questions Answered
What causes paint to not stick to ceilings?
Common causes include moisture, poor cleaning, improper priming, and using incompatible paints. Address the moisture source, prep surface thoroughly, and use a suitable primer before repainting.
Causes include moisture, poor cleaning, bad priming, and incompatible paints. Fix moisture, prep well, prime correctly, and repaint.
Does humidity affect ceiling paint adhesion?
Yes. High humidity slows drying, traps moisture, and can weaken the bond. Paint in breathable conditions and consider a dehumidifier during curing.
Yes, humidity can slow drying and weaken the bond. Paint in lower humidity and use a dehumidifier if needed.
Can I use regular wall paint on ceilings?
Ceiling paints are formulated differently. For best adhesion, use ceiling-grade paint with a flat finish and a compatible primer. Avoid gloss finishes on ceilings.
Ceiling paints are best; use ceiling-grade paint with proper primer and avoid gloss finishes.
Is priming always necessary before ceiling painting?
Priming is often essential, especially on repaired, stained, or glossy surfaces. It improves adhesion and blocks stains that can bleed through topcoats.
Priming is usually necessary, especially on repairs or glossy surfaces.
How long should primer dry before painting a ceiling?
Drying times vary by product, but typically primers should dry to a tack-free finish before topcoating. Always follow the label instructions.
Let the primer dry fully as directed on the label before painting.
Watch Video
Quick Summary
- Prep thoroughly: clean, dry, and repair surface first
- Use the right primer for ceilings and the correct topcoat
- Apply thin coats and ensure proper drying time between layers
- Fix moisture issues before repainting to prevent peeling