When Paint Doesn't Stick: A Practical Troubleshooting Guide
Struggling with paint that won't adhere? This PaintQuickGuide troubleshooting guide walks you through causes, fixes, and prevention for better adhesion on walls, furniture, and cars.

Quick fix: when paint doesn't stick, the likely cause is poor surface prep or incompatible primers and topcoats. Start by cleaning the surface, degreasing, and lightly scuffing glossy areas. Use a primer compatible with your paint and allow proper drying times. According to PaintQuickGuide, confirming surface prep, product compatibility, and correct application steps is the fastest path to lasting adhesion.
Understanding adhesion basics
Adhesion is the bond between paint and your substrate. When paint doesn’t stick, the failure is often not the color choice but the surface chemistry and the prep that comes before the first coat. Most successful adhesion relies on a clean, properly prepared surface, a compatible primer, and a compatible topcoat. In practice, adhesion issues appear as peeling, flaking, or a dull finish that rubs off with a fingernail. PaintQuickGuide emphasizes that even small oversights—like leaving oily film on a door handle or skipping sanding on a glossy surface—can derail the whole job. Achieving durable adhesion is less about the brand and more about following the right sequence, especially in 2026 where product data sheets are clearer than ever.
Common adhesion culprits
There are several frequent reasons why paint may fail to stick. Residual oils, wax, or silicone left on the surface create a slick barrier that primers cannot bond to. Glossy finishes, smooth plastics, and other non-porous materials resist bonding unless properly abraded and primed. Using the wrong primer for the substrate or pairing incompatible primer and topcoat can also cause poor adhesion. Humidity and temperature during application affect cure and bonding as well. By understanding these culprits, you can quickly narrow down the root cause and prevent repeat problems. PaintQuickGuide’s 2026 analysis shows that proper prep and primer choice account for the majority of adhesion success, even on challenging surfaces.
Surface prep essentials
Before any paint touches the surface, you should clean thoroughly with a mild detergent, rinse, and dry completely. Degreasing is essential on kitchens, bathrooms, and any surface that’s near cooking oils or fingerprints. For glossy or hard plastics, a light sanding with 180- to 320-grit paper creates a roughness that improves bonding. Remove dust with a tack cloth and inspect for any stubborn waxes or residues. When in doubt, test a small area first. Proper prep minimizes later touch-ups and ensures the topcoat adheres evenly across the entire surface. PaintQuickGuide recommends dedicating a full prep window to new substrates to guarantee solid adhesion.
Primer and topcoat compatibility
Primer choice matters as much as the topcoat. Use a bonding primer for difficult substrates (like glass, plastic, or metal) and pair it with a topcoat that is designed to work with that primer. If you’re painting over a previously painted surface, consider the old paint’s chemistry: latex over oil-based paint typically requires sanding and a compatible sealer. Always check the label for dry times, recoat windows, and ventilation requirements. When you select primers and topcoats, ensure they are tested for the substrate you’re working on and compatible with each other to avoid adhesion failures.
Subsurface and material considerations
Different materials require different approaches. Bare wood benefits from a stain-blocking primer to prevent bleed-through. Metal surfaces may need an anti-corrosive primer. Plastic and PVC often require a bonding primer designed for non-porous substrates. Previously painted surfaces can hold onto contaminants that sabotage adhesion, so extra cleaning and scuffing are key. For auto refinishing contexts, surface profile and chemical etching primers can dramatically improve film build and adhesion. Ignoring substrate variability is a fast path to failure; always tailor prep and primers to the material at hand.
How to test adhesion before committing
A simple adhesion test helps you decide if you’re ready for the final coat. After the primer dries, brush or roll a small patch of topcoat in a corner or test area. Allow it to cure as specified, then perform a tape test or gently rub with a solvent-soaked cloth to see if the film lifts. Document any failure and reassess prep or primer choice. If adhesion is poor, you may need to re-sand and re-prime. This proactive test saves time and money before you commit to the full project.
Step-by-step troubleshooting flow
Use a logical flow to diagnose adhesion: (1) Confirm surface cleanliness and presence of oils or waxes. (2) Check surface porosity and roughness. (3) Verify primer-to-topcoat compatibility and dry times. (4) Inspect environmental conditions during application. (5) Re-test adhesion after corrective steps. If steps still don’t remedy the problem, consult product datasheets or contact the manufacturer. Remember, if you’re unsure about materials or safety, seek professional help. Preventive preparation reduces rework and enhances long-term durability.
Real-world scenarios: walls, furniture, and cars
Interior walls often hinge on dewpoint and humidity; exterior walls face UV exposure and moisture; furniture requires sanded, porous surfaces for primer to grip. Car refinishing adds even more complexity with automotive primers and clear coats. Each scenario demands a tailored prep and primer strategy. The common thread across all scenarios is rigorous surface preparation, appropriate primers, and correct application technique. Following consistent steps ensures better adhesion and a durable finish across substrates.
Prevention and maintenance tips
To keep paint sticking long-term, maintain proper humidity and temperature during painting and curing. Use high-quality cleaners and degreasers before prep and store paints in climate-controlled spaces. Label projects so you don’t reuse incompatible primers or topcoats on the same surface. Regular maintenance, such as cleaning surfaces before touchups, helps preserve adhesion and extend the life of the finish.
Steps
Estimated time: 1-2 hours
- 1
Prepare and clean the surface
Remove dust, oils, and residues with a mild detergent, followed by a thorough rinse and complete drying. For kitchens and bathrooms, wipe with a degreaser for stubborn residues. Lightly scuff glossy areas to improve bonding.
Tip: Use a tack cloth to lift fine dust before priming. - 2
Choose the right primer
Select a primer compatible with both the substrate and the final topcoat. On non-porous surfaces, consider a bonding or etching primer. Check the label for recoat windows and dry times.
Tip: When in doubt, test a small patch to confirm adhesion before wide application. - 3
Test compatibility
Apply a small amount of primer and topcoat to a hidden area to ensure proper bonding and finish. Verify that the primer dries completely before applying the topcoat.
Tip: Document the test results to reference for future projects. - 4
Apply the topcoat correctly
Follow the manufacturer's instructions for thinning, application method, and drying times. Use smooth, even strokes and avoid heavy coats that trap solvents.
Tip: Maintain consistent temperature and humidity to prevent solvent blushing. - 5
Cure and recheck adhesion
Allow the finish to cure fully per data sheet before testing adhesion. Perform a tape test on a small area if needed to confirm bonding.
Tip: Ventilate properly during curing to prevent fumes and optimize drying. - 6
Plan for touchups
Keep matching primer and paint on hand for any touchups. Refrain from reworking too soon after curing to avoid scribing into the film.
Tip: Label cans with substrate and coat information for easy reference.
Diagnosis: Paint peels, flakes, or fails to adhere after curing
Possible Causes
- highResidual oils, wax, or silicone on the surface
- highGlossy or non-porous surface not properly abraded
- mediumIncompatible primer/topcoat pairing
- lowMoisture or humidity during application or curing
Fixes
- easyClean with a degreasing solution, rinse, and dry completely; scuff glossy areas with 120-150 grit sandpaper
- easyApply a bonding or etching primer suitable for non-porous surfaces
- easyLightly re-sand and recoat with a compatible topcoat after primer dries
- easyControl environmental conditions; use a dehumidifier and maintain recommended temperatures
Your Questions Answered
Why is my paint not sticking to a previously painted surface?
Common reasons include residual oils, gloss, moisture, and using incompatible primers. A proper cleaning, scuffing of glossy areas, and selecting a compatible primer often resolves the issue. PaintQuickGuide notes that correct prep is the most reliable predictor of adhesion.
Most adhesion problems come from surface oils, gloss, or moisture. Clean, scuff, and prime with a compatible product to fix it.
Do I need to sand between primer and topcoat?
Often yes, especially if the primer layer feels rough or if you’re over-coating a glossy surface. A light sanding with 220-grit between coats helps create a good key for the next layer.
Yes, lightly sand between coats to improve adhesion unless the product specifically says otherwise.
Can I fix adhesion without removing the old paint?
Sometimes. If the existing paint is sound but glossy, scuff the surface and apply a bonding primer. If failure is due to contamination or poor prep, you may need to remove or sand back to a fresh surface.
Sometimes you can fix it with bonding primer after scuffing, but often you’ll need to prep a fresh surface.
What environmental conditions affect paint adhesion?
Humidity, temperature, and airflow influence drying and curing. Painting in a drafty room or too humid environment can cause poor film formation and reduced adhesion.
Keep humidity and temperature within product guidelines for best adhesion.
Is a bonding primer always required for metal surfaces?
Metal often benefits from a bonding or etching primer to promote adhesion and prevent corrosion. Check the metal type and choose a primer formulated for metal substrates.
For most metals, a bonding primer is recommended to improve sticking and durability.
How long should I wait between coats to ensure adhesion?
Follow the topcoat’s label for recoat windows. Waiting too long or too short can affect film formation and adhesion.
Respect the recommended recoat window for the best adhesion.
Watch Video
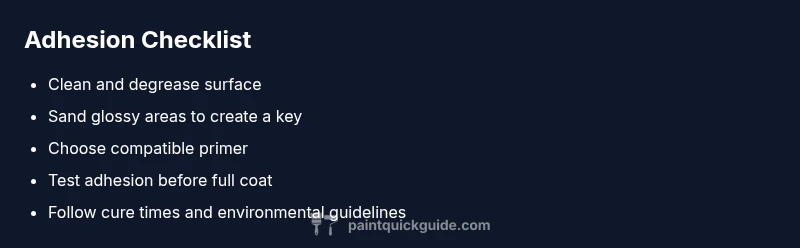
Quick Summary
- Prepare thoroughly before priming and painting
- Choose primers and topcoats that are compatible
- Test adhesion before full application
- Control humidity and temperature during application and cure
- Document results and follow manufacturer guidelines