Why Is My Paint Sticky? Troubleshooting Guide
Learn how to diagnose and fix a tacky paint finish quickly. We cover humidity, drying times, surface prep, and safe re-coating steps to restore a smooth, durable finish for walls, furniture, and cars.

Sticky paint is usually caused by humidity, improper cure time, or applying coats too thick. Stabilize the environment, wait for proper dry time, then test with a gentle touch. Next, wash the surface, lightly sand tacky spots, and recoat in thin layers with compatible products.
Understanding Sticky Paint: Why It Happens
Sticky or tacky paint finishes are more common than you might think, and they usually stem from a mix of environmental conditions, product compatibility, and application technique. According to PaintQuickGuide, the most frequent culprits are high humidity, temperature swings during curing, using incompatible primers or topcoats, and applying coats that are too thick. For auto refinishing, tackiness can also come from insufficient flash-off time between coats or an incompatible hardener. Recognizing these root causes helps you diagnose quickly and plan an effective fix. In practice, you’ll often find that one factor isn’t to blame alone, but a combination of surface prep, climate, and product choice working against proper cure.
Check Your Surface Before You Recoat
Before you repaint or topcoat, inspect the existing film closely. A tacky surface often indicates the previous coat hasn’t cured fully. Wipe with a clean cloth in a small test area to see if the solvent prompts smearing or lifting. If so, you’ll need to allow more drying time or remove the tacky layer entirely and start with a clean surface. Surface prep is your first defense: clean, degloss, and lightly sand as needed to ensure adhesion for the next coat. PaintQuickGuide emphasizes that proper prep reduces the risk of repeats after recoat.
Environmental Factors: Humidity, Temperature, and Ventilation
Environmental conditions play a huge role in paint cure. High humidity slows evaporation and keeps solvents from flashing off quickly, which can leave a tacky film. Likewise, room temperature that’s too low or fluctuating can impede cure. Provide good ventilation to help solvents escape and keep air movement steady. If you’re painting in a garage or room with poor airflow, use a fan and open doors or windows when safe. Avoid painting during rain or days with heavy humidity, and wait for a window of stable conditions to ensure proper cure in the long term.
Product and Primer Compatibility: The Right Match Matters
Compatibility between primer, paint type, and topcoat is essential. If you’re coating over an incompatible primer or using a topcoat that doesn’t pair with the underlying layer or substrate, you may end up with a tacky finish even after what seems like adequate drying time. Check data sheets for drying times, flash-off recommendations, and recoat windows. If a mismatch is suspected, remove the tacky layer and re-prepare with a compatible primer and topcoat system before proceeding. PaintQuickGuide suggests performing a small test panel when using new product lines.
Application Technique: Coat Thickness and Flash Time
Thick coats dry slowly and can trap solvents, leading to a tacky surface. Apply thin, even coats and allow adequate flash-off time between layers. Use consistent rolling or spraying passes, maintaining a steady distance and speed to avoid heavy buildup. Allow the surface to feel dry to the touch before applying the next coat, and never rush the cure by applying heat or forcing dry conditions that aren’t recommended by the product manufacturer.
Fixing a Tackiness: Step-by-Step Recovery
If the finish remains tacky, the safest approach is to restore with proper prep and a fresh, correctly applied coating. Start by washing the sealed, tacky area to remove contaminants, then lightly sand to break the tacky film and improve adhesion. Wipe away dust and allow the surface to dry fully in appropriate conditions. Apply a thin, even coat of the recommended topcoat, and refrain from re-coating until the film surface is fully dry on the whole area. If the tackiness recurs, you may need to strip and re-prime before repainting to guarantee a durable finish.
Prevention: How to Avoid Sticky Finishes in the Future
Plan ahead for the painting environment: control humidity, maintain a stable temperature, and ensure adequate ventilation. Use compatible primers and finishes, and practice thin coats with proper flash-off time. Consider testing a small area before tackling large projects, especially when switching product lines or substrates. Keeping notes on conditions and products used helps recreate ideal conditions for future jobs and reduces the chance of a tacky finish returning.
?
Steps
Estimated time: 60-120 minutes for prep and repair; additional cure time per product guidelines
- 1
Assess ambient conditions
Check the room temperature, humidity, and ventilation. If the area is damp or stagnant, pause painting and improve airflow and climate control before proceeding.
Tip: Use a simple hygrometer/thermometer to guide future projects. - 2
Prepare the surface
Wash the tacky film off with a mild cleaner, rinse, and dry. If surface gloss or texture is uneven, consider deglossing and light sanding to promote adhesion.
Tip: Avoid aggressive solvents that can react with the previous finish. - 3
Sand lightly to remove tack
Gently sand the tacky area with fine-grit sandpaper to create a fresh bonding surface, then wipe away dust with a tack cloth.
Tip: Keep sanding minimal to prevent damage to the base layer. - 4
Choose the right coating
Select a compatible primer and topcoat based on your substrate and previous finish. Read the product data sheets for dry and recoat times.
Tip: When in doubt, test on a small area first. - 5
Apply thin coats
Apply the finish in thin, even coats, allowing each coat to dry fully before applying the next. Avoid puddling or heavy runs.
Tip: Keep a wet edge to prevent lap marks. - 6
Final cure and testing
Allow the final coat to cure in a controlled environment. Test for tackiness by gently touching the surface once the recommended dry time has passed.
Tip: If still tacky, repeat cleaning and inspection steps or consult product guidelines.
Diagnosis: Paint remains tacky or sticky hours/days after application
Possible Causes
- highHigh humidity in the drying environment
- highCoating applied too thick or without proper flash-off time
- highIncompatible primer/topcoat or substrate
- mediumLow surface temperature or poor ventilation during cure
Fixes
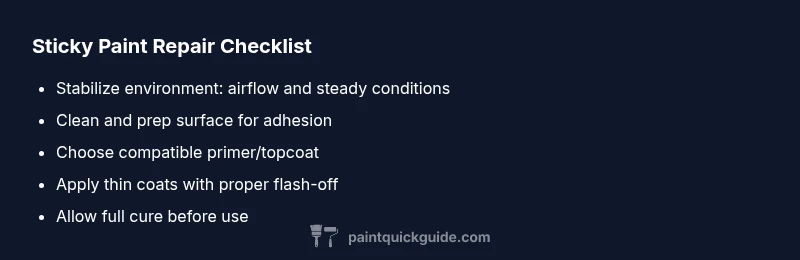
- easyStabilize the environment: increase ventilation, and avoid painting in high humidity or extreme temperatures.
- easyWash surface and lightly sand tacky areas to promote adhesion for a fresh coat.
- mediumReapply in thin coats with adequate drying time between layers using a compatible primer/topcoat system.
Your Questions Answered
What causes sticky paint after painting?
Sticky paint is usually due to high humidity, improper cure time, thick coats, or product incompatibility. Address the environmental conditions, recheck surfaces, and ensure you are using compatible primers and topcoats.
Sticky paint is usually caused by humidity, cure time, thick coats, or product compatibility. Check environment, prep surfaces, and use compatible products.
How long should paint dry before recoating?
Dry times vary by product; always follow the manufacturer’s guidelines. In general, allow adequate flash-off and ambient cure time in a stable environment before applying a second coat.
Follow the product’s dry times and ensure the environment is stable before recoating.
Can I fix tacky paint without sanding?
In some cases, cleaning and re-coating with a compatible system can fix tackiness without sanding. However, failing to roughen the surface can reduce adhesion and lead to future failures.
Sometimes cleaning and re-coating works, but roughening the surface helps adhesion if tackiness remains.
Is tackiness always a sign of bad prep?
Not always, but poor prep is a common cause. However, environmental conditions and product compatibility can also create a tacky finish even with good prep.
Often prep is a factor, but environmental conditions and product choices also play a big role.
When should I repaint completely?
If tackiness persists after cleaning, sanding, and re-coating, or if the finish is uneven or brittle, consider stripping and repainting with a properly staged cure and environment.
If tackiness won’t fix with cleaning and re-coating, consider a full repaint with proper prep and cure conditions.
Watch Video
Quick Summary
- Control humidity and temperature for proper cure
- Use compatible primers and coatings
- Apply thin coats with adequate flash-off time
- Test a small area before full application