Waterproofing Basement Paint: A Practical Guide
Learn how to waterproof basement walls with paint: moisture prep, primers, sealants, and two-coat application to resist dampness, mold, and humidity.

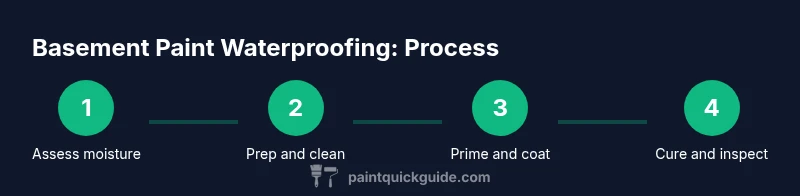
By following this guide, you'll learn how to choose and apply waterproofing basement paint that resists moisture, mold, and humidity. You'll assess basement moisture, prep concrete, select the right primer and elastomeric or epoxy paint, patch cracks, and apply two coats with proper ventilation. Expect thorough surface prep, safety gear, and a curing period before use.
Why waterproofing basement paint matters
Water intrusion and humidity are common in basements, and without proper barriers, paint can peel, mildew can grow, and walls can degrade. Waterproofing basement paint is not a cosmetic upgrade alone—it’s a moisture management strategy that protects structural materials and improves indoor air quality. The PaintQuickGuide team emphasizes that resistance to dampness starts with good prep, the right coating system, and correct application. By choosing paints formulated for masonry and moisture-rich environments, homeowners can reduce future repair costs and extend the life of basement walls. Understanding the science of moisture migration and evaporation helps you pick products that stay flexible when temperatures swing, preventing microcracks from forming under pressure.
Surface prep and moisture control
Effective waterproofing begins with clean, dry surfaces. Start by removing loose paint, efflorescence, and efflorescent salt deposits using a stiff brush and a masonry cleaner. Rinse and allow the surface to dry completely; damp walls are the primary cause of coating failure. Inspect walls for cracks, holes, and damp patches. Use a masonry crack filler to seal larger gaps and apply a breathable primer to improve adhesion. If you detect active moisture, address the source first (drainage, gutters, exterior sealing) or delay painting. This approach reduces the likelihood of premature coating failure and mold formation. According to PaintQuickGuide, proper moisture management is essential before applying basement paints.
Choosing the right paint system for basement walls
Basement walls demand coatings designed for concrete and masonry substrates. Elastomeric masonry paints and epoxy-based coatings are common choices for their water resistance and crack-bridging abilities. Elastomeric products form a flexible barrier that tolerates substrate movement, while epoxy systems create a durable, chemical-resistant layer. For most basements, a high-quality acrylic latex masonry paint with a breathable primer provides great performance at a reasonable cost. Avoid standard indoor wall paints on concrete without suitable waterproofing primers, as they are more prone to peeling in damp environments. Always verify the compatibility of primers and topcoats with your chosen substrate.
Primers and sealants: primers that improve adhesion and moisture resistance
Primer choice matters as much as the topcoat. Use a bonding primer labeled for masonry and a second coat if you’re applying an elastomeric finish. Primers improve adhesion, reduce stain bleed, and help the coating withstand moisture. For walls with efflorescence, choose a primer that blocks mineral salts and allows moisture to escape without raising the surface. Sealants and crack fillers should be compatible with your coating system; apply cracks in thin layers and let dry thoroughly before priming. If you’re unsure about bonding, perform a small test patch to confirm adhesion. PaintQuickGuide recommends using primers specifically designed for basement walls to maximize long-term durability.
Step-by-step painting process (overview)
This section provides a high-level sequence you’ll see repeated in the STEP-BY-STEP block. Start with safety and surface prep, then prime, apply first coat, inspect, and apply a second coat. Ventilate the space well and avoid painting in extreme humidity or during a rainstorm. The right order—clean, patch, prime, and paint—greatly improves adhesion and longevity. After finishing, allow ample curing time in a consistently dry environment to reach full performance.
Common pitfalls and how to avoid them
A frequent mistake is painting over damp walls or applying coats too thickly, which traps moisture and causes peeling. Another pitfall is choosing a topcoat that isn’t compatible with the primer or substrate. Always read label directions and ensure proper surface prep. In basements, poor ventilation can lead to lingering solvent odors; use fans and open windows where possible. Take time to cure between coats and avoid rapid temperature swings that can stress the coating. Planning ahead with a moisture check and a drying window saves time and money in the long run.
Maintenance and long-term performance
To preserve waterproof basement paint, maintain humidity at comfortable levels with a dehumidifier, especially in warm periods. Regularly inspect walls for cracks, damp patches, and mold growth, and promptly address any issues. Clean painted surfaces with a mild detergent and soft brush to avoid abrading the coating. If you notice wear or minor cracking, spot-repair with compatible filler and recoat as needed. Consistent maintenance helps extend the life of the waterproofing system and protects your investment in a dry, healthy basement.
Cost considerations and budgeting tips
Costs vary based on the coating system, surface condition, and labor. Elastomeric and epoxy-based coatings generally cost more upfront but offer superior moisture resistance and longer life than standard masonry paints. For DIY projects, factor in primers, sealants, and ventilation needs, plus time for surface prep and curing. If you hire a pro, expect bids to reflect material quality, wall size, and complexity of moisture issues. Rather than chasing the cheapest option, balance performance and value by choosing a proven basement-grade system with proper surface prep and ventilation. PaintQuickGuide highlights that investing in the right coating plus thorough prep reduces long-term maintenance.
Safety and ventilation considerations
Working in basements requires good ventilation to minimize inhalation of paint fumes and cleaners. Wear a respirator or mask rated for organic vapors when using solvent-based primers or coatings, safety goggles, and gloves. Keep the space well-ventilated during all steps, and use fans to move air toward open doors or windows. If you encounter mold, treat it with a product designed for mold remediation and promptly dry the area before painting. Never mix incompatible products; follow label instructions and allow adequate cure time between steps.
Final note on performance expectations
Waterproof basement paint improves moisture resistance and aesthetics, but no coating is a magic solution for ongoing leaks. Combine quality products with proper exterior drainage, interior moisture control, and routine maintenance. With careful prep, correct product selection, and proper application, you’ll achieve a durable, breathable barrier that performs under basement conditions. The PaintQuickGuide team emphasizes patience and thoroughness for lasting results.
Tools & Materials
- Mold and mildew cleaner (EPA-registered)(Follow label directions; wear gloves)
- Broom, stiff-bristle brush, and scraper(For cleaning and removing loose material)
- Masonry cleaner or detergent(Use non-residue formulas)
- Pressure washer or garden hose with spray nozzle(Helpful for large areas, ensure area dries completely)
- Masonry crack filler or epoxy crack sealant(Fill cracks in thin layers; cure before painting)
- Bonding primer for masonry(Use breathable primer compatible with chosen paint)
- Elastomeric or epoxy basement paint(Choose based on moisture levels and substrate)
- Acrylic latex masonry paint(Use as topcoat if elastomeric/epoxy is not desired)
- Water-based or solvent-based primer (depending on topcoat)(Check compatibility with topcoat)
- Paint rollers with long nap (3/4-1 inch)(Porous surfaces require longer nap)
- Mini rollers and angled brushes(Access corners and edges)
- Paint tray and liners(Keep work area clean)
- Drop cloths or plastic sheeting(Protect floors and fixtures)
- Painter’s tape(Mask edges and prevent bleed-through)
- Respirator or organic vapor mask(Protect lungs from fumes)
- Safety goggles and gloves(Personal protective equipment)
- Dehumidifier or moisture meter(Monitor and control humidity during curing)
- Ladder or stable stand(Access higher sections safely)
- Ventilation fan(Improve air movement in enclosed basements)
Steps
Estimated time: 2-3 days for prep, priming, and two coats plus curing time
- 1
Assess moisture and plan
Begin with a comprehensive moisture check and plan the workflow. Identify active leaks, damp patches, and areas requiring crack repair. Document findings and schedule exterior drainage fixes if needed. A clear plan reduces rework and ensures coatings perform as designed.
Tip: Record moisture symptoms with photos to guide repairs and track improvement. - 2
Prep area and protect surroundings
Clear furniture and cover floors with drop cloths. Remove loose paint and debris while ensuring the surface remains intact. Tape edges around windows and fixtures to protect from splatter. Proper protection is essential to a clean, professional result.
Tip: Use lighter tapes near edges to prevent peeling of existing coatings. - 3
Clean and dry the walls
Scrub walls with a masonry cleaner, then rinse to remove soap residues. Allow walls to dry completely; damp surfaces will cause primer failure and paint peeling. If you see efflorescence, treat it according to product directions before priming.
Tip: For large basements, plan for multiple drying intervals to ensure complete dryness. - 4
Repair cracks and defects
Fill cracks with compatible crack filler in thin layers, letting each layer dry. Sand repairs smooth so they blend with the surrounding surface. Uneven patches can telegraph through the finish and require a second skim coat.
Tip: Wipe away excess filler before it fully cures to avoid sanding dust. - 5
Choose and apply primer
Apply a bonding masonry primer to improve adhesion and seal porous concrete. Follow the label for coverage and drying times. Primer helps prevent stain bleed and enhances the performance of the topcoat.
Tip: Use a roller for flat surfaces and a brush for edges and corners. - 6
Select the topcoat
Choose a waterproofing finish suitable for basements—elastomeric for crack bridging or epoxy for high durability. Ensure the product is compatible with your primer and substrate. Read labels carefully to confirm suitability for interior, moisture-prone walls.
Tip: Test a small area to verify adhesion and finish before full application. - 7
Open and cure spaces
Ensure consistent temperature and humidity during application. Avoid painting during or immediately after rain, and provide adequate ventilation to minimize fumes. A stable environment helps coatings cure properly.
Tip: Use a dehumidifier to maintain steady humidity during curing. - 8
Apply first topcoat
Load your roller evenly and apply long, steady strokes in a W pattern to ensure even coverage. Avoid heavy coats that can trap moisture. Allow the first coat to dry fully per product directions before inspecting for coverage gaps.
Tip: Back-brush along edges to prevent lap marks. - 9
Inspect and repair
Examine walls for missed patches or thin spots. Sand any high spots lightly and recoat those areas. Repeat as needed until coverage is uniform. Proper inspection protects long-term performance.
Tip: Use a bright work light at low angles to reveal imperfections. - 10
Apply second coat
Apply a second coat to maximize color uniformity and moisture resistance. Two coats are typically recommended for basement coatings, especially on new or repaired surfaces. Allow full curing time between coats.
Tip: Cross-roll perpendicular to the first coat to improve evenness. - 11
Final cleanup and venting
Wipe tools, remove tape, and clean spillages promptly. Continue to ventilate the space to dissipate fumes during curing. Keep doors/windows open where feasible for several hours after application.
Tip: Dispose of solvent wipes and unused materials according to local regulations. - 12
Monitor and maintain
Periodically inspect walls for damp patches or cracks. Address moisture sources promptly—drainage, sealing, or dehumidification—to preserve the coating’s effectiveness. Ongoing maintenance extends the life of your waterproofing system.
Tip: Note changes in humidity and mold growth to catch early issues.
Your Questions Answered
Is waterproofing paint the same as regular interior paint?
Waterproofing paints are formulated for damp environments and often include elastomeric or epoxy components. They deliver greater moisture resistance, but still require thorough prep and proper curing.
Waterproofing paint is designed for damp spaces and needs good prep and curing for best results.
Can I paint over damp concrete?
Painting over damp concrete can trap moisture and lead to coating failure. Allow the surface to dry completely and treat moisture sources before applying primer and paint.
No — damp concrete should dry fully before painting to prevent peeling.
What primer should I use for basement walls?
Choose a bonding masonry primer compatible with your topcoat. Primers improve adhesion, block stains, and help coatings perform better in moisture-rich spaces.
A bonding masonry primer is usually the right choice for basement walls.
How long does basement coating take to cure?
Cure time varies by product and conditions. Expect multiple drying periods between coats and several days for full cure under typical basement humidity and temperature.
It usually takes several days for full cure, depending on humidity and product.
Are elastomeric paints better than epoxy for basements?
Elastomeric coatings bridge minor cracks and provide good moisture resistance, while epoxy systems offer exceptional durability. The best choice depends on wall condition and budget.
Elastomeric bridges small cracks; epoxy lasts longer but costs more.
Do I need to seal exterior walls before basement painting?
Exterior sealing and drainage improvements reduce moisture ingress. Addressing exterior moisture is often required to maximize interior coating performance.
Yes, fix exterior moisture problems to protect interior coatings.
What safety precautions should I take?
Wear PPE, ensure good ventilation, and follow product safety data. Use a respirator for solvent-based coatings and keep kids and pets away during application.
Wear protective gear and ventilate well during painting.
Can I DIY basement waterproofing paint, or should I hire a pro?
For typical basements with no active leaks, a confident DIY approach can work. If moisture problems are severe or there are active leaks, consult a pro to prevent failures.
DIY works for mild cases; call a pro if leaks are present.
Watch Video
Quick Summary
- Prepare thoroughly before painting to ensure adhesion
- Choose elastomeric or epoxy coatings for basement moisture resistance
- Seal cracks and manage moisture sources for lasting results
- Ventilate and allow proper curing for best performance