Spray Paint with Primer: A Practical How-To
Learn how to spray paint with primer for smooth, durable finishes on walls, furniture, and automotive parts. This practical guide covers prep, safety, technique, and cost considerations.

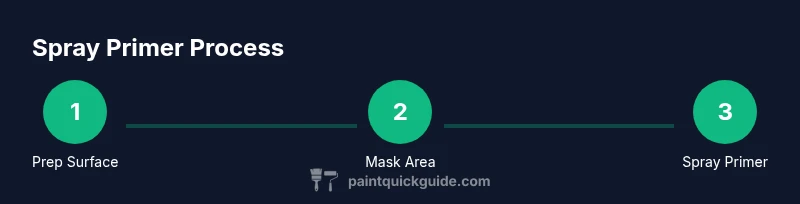
You can successfully spray paint with primer by following a clean prep, proper masking, and controlled spraying. Start by cleaning and sanding the surface, mask edges, shake the primer can well, strain if possible, and apply 2–3 light coats from about 6–8 inches away, letting each coat dry before the next. Finish with topcoat as needed.
What is spray paint with primer and why it matters
Spray paint with primer combines adhesion, stain-blocking, and color-ready coverage in a single product, making it a practical choice for homeowners, DIY enthusiasts, and auto refinishing hobbyists. According to PaintQuickGuide, primer improves adhesion to challenging surfaces, reduces the number of top coats required, and helps create a uniform base so color coats look consistent across curves and textures. When you choose a primer designed for spray use, you can achieve smoother finishes, fewer sags, and better hiding of previous colors or blemishes. This section lays the groundwork for how primer interacts with different substrates—wood, metal, plastic, or composite—and why a primer-first approach saves time in the long run across interior, exterior, and small auto refinishing jobs.
In addition to improving adhesion, primer acts as a barrier against tannins, stains, and moisture that can bleed through topcoats. It can also seal porous surfaces so that paint does not soak in unevenly. The right primer helps you avoid frequent touch-ups and helps the final color look truer to the chip you tested. PaintQuickGuide’s guidance emphasizes selecting a primer compatible with your chosen spray paint, surface type, and environmental conditions. This alignment between primer and finish is essential for predictable results and lasting durability.
Safety and ventilation considerations when spray painting
Spray painting, even with primer, releases aerosols that can irritate eyes, lungs, and skin. Always work in a well-ventilated area and wear appropriate PPE. A respirator rated for organic vapors, safety goggles, and chemical-resistant gloves are baseline protections. Keep the work area free of ignition sources and avoid applying primers in high humidity or extreme heat, which can affect drying times and finish quality. If you’re painting indoors or in a garage, use a fan to direct airflow away from you and toward an exhaust outlet. PaintQuickGuide emphasizes using a dedicated, ventilated space and proper masking to protect nearby surfaces, furniture, and flooring.
Before you begin, prepare a stable space with a drop cloth or plastic sheeting to catch overspray. Close doors and windows if you’re not using an outdoor setup, and consider a portable spray booth or a simple indirect-vent setup to minimize dust settling on wet surfaces. These precautions help maintain clear, smooth coats while reducing cleanup afterward.
Choosing the right primer for spray applications
Not all primers are created equal when used with spray equipment. For most household projects, a water-based acrylic primer or a shellac-based primer can be sprayed with good results, provided the nozzle and viscosity are appropriate for your tool. If you’re working on metal or glossy surfaces, a bonding primer or an adhesion-promoting primer is often recommended to ensure the topcoat adheres evenly. When spraying plastic parts or automotive panels, check the primer’s compatibility with the plastics and the type of topcoat you plan to use. Bonding primers help with difficult substrates by creating a strong link between the surface and the subsequent paint layer.
Consider the surface texture and porosity—porous woods or composite materials may require a second light coat to seal before topcoats. Always test primer behavior on a small sample piece first to gauge coverage and drying behavior. PaintQuickGuide notes that choosing the right primer reduces the risk of peeling, cracking, or color shifts after curing.
Masking, sanding, and surface preparation
Masking is crucial to keep overspray from landing on adjacent surfaces, trim, or hardware. Use high-quality painter’s tape, masking film, and plastic sheeting to protect edges and surrounding areas. Lightly sand the surface to create a micro-roughness that helps the primer bite in, especially on glossy finishes or previous coatings. After sanding, wipe away dust with a tack cloth or lint-free wipe; a clean surface improves adhesion and prevents imperfections from being trapped under the primer.
For bare wood, wipe with a damp cloth and let it dry completely; for metal, remove rust and oils. On plastics, a light abrasion with 400–600 grit can help, but avoid deep scratches that could telegraph through the finish. Ensure the surface is dry and dust-free before spraying. If there are stains or tannins, a stain-blocking primer may be required to prevent bleed-through.
Application technique: distance, coats, and drying times
Spray technique matters as much as the primer itself. Hold the can roughly 6–8 inches from the surface and use smooth, even passes with a light mist, overlapping each stroke to avoid stripes. Apply multiple very light coats rather than a single heavy coat to minimize runs and sags. Allow adequate drying time between coats according to the can’s instructions and the environment; warmer, drier days generally shorten the cure time, while high humidity lengthens it. After the primer has dried, check for uneven spots; lightly re-sand those areas and apply a touch-up coat as needed. If you’re aiming for a perfectly uniform finish, consider a finishing coat once you’re satisfied with the primer’s uniformity.
For auto refinishing or exterior surfaces, maintain a steady pace and consistent motion to avoid heavy deposits in one area. If you notice clogging, stop spraying, shake the can again, and strain if possible. A final light coat can help seal the surface before color or clear coats are applied.
Finishing touches: topcoats, sealants, and cleanup
Primer alone rarely delivers the final look; you’ll typically add a topcoat for color, UV resistance, and durability. After the primer is fully dry, you can proceed with sanding between topcoat layers for a smooth appearance. Use the same distance and spray technique as you did with the primer for consistent results. When finished, remove masking materials carefully to avoid peeling fresh edges. Ventilate the area to help with curing and reduce odors. Clean the spray equipment promptly according to the manufacturer’s directions to prevent buildup that can affect spray performance.
If you’re protecting a surface that will see wear, consider a clear sealant or protective topcoat for added durability. For interior projects, a low-odor, water-based topcoat is often preferred to minimize fumes. Auto refinishing typically uses a color-coat followed by a clear coat to protect the finish and enhance gloss.
Troubleshooting and fixes: common issues and remedies
Even with careful prep, you may encounter issues like orange peel, runs, or sags. For orange peel, a light scuff-sand followed by a recoat can help reduce texture; ensure the surface is clean before applying more coating. Runs and sags often indicate too much material or too close a distance; back off slightly, feather the edges, and apply a thin, even coat. If you see insufficient coverage, apply a light second or third coat, allowing adequate drying time between passes. Dust or debris trapped in the finish can be buffed out with a fine compound after curing. If you’re masking areas that reveal bleed-through, consider a different primer or an extra coat that can help seal the substrate before applying the final color.
Always test new techniques on a scrap piece before applying to the final surface, and adjust your distance, spray angle, and stroke speed based on the results. PaintQuickGuide encourages keeping a consistent technique and addressing problems early to avoid extensive rework.
Cost planning and practical tips
Budgeting for spray painting with primer involves considering primer cost, topcoat cost, and consumables like sandpaper, masking materials, and PPE. Plan for a few coats and potential re-dos if the surface is challenging. Shopping for primers that are compatible with your spray equipment can help minimize waste and time. If you’re working on multiple projects, buying in bulk or choosing a versatile primer can reduce per-project costs over time. Keep in mind that studio-style cleanups and protective gear are essential investments for safer, more consistent results. PaintQuickGuide recommends tallying the total surface area, calculating coverage per can, and factoring in extra material for practice and touch-ups to avoid mid-project shortages.
Finally, scheduling curing time in your project plan can prevent rushed topcoats and avoid sticky finishes. If you’re refinishing a vehicle or furniture, plan around your environment and temperature; optimal curing occurs under stable conditions. A little upfront preparation goes a long way toward predictable color and lasting protection.
Tools & Materials
- Primer spray can (aerosol)(Choose a primer compatible with your surface and spray equipment; bond or stain-blocking primers are common options)
- Sandpaper (80-120 grit)(Used for roughening smooth surfaces to improve primer adhesion)
- Masking tape(Secure edges and protect adjacent areas; high-quality tape reduces edge bleed)
- Drop cloth or plastic sheeting(Protect floors and surrounding items from overspray)
- Respirator or paint mask(Choose one rated for solvents/organic vapors; eye protection is recommended as well)
- Masking film or plastic sheeting for spraying area(Optional but helpful for larger projects to contain overspray)
- Topcoat spray can or brush-on/topcoat system(Select a compatible topcoat finish (matte, satin, gloss) for the desired look)
Steps
Estimated time: 45-90 minutes of active work plus drying times between coats
- 1
Prepare the work area and surface
Clear the space, lay down drop cloths, and wipe the surface clean. Lightly sand to create a micro-roughness and remove old finishes or oils. Wipe away dust with a tack cloth and let dry completely.
Tip: Hold sanding pressure light to avoid deep scratches; always test sanding on a scrap piece first. - 2
Mask and protect surroundings
Apply painter’s tape to edges and cover nearby surfaces with masking film. Create a clean, protected zone to minimize overspray and protect hardware or trim.
Tip: Prop up masking film at a slight angle to prevent peeling off while spraying. - 3
Shake, strain, and test spray
Shake the primer can vigorously for the recommended time. If possible, strain or test spray on a scrap piece to verify nozzle function and spray pattern.
Tip: Use a short burst to verify the spray pattern before covering the main surface. - 4
Apply light, even coats
Spray in smooth, overlapping passes from the recommended distance. Avoid heavy layers to prevent runs and orange-peel texture.
Tip: Cross-hatch your passes (vertical then horizontal) for even coverage. - 5
Inspect and sand between coats
Let each coat dry fully, then inspect for imperfections. Lightly sand if needed and clean the surface before applying the next coat.
Tip: Use a tack cloth to remove dust after sanding. - 6
Finish with topcoat
Once the primer is fully dry, apply the topcoat using the same technique. Allow curing time as recommended before handling.
Tip: Avoid rushing the cure; humidity or temperature extremes can affect gloss and adhesion. - 7
Cleanup and storage
Turn off ventilation, remove masking materials carefully, and clean the nozzle and any tools promptly.
Tip: Store primers upright in a cool, dry place away from heat sources.
Your Questions Answered
Do I need to sand the surface before priming for spray paint?
Yes. Sanding creates a micro-rough surface that improves primer adhesion and helps achieve a smoother final finish. Clean off dust before applying primer.
Yes, sanding helps the primer grip the surface and prevents peeling later.
Can I spray primer directly on metal or plastic?
Yes, but choose a primer formulated for the substrate—bonding primers are often best on plastics and metal to ensure good adhesion.
Yes, but pick a bonding primer suitable for metal or plastic.
How long should primer dry before painting?
Follow the can label for drying time, which can vary with temperature and humidity. In general, wait until the primer is fully dry and cured to prevent lifting.
Wait until the primer is fully dry as per the label before applying color.
Is it better to use a brush or spray primer?
For spray projects, spraying primer typically yields a more uniform coat with less brush marks. Brushes can work on small or tight areas but may leave strokes.
Spray primer gives the most even coat; brushes can be useful for edges or tight spots.
What safety gear is essential when spraying primer?
A respirator, safety goggles, and gloves are essential. Ensure good ventilation and keep the work area free of ignition sources.
Wear a proper respirator, eye protection, and gloves; ventilate well.
Watch Video
Quick Summary
- Prepare thoroughly before spraying primer.
- Mask and protect surrounding areas to control overspray.
- Apply thin, even coats from the correct distance.
- Allow proper drying between coats and between primer and topcoat.
- Finish with an appropriate topcoat and follow safe cleanup practices.