Furniture Spray Paint: A Practical Guide
Learn how to refinish furniture with spray paint. Prep, prime, spray, and seal for a durable, smooth finish with practical, DIY-friendly steps from PaintQuickGuide.

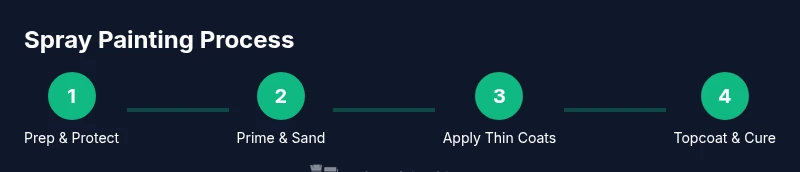
In this guide you will learn how to refinish furniture with spray paint, including prep, priming, spraying, and finishing for a smooth, durable result. You’ll need proper ventilation, masking and protective gear, quality spray paints, the right primer, and thin, even coats. Follow the step-by-step approach for best results.
What is furniture spray paint and when to use it
Furniture spray paint is a fast, user-friendly option designed for applying color to wood, metal, and other prepared surfaces. It delivers thin, even coats with minimal brush marks, making it ideal for upcycling chairs, tables, cabinets, and decorative items. According to PaintQuickGuide, furniture spray paint is formulated for rapid coverage on prepped surfaces while offering good adhesion and a smooth finish. You should use it when you want a clean, professional look without heavy brush strokes, and when you need to complete a project in a weekend. Choose a base color that suits the room, and pick a finish such as satin or matte to control the final appearance. Always read the label for recommended substrates and drying times, and test on a hidden area before committing to the full piece. The shorter dry times of spray paint mean faster completion, but you still need to protect surrounding surfaces and allow ample cure time between coats.
Types of spray paints and finishes for furniture
Spray paints come in water-based and solvent-based formulations. Water-based paints are usually low-odor, quick-drying, and easier to clean up, making them ideal for indoor projects. Solvent-based sprays can offer stronger adhesion and a harder finish, but they require more ventilation and solvent-specific cleanup. Finishes range from matte to satin to gloss, with satin often preferred for furniture because it hides minor imperfections while still looking refined. When selecting a finish, consider room lighting, exposure to wear, and whether you want a vintage or contemporary look. For durable results, pair color coats with a compatible clear topcoat designed for spray applications. PaintQuickGuide recommends testing a small sample on a scrap piece to compare sheen and adhesion before committing to the entire project.
Preparation and surface prep for best results
Preparation is the single most important factor for a flawless spray paint finish. Start by cleaning the piece thoroughly to remove grease, dust, and wax. Lightly degloss the surface if it has a slick finish, then lightly sand with fine-grit sandpaper to create a tooth for the paint to grip. Wipe away all dust with a tack cloth. Protect nearby surfaces with painter’s tape and drop cloths. If you’re repainting dark to light, consider a stain-blocking primer to ensure even coverage. Finally, check for loose parts that could rattle during spraying and secure or remove them as needed. Proper prep reduces the risk of runs and helps the color appear true to the sample. PaintQuickGuide’s analysis emphasizes that consistent preparation leads to predictable results and easier troubleshooting.
Primers, sealers, and compatible topcoats
Primers create a stable foundation and improve adhesion on challenging surfaces such as metal, plastic, or glossy finishes. Use a spray primer designed for furniture projects or the same brand as your spray paint to ensure compatibility. After color coats, apply a clear sealer or topcoat to protect against chips, scuffs, and moisture. For indoor furniture, satin or matte sealers balance durability with a refined appearance. When spraying topcoats, apply light, even passes parallel to the surface and avoid saturating any single area. If the surface is heavily stained or porous, two coats of primer followed by a color coat and a topcoat yield the best results.
Technique: Spray parameters and applying coats
Begin with a test spray on a spare board to dial in distance, motion, and spray pattern. Hold the can 6–12 inches from the surface and use smooth, sweeping passes, overlapping each pass slightly. Apply multiple thin coats rather than one thick coat to reduce drips and orange peel. Allow each coat to dry according to the can label before applying the next. For curved or detailed areas, use short bursts and keep the can in motion to maintain even coverage. Finish with a light mist layer to seal edges and achieve a uniform sheen. Proper ventilation and PPE are essential during spraying.
Troubleshooting: Drips, orange peel, and uneven color
Common issues include drips from holding the spray too close or applying coats too quickly, orange peel from inconsistent spray speed, and color variation from uneven coat thickness. If you notice drips, wipe lightly with a clean cloth once dry, then sand and recoat. For orange peel, switch to thinner coats and adjust distance. Uneven color can be caused by insufficient surface prep or contaminated spray; always start with a clean surface and test an inconspicuous area first. If color looks uneven in certain lighting, consider a second tint or glaze after the topcoat has cured. Regular practice and careful technique will improve your results over time.
Cleaning up and maintaining your project
After finishing, ventilate the area and allow the finish to cure fully before handling. Clean spray equipment by following the spray paint manufacturer’s instructions, usually with appropriate solvents or water for water-based paints. Dispose of used rags safely and avoid spontaneous combustion by laying them flat to dry before disposal. Store leftover paint upright in a cool, dry place with the cap on to extend shelf life. Regular dusting and occasional polishing with a furniture-safe product can keep the finish looking fresh for years.
Tools & Materials
- Protective respirator or mask(NIOSH-approved respirator for solvent- or water-based paints)
- Safety goggles(Steam or splash protection for eyes)
- Thin nitrile gloves(Keep gloves handy for prolonged sessions)
- Drop cloths or plastic sheeting(Cover floors and nearby surfaces)
- Painter’s tape(Mask edges and protect hardware or edges)
- Degreaser or all-purpose cleaner(Remove oils and residues before prep)
- Mild dish soap or degreaser(For final cleaning before paint)
- Sanding block or 220-grit sanding sponge(Create tooth for paint to bite into)
- Tack cloth(Wipe away fine dust after sanding)
- Primer suitable for spray paint(Choose water-based for indoor use or solvent-based if needed)
- Spray paint for furniture (water-based preferred)(Test color on scrap first; ensure compatibility with primer)
- Clear topcoat spray (matte/satin)(Seal and protect the finished piece)
- Ventilation fan or open window(Increase airflow in indoor spaces)
Steps
Estimated time: 2-4 hours
- 1
Set up workspace and protect area
Move the piece to a well-ventilated area and lay down drop cloths. Use painter’s tape to shield any areas you don’t want painted. Wear a respirator and goggles, and keep a window open or use a fan to circulate air. This initial setup minimizes cleanup and protects you and other surfaces.
Tip: Keep a small test scrap nearby to confirm spray distance and pattern before touching the main piece. - 2
Clean and degrease the surface
Wipe the furniture with a degreaser or mild cleaner to remove oils and fingerprints. Rinse with clean water if needed and allow to dry completely. A clean surface improves primer adhesion and ensures an even final color.
Tip: Avoid using wax or silicone cleaners; they can prevent paint from sticking properly. - 3
Lightly sand to create tooth
Gently sand glossy or smooth surfaces with 220-grit sandpaper to scuff the finish. Wipe away dust with a tack cloth or damp microfiber. A lightly abraded surface helps the paint adhere and reduces sags.
Tip: Don’t over-sand delicate veneers; aim for a uniform dulling rather than deep scratches. - 4
Mask edges and protect hardware
Mask any edges, joints, or hardware that you don’t want coated. Use thin painter’s tape and avoid extended tape over curved profiles where it may peel later. This step prevents unintentional color on integral parts.
Tip: Double-check masking after moving the piece to a new position; gravity can shift tape slightly. - 5
Prime if needed based on surface
If the surface is very dark, porous, or glossy, apply a compatible primer. Allow primer to dry according to the label before applying color. Primer creates a uniform base and improves color stability across coats.
Tip: Test priming on a small patch to confirm coverage before full application. - 6
Apply the first thin coat of spray paint
Shake the can well, then apply the first light coat from a consistent distance. Use slow, even strokes and keep the can moving to avoid buildup. Allow the coat to dry before evaluating color and coverage.
Tip: Apply multiple thin coats rather than a single heavy one to reduce drips and orange peel. - 7
Apply additional coats and a final topcoat
Continue with 1–2 more thin coats until coverage is even and color looks uniform in all lighting. Finish with a clear topcoat spray to protect the finish. Let each coat dry before applying the next and allow the final coat to cure fully.
Tip: Keep your spray steady and maintain a constant distance for a smooth, professional look. - 8
Cure and final inspection
Allow the painted surface to cure in a dust-free environment according to the topcoat label. Inspect for missed spots, smoothness, and overall color consistency. Lightly buff any imperfections with a clean cloth after curing, if recommended by the finish.
Tip: If color looks uneven in certain lighting, a light glaze or wax can help even out appearance after full curing.
Your Questions Answered
Do I always need primer for furniture spray paint?
Not always. If the surface is already smooth, clean, and light-colored, you may skip primer, but for dark colors, porous woods, or glossy finishes primer is recommended to ensure even coverage.
Often primer is advised for challenging surfaces to ensure even color and adhesion.
Can I spray paint over glossy finishes?
Glossy surfaces should be deglossed or lightly sanded to create tooth for the paint. Using a compatible primer helps adhesion and prevents peeling later.
Degloss, sand, prime, then paint for best results on glossy finishes.
What safety gear is required?
Wear a respirator or mask, safety goggles, and gloves. Ensure good ventilation or work outdoors, and keep flames and sparks away from the area.
Protect your lungs and eyes, and paint in a ventilated space.
How long does it take for the spray finish to cure?
Cure times depend on temperature, humidity, and the product used. Always follow the can label directions and allow the topcoat to cure fully before heavy use.
Check the product label for cure times and conditions.
Can furniture spray paint be used on metal?
Yes, but you may need a primer formulated for metal and a compatible topcoat. Clean and lightly sand the metal surface to improve adhesion.
Metal surfaces respond well to proper prep and the right primer and topcoat.
Is spray painting durable for high-use surfaces?
Durability improves with proper prep, light coats, and a protective topcoat. For high-use surfaces, consider UV and moisture-resistant topcoats and periodic maintenance.
Durability depends on prep, coats, and the topcoat quality.
Watch Video
Quick Summary
- Prepare and protect before painting
- Apply light coats for even color
- Use a compatible topcoat for durability
- Test on scrap before committing to the piece
- Allow full cure for best results