Protect Paint: Practical Home and Auto Protection Guide
Learn practical, cost-aware ways to protect paint on walls and vehicles. This guide covers prep, coatings, maintenance, and budgeting tips from PaintQuickGuide.

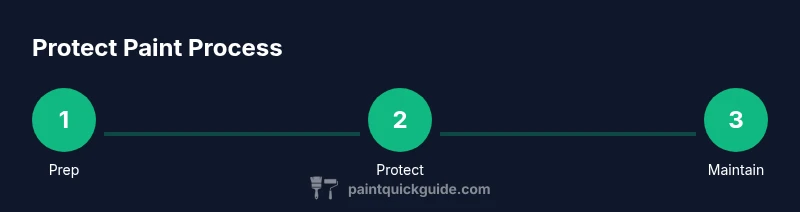
You will learn practical, actionable ways to protect paint on walls and cars, including surface preparation, appropriate protective coatings, and ongoing maintenance routines. This quick guide highlights key products, timing, and cost ranges, plus common mistakes to avoid to maximize durability. It also covers DIY-friendly steps, safety tips, and how to evaluate finishes for different surfaces.
Why protecting paint matters
According to PaintQuickGuide, protecting paint begins with understanding the common exposures that degrade surfaces over time. Paint acts as the first line of defense against UV, moisture, road grime, and daily wear. When left unprotected, tiny chips can propagate, moisture can seep in, and colors can fade unevenly. Protecting paint is about more than aesthetics; it preserves value, reduces future repair needs, and makes upkeep simpler. A thoughtful protection plan keeps walls looking fresh and vehicles glossy, while also resisting stains and scratches. The main goal is to invest a reasonable effort now to extend the life of your paint and minimize maintenance headaches later. By prioritizing prep and choosing the right shield, homeowners and DIY enthusiasts can enjoy longer-lasting finishes with less effort over time.
Surface prep fundamentals
Surface prep is the foundation of any durable paint protection. Before applying a coating, remove dirt, oils, and old residues so that the new shield adheres properly. Start with a thorough cleaning using mild detergent and clean water; for greasy spots, a dedicated degreaser is advisable. Rinse thoroughly and dry with a lint-free microfiber cloth to prevent streaks. If masking is required, protect edges with painter’s tape and cover floors with drop cloths. Lightly de-gloss or scuff-sand glossy surfaces to improve adhesion, but avoid aggressive abrasion on delicate finishes. Finally, test a small patch to confirm compatibility and color retention. Skipping prep is the single biggest risk to protection success, so take the time to get this step right.
Coatings and finishes for protection
Selecting the right coating depends on surface type, climate, and maintenance habits. For walls, polymer sealants or wax-like finishes provide a cleanable, hydrophobic layer that repels moisture and stains. For cars, options range from waxes and sealants to advanced ceramic coatings; each has trade-offs in gloss, durability, and ease of application. Waxes are affordable and DIY-friendly but wear faster in sun and rain. Sealants last longer but require precise prep. Ceramic coatings offer strong UV protection and long-lasting durability but demand careful surface preparation and curing. When choosing, verify surface compatibility, temperature window for application, and recommended cure times. Apply in thin, even coats, in shade and at cool temperatures, and follow product instructions for reapplication intervals. A thoughtful protection strategy aligns with your routine and environment to maximize results.
Wall-specific protection strategies
Interior and exterior walls face different threats, but the protection principle remains the same: choose a finish that endures your environment. Exterior walls benefit from UV-stable, weather-resistant topcoats that resist fading and moisture intrusion. Interior walls in kitchens or bathrooms may require coatings that resist humidity and cleaning agents. While protective films are not common on walls, high-traffic areas can benefit from durable, tint-balanced coatings that resist scuffs. Avoid harsh solvents on recently protected surfaces and always test cleaners on a small area first. Regular maintenance, gentle cleaning, and reapplication when wear is detected help preserve wall finishes over time. The right combination of prep, coating, and care will keep walls looking vibrant and protected against daily abuse.
Automotive paint protection options
For vehicles, the goal is to shield against road debris, UV, and environmental contaminants. Paint Protection Film (PPF) provides a clear, tough, sacrificial layer over vulnerable panels, while ceramic coatings create a hard, hydrophobic surface with excellent UV resistance. Traditional waxes offer a low-cost, simple solution but require frequent reapplication. Sealants strike a balance between ease and durability. When selecting a system, consider climate, driving habits, and maintenance routine. Always ensure the surface is thoroughly clean and dry before applying any coating, and allow proper cure time. Do not mix products unless the manufacturer explicitly allows it, and follow their step-by-step directions for best results. With proper prep and correct product choice, you’ll enjoy long-lasting shine and protection.
Maintenance, inspection, and scheduling
Protection is an ongoing commitment, not a one-off task. Schedule regular inspections to identify chips, dulling, or micro-scratches that indicate wear. Clean surfaces using appropriate products and avoid aggressive cleaners that can degrade coatings. Reapply or refresh protective layers as recommended by manufacturers or when performance drops, particularly in harsh climates or after extreme weather. Parking in shade or a garage and using breathable protective covers can reduce UV exposure and moisture intrusion. Keep a simple maintenance log and set reminders for reapplication or testing patches. A steady routine helps maintain protective performance and sustains appearance over time.
Common missteps and quick fixes
Common mistakes include skipping prep, applying thick coatings in one pass, or ignoring cure times. Skipping cleaning leaves oils and dust that cause uneven finishes. Applying multiple layers too quickly can trap moisture and create hazy results. If you notice streaks or residue, wipe with the appropriate cleaner and allow full cure before re-testing performance. Always patch test new products in a discreet area to avoid surprises. For quick fixes, lightly re-sand and reapply a thin, even layer after proper curing. By avoiding oversized steps and focusing on even layers, you improve protection outcomes.
Budgeting, ROI, and a quick-start plan
Protecting paint can be practical and affordable when you plan well. Start by listing all surfaces that need protection, product options, and maintenance intervals. Group tasks by surface type (walls vs vehicles) and select coatings that fit your climate and lifestyle. Consider product and tool costs, plus any professional assistance for complex coatings. A plan that favors regular maintenance over expensive, sporadic treatments yields better long-term results and appearance. Use a simple calendar to track protection cycles and stay ahead of wear. The ROI comes from longer-lasting finishes, fewer touch-ups, and cleaner, easier-to-maintain surfaces over time.
Tools & Materials
- Soap and water or mild detergent(For initial cleaning prior to protection)
- Microfiber towels(Lint-free to avoid scratching surfaces)
- Degreaser or isopropyl alcohol(Use on oily residues or fingerprints)
- Masking tape(Painter's tape for edges and trim)
- Drop cloths or plastic sheeting(Protect floors and furniture)
- Painter's plastic or paper(Additional edge protection)
- Protective coatings (wax/sealant/ceramic coating)(Choose based on surface and climate)
- Applicator pads and foam brushes(Apply coatings evenly)
- Ventilation fans or open space(Maintain airflow during application)
- Gloves and safety glasses(Protect hands and eyes)
- Respirator or mask(If using solvents or aerosols)
- Paint protection film (PPF) kit (optional, car surfaces)(Advanced option for automotive surfaces)
- Ceramic coating kit (optional)(For long-term protection and gloss)
Steps
Estimated time: 2-6 hours
- 1
Gather and prep workspace
Collect all tools and materials, designate a clean area, and lay down drop cloths to protect floors. Ventilate the space adequately. This initial setup reduces mistakes and ensures safe handling of coatings.
Tip: Verify lighting so you can see even coverage; better lighting prevents missed spots. - 2
Clean and degrease surfaces
Wash surfaces with mild detergent or degreaser as needed to remove oils, dust, and residues. Rinse thoroughly and dry with a microfiber cloth. Cleanliness is essential for adhesion and longevity of the protective layer.
Tip: Use a two-bucket wash method to minimize cross-contamination. - 3
Mask edges and protect surrounding areas
Apply painter’s tape along edges and cover adjacent surfaces with drop cloths. Masking prevents accidental coating on trim and fixtures and yields a crisp, professional look.
Tip: Press tape firmly to prevent bleed; burnish edges with a fingernail. - 4
Apply protective coating in thin, even coats
Choose the coating appropriate for the surface and apply in thin, uniform layers. Work methodically across sections, maintaining consistent pressure and coverage. Allow specified cure time between coats.
Tip: Less is more; multiple light coats outperform a single thick layer. - 5
Cure time and environmental control
Let coatings cure in a shaded, dust-free environment away from rain or heavy humidity. Avoid touching or exposing treated areas until full cure is achieved.
Tip: Use a fan to maintain airflow and prevent dust settling during cure. - 6
Inspect, touch up, and schedule maintenance
Review the project for any missed spots or streaks and touch up as needed. Document maintenance dates and plan follow-up coatings based on wear and climate.
Tip: Keep a small touch-up kit handy for quick fixes.
Your Questions Answered
Why is surface prep critical for paint protection?
Prep creates a clean, receptive surface so coatings bond properly. Skipping prep leads to adhesion problems, uneven coverage, and shorter protection life.
Prep is the foundation. Without it, coatings won't bond properly and protection will fail sooner than expected.
Which coating lasts the longest for exterior walls?
Durability depends on climate and surface, but UV-stable sealants and ceramic-like finishes tend to resist fading longer than basic waxes. Always follow manufacturer instructions for cure and reapplication.
For exterior walls, UV-stable sealants or advanced finishes usually last longer than basic waxes, especially in sunny climates.
Can I protect paint without coatings?
While some paints include built-in protective features, many situations benefit from an external coating for extra moisture, stain, and UV resistance. Consider the surface and environment when deciding.
In some cases you can get by without extra coatings, but extra protection usually pays off in durability.
Does cleaning with water degrade coatings?
Water on its own does not degrade protective coatings if you use mild detergents and avoid harsh cleaners. Follow up with a gentle rinse and dry to prevent water spots and residue.
Water is fine with the right cleaners; harsh chemicals can weaken coatings over time.
Is protective film only for cars?
PPF is most common on cars but can also protect other high-wear surfaces. Assess area exposure and consult a professional to determine suitability.
PPF isn’t just for cars; some people use protective films on other high-wear surfaces, but often it’s vehicle-focused.
How often should I reapply a protective coating?
Reapplication depends on climate, surface, and product. Regular inspection and adherence to curing recommendations guide refresh intervals rather than a fixed calendar.
Check the coating's performance and cure time, then reapply when wear appears.
Watch Video
Quick Summary
- Prepare surfaces thoroughly before protection.
- Choose coatings based on surface and climate.
- Apply thin, even coats and respect cure times.
- Maintain surfaces with regular inspection and refresh when needed.