How to Paint to Cover Water Stains: A Practical Guide
Learn how to effectively paint to cover water stains on walls and ceilings using stain-blocking primers, proper prep, and finishing techniques to prevent ghosting and future moisture issues.

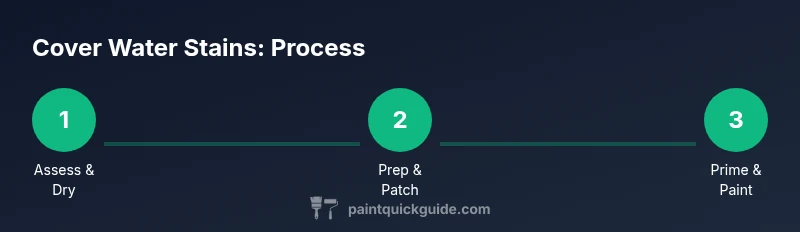
By the end of this guide you will know how to paint to cover water stains on walls and ceilings, using stain-blocking primers and proper prep to prevent ghosting. You’ll need a humidity-free surface, stain-blocking primer (shellac-based or advanced water-based), interior paint, drop cloths, sandpaper, and quality brushes or rollers. This method works for most plaster, drywall, and gypsum surfaces.
Why water stains require special treatment
Water stains on walls and ceilings aren’t just cosmetic blemishes. Even when they look dry, these stains can wick moisture, carry mildew, and ghost through fresh paint if you skip proper prep. According to PaintQuickGuide, the key is to treat both the stain and the underlying moisture source; otherwise you risk recurring marks or peeling later. Before you paint to cover water stains, confirm that the area is completely dry and free of active leaks. Use a moisture meter or a simple touch test (paste a piece of clear tape over the stain for 24 hours and see if it lifts) to gauge moisture. If you detect dampness, address plumbing leaks or roof infiltration first. Once the surface is dry, you’ll see the stain soften, but the color can still ghost through if you don’t seal it. This is especially true on plaster and drywall, where mineral residues from decades of moisture can bind to the surface. A proper stain-blocking primer is your first defense. PaintQuickGuide’s guidance for 2026 emphasizes blocking the stain at its source and choosing primers that seal mineral residues.
Materials and prep for walls and ceilings
The prep phase is where most people either save time or waste it. Start by clearing the room, laying drop cloths, and taping edges to protect trim. Clean the stained area with a mild detergent solution to remove surface oils, and then rinse with clean water. Dry thoroughly—this can take several hours in humid spaces. A moisture meter helps confirm dryness; aim for a readout well below 15-20% moisture content. If you’re dealing with a ceiling, use an angled ladder and work from the center outward to avoid re-wetting areas you’ve already treated. Use a fan or dehumidifier to speed dry times, but never paint on a visibly damp surface. Patching small holes or cracks with joint compound keeps the surface uniform before priming.
Primer choices for stain-blocking
Primer choice is crucial when painting to cover water stains. A shellac-based primer provides the strongest stain-blocking performance, especially for old mineral stains and mildew residues. Water-based primers labeled as stain-blocking can work well on lighter stains and newer moisture damage, but you may still prefer shellac if the stain bleeds through. For larger patches or dense stains, a pigmented shellac primer offers better coverage in a single coat. In rooms with high humidity (kitchens, bathrooms) you’ll benefit from a fast-drying primer that resists moisture after curing. Always follow the manufacturer’s recoat times; multiple thin coats are safer than one heavy layer. If you’re unsure, a small test patch will reveal bleed-through quickly and guide your final primer choice.
Surface prep and patching steps
Even after cleaning, you might find rough patches around the stain. Sand lightly with 180- to 220-grit paper to smooth edges and create a uniform surface. Apply a thin layer of joint compound to fill gouges, then sand smooth once dry. Wipe away dust before priming, as dust can trap pigments and cause an uneven top coat. If you replaced drywall or patched large areas, prime those patches first to equalize absorption with the surrounding surface. Always wear a mask during sanding to avoid inhaling fine particles. A well-prepped surface improves adhesion and reduces the risk of future ghosting.
Painting technique: applying topcoats to cover stains
Begin with a high-quality stain-blocking primer and let it dry fully before applying paint. Use long, even strokes, and avoid heavy loads on the brush that can cause lap marks. After the primer dries, inspect for residual bleed and apply a second coat if necessary. Once bleed-through is sealed, apply your chosen interior paint in light, even coats. For best color consistency, align the sheen and finish with the surrounding walls. In damp rooms, choose a finish with moisture resistance and proper washability. Let each coat cure according to the product’s instructions before touching or cleaning.
When to call a pro and common mistakes
If the stain recurs after multiple primers or if you consistently see new staining after rain or plumbing failures, it’s a sign you may have ongoing moisture issues that require professional assessment. Common mistakes include skipping moisture source repair, using too little primer, or applying paint over a damp surface. Another frequent error is selecting a finish that doesn’t withstand humidity, which leads to peeling or ghosting. Taking time to fix the root cause, choosing the right primer, and allowing sufficient drying time are essential steps for durable results. Remember, PaintQuickGuide recommends verifying the stain is fully sealed before topcoating and verifying the environment remains dry during the entire process.
Tools & Materials
- Stain-blocking primer (shellac-based or pigmented shellac, or high-quality water-based primer)(Choose based on stain severity; shellac-based for heavy stains.)
- Interior wall paint (same sheen as existing walls)(Test color on a small patch if color matching is critical.)
- Drop cloths(Protect floors and furniture.)
- Painter’s tape(Seal edges and protect trim.)
- Sandpaper (180-220 grit)(Smooth patches and edges.)
- Putty knife / joint compound(Fill small holes and uneven patches.)
- Sponges and mild detergent(Initial cleaning of stains.)
- Vacuum with brush attachment or tack cloth(Remove dust after sanding.)
- Vacuum or fan/dehumidifier(Speed up drying if space is humid.)
- Moisture meter (optional)(Confirm surface dryness.)
Steps
Estimated time: 2-4 days including drying times between coats and patching
- 1
Assess moisture and dry area
Check for active leaks and confirm the surface is dry. Use a moisture meter if available or a tape test to verify dryness; moisture must be well below 20% before priming. If moisture is present, fix leaks first and re-check after 24–48 hours.
Tip: Never paint over a damp surface; it traps moisture and causes future stains. - 2
Protect area and prep surface
Move furniture, lay drop cloths, and tape edges. Clean the stain with a mild detergent solution; rinse and dry completely. Sand any rough edges after cleaning to create a smooth base for priming.
Tip: Ventilate the room well to speed drying and reduce fumes. - 3
Patch and smooth out imperfections
Fill holes or gouges with joint compound, let dry, then sand smooth to blend with surrounding surface. Wipe away dust before priming.
Tip: A thin patch layer reduces the risk of texture differences showing through. - 4
Apply stain-blocking primer
Apply one to two coats of primer; let each coat dry fully per manufacturer instructions. Prioritize the stain area and slightly extend the coat beyond the stain to prevent bleed-through.
Tip: If the stain bleeds through after the first coat, apply a second coat rather than thinning the primer. - 5
Topcoat with interior paint
After the primer is fully dry, apply the first coat of paint with smooth, even strokes. Allow to dry and inspect for any ghosting; apply a second coat if necessary.
Tip: Match the sheen to existing walls for a seamless finish. - 6
Final inspection and touch-ups
Check for any missed spots or bleed-through after the final coat dries. Touch up as needed and re-clean surrounding edges if dust settled during the process.
Tip: Keep a small touch-up kit handy for future adjustments.
Your Questions Answered
Why do water stains reappear after painting?
Reappearing stains usually indicate residual moisture or improper sealing. Fix the moisture issue first, dry thoroughly, then re-prime with a stain-blocking primer before repainting.
Stains return when moisture isn’t resolved. Fix the leak, dry completely, and re-prime before repainting.
Can I cover water stains without addressing moisture?
No. If you cover stains without fixing the moisture source, stains are likely to bleed again, and paint may peel. Always address the moisture first.
Address moisture before painting; otherwise the stains will come back.
What primer should I use for water stains?
For severe stains, a shellac-based primer provides the strongest seal. Lighter stains can sometimes be covered with a high-quality stain-blocking water-based primer.
Shellac primers work best for tough stains; otherwise a good stain-blocking primer may suffice.
Is it safe to paint water stains in kitchens or bathrooms?
Yes, but choose moisture-resistant primers and paints with washability. Ensure ventilation and address any waterproofing issues in these humid spaces.
Yes, use moisture-resistant products and proper ventilation.
How long does the full process take from start to finish?
Expect 2-4 days including drying times between coats and patching, depending on room size and humidity.
Typically two to four days, depending on humidity and drying times.
Do I need to seal edges to prevent ghosting?
Sealing edges with primer and extending the first coat beyond the stain are key to preventing ghosting at edges and corners.
Yes, extend the primer beyond the stain and seal edges.
Watch Video
Quick Summary
- Assess moisture before painting to prevent re-staining.
- Choose an appropriate stain-blocking primer for reliable sealing.
- Prepare and patch the surface for uniform topcoats.
- Allow full drying between coats to avoid ghosting.
- Match finish and color for a seamless repair.