Water Proof Paint: A Practical Guide to Waterproof Coatings
Learn how to select water proof paint for interior, exterior, and automotive surfaces. This guide covers types, prep, application techniques, safety, and maintenance to protect moisture-prone surfaces.

This guide shows you how to choose and apply water proof paint for walls, floors, and metal surfaces, with step-by-step instructions, surface preparation tips, and maintenance guidance. You’ll learn about coating types, ideal substrates, and how to achieve a durable moisture barrier that lasts in kitchens, bathrooms, basements, and exterior walls.
Why Water Proof Paint matters
Moisture is a stealthy enemy of indoor and outdoor surfaces. Even small leaks, high humidity, or condensation can lead to coating failure, peeling, mold growth, and higher maintenance costs. A proper water proof paint forms a moisture-resistant barrier that helps surface assemblies maintain structural integrity and aesthetics over time. For homeowners dealing with bathrooms, basements, kitchens, or exterior brick and stucco, selecting the right water proof paint is a practical investment.
According to PaintQuickGuide, the best results come from matching the coating to the surface and the exposure. A paint that remains flexible in damp air will resist cracking on metal flashing, while a film that breathes enough to release trapped moisture will prevent blistering on masonry. The choice becomes more critical in climates with frequent rain, coastal spray, or freeze-thaw cycles. When used correctly, water proof paint reduces maintenance cycles and extends the life of siding, plaster, or drywall.
This guide uses the term water proof paint to reflect the broad family of coatings designed to curb water penetration while remaining paintable and workable across substrates. We'll cover types, prep, application, and maintenance so you can select a product with confidence and execute a durable finish. PaintQuickGuide’s mission is to help homeowners, DIY enthusiasts, and auto refinishing hobbyists achieve predictable results with practical steps.
Water Proof Paint Types and How They Work
Water proof paint comes in several chemistries, each with its own strengths and limitations. Elastomeric acrylic coatings are popular for exterior masonry because they form thick, flexible films that bridge hairline cracks and resist wind-driven water. Epoxy-based systems offer superb chemical and moisture resistance on metal, concrete, and floors but require careful surface preparation and ventilation due to stronger fumes. Polyurethane coatings provide excellent abrasion resistance and UV stability, often used on automotive and high-traffic surfaces, while silicone-modified latex blends combine elasticity with long-term water resistance for interior walls that experience humidity.
In damp interiors, latex or acrylic water proof paints with added waterproofing resins can deliver good moisture barriers without sacrificing color and finish. For ceilings or areas with high humidity, elastomeric finishes are effective but require proper ventilation and cure time. Always confirm compatibility with the substrate, temperature, and climate. Remember that not all “waterproof” labels are equal—read the technical data sheet (TDS) for film thickness, moisture tolerance, and surface prep requirements.
Key takeaway: select the coating type based on surface chemistry, expected moisture exposure, and the desired balance between breathability and moisture resistance.
Choosing the Right Water Proof Paint for Your Surface
Interior walls: For bathrooms and kitchens, a durable acrylic latex water proof paint with mold inhibitors is often sufficient. Exterior walls: Choose elastomeric acrylics or silicone-modified acrylics that tolerate repeated moisture and UV exposure. Metal surfaces: Epoxy or polyurethane coatings offer strong adhesion and corrosion resistance when properly prepped. Wood and plaster: A bonding primer with a flexible topcoat helps resist cracking and allows for expansion and contraction.
Guidelines to follow:
- Surface prep dictates success: clean, dry, and repair any damage before coating.
- Climate matters: humid, rainy, or coastal environments benefit from thicker, more elastic films but require longer cure times.
- Substrate compatibility: verify that the paint’s resin system works with the surface (wood, masonry, metal, etc.).
- Primer matters: primers improve adhesion, reduce absorption, and extend topcoat life.
- Multiple thin coats beat one thick coat for durability and appearance.
Action steps for selecting a product include identifying substrate type, anticipated exposure (indoor vs outdoor, humidity level), and the desired finish (matte, satin, or gloss).
Surface Prep Before Application
Effective surface preparation is the backbone of a long-lasting water proof paint job. Start by removing dirt, dust, and loose coatings with a stiff brush or vacuum. Repair cracks and holes with an appropriate filler, then sand smooth so the new coating adheres evenly. If moisture is an issue, address it before painting—repair leaks, improve ventilation, and ensure the surface is completely dry.
Mask off surrounding areas with painter’s tape and protect floors with drop cloths. Clean heavily stained areas with a mild detergent solution, rinse, and allow to dry. If you’re working on glossy surfaces, lightly scuff the area to improve adhesion. Finally, apply a primer compatible with your water proof paint to improve film formation and reduce topcoat absorption.
Application Techniques: Tools, Steps, and Tips
Applications should follow the manufacturer’s recommended film thickness and drying times. Use high-quality brushes for edges and corners, and a compatible roller for larger flat areas. Apply thin, even coats in a consistent direction, usually using a cross-hatch method for first coats on textured surfaces. Do not rush the coating; allow adequate drying between coats.
Jeffers a second coat if the product requires it, ensuring uniform coverage and a seamless finish. After the final coat, recheck for pinholes or missed spots and touch up as needed. Clean tools promptly with the recommended solvent or water-based cleaner. Proper ventilation reduces fumes and speeds drying.
Tips: Work in mild, dry conditions when possible; protect skin and eyes; label different containers to prevent cross-contamination. If applying on metal or outdoors, use weather-resistant primers and sealants to maximize durability.
Common Pitfalls and How to Avoid Them
Rushing the prep or applying over damp surfaces is the most common cause of coating failure. Skipping primer on porous substrates can lead to uneven color and poor adhesion. Using the wrong sheen or coating type for a given surface will shorten life and increase maintenance. Failing to ventilate can create hazardous fumes and affect curing. Finally, applying too thick a coat invites cracking and poor cure; multiple thin coats are always better than one heavy layer.
Maintenance and Longevity
A well-applied water proof paint finish requires ongoing maintenance. Clean surfaces with mild cleaners to prevent mold growth, inspect for peeling or blistering after extreme weather, and perform touch-ups as needed. Recoat when the color or film quality starts to degrade; always follow the manufacturer’s recoat window and cure times. Store paint in a cool, dry place and label cans with the surface and date of application to track durability over time. Proper upkeep extends the life of the coating and reduces the need for early replacement.
External References and Further Reading
For deeper understanding and standards, refer to authoritative sources:
- EPA: Moisture control and building materials guidance (https://www.epa.gov)
- University Extension references on coatings and moisture management (https://extension.illinois.edu)
- National Institute of Standards and Technology on coating performance and testing (https://www.nist.gov)
Tools & Materials
- Waterproof paint (appropriate type for surface)(Select elastomeric acrylic for masonry or epoxy for metal where maximum moisture resistance is needed)
- Primer compatible with waterproof paint(Primers improve adhesion and reduce topcoat absorption)
- High-quality brushes (3-4 in, synthetic or natural depending on paint)(Use synthetic for latex/water-based paints)
- Rollers (9-12 mm nap for smooth surfaces, higher for textured)(Keep roller covers clean and lint-free)
- Paint tray and liners(For even coating thickness)
- Drop cloths and painter's tape(Protect adjacent areas)
- Putty knife and patch material(For repairing cracks before painting)
- Sandpaper (120-220 grit)(Smooth edges and improve adhesion)
- Solvent or water for cleanup(Follow paint type for cleanup)
- Personal protective equipment (gloves, goggles, mask)(Ventilate area; fumes may dominate)
Steps
Estimated time: 3-6 hours active work; 24-72 hours cure depending on product and climate
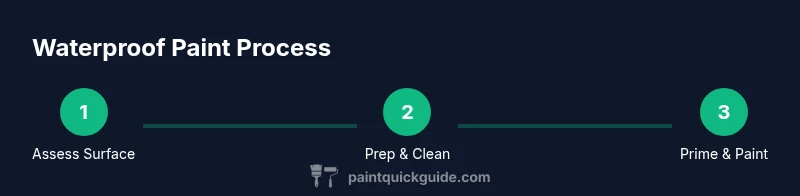
- 1
Assess surface and paint type
Evaluate moisture exposure, substrate compatibility, and climate. Decide between elastomeric, epoxy, or acrylic water proof paint based on surface chemistry and exposure. Confirm that the chosen product meets local building codes and manufacturer guidelines.
Tip: Document the substrate and exposure to guide coating thickness and curing expectations. - 2
Gather tools and materials
Assemble brushes, rollers, trays, primer, paint, drop cloths, tape, and PPE before starting. Check that all items are compatible with the chosen water proof paint and surface. Organize tools by task to streamline the workflow.
Tip: Label containers to avoid cross-contamination between primers and topcoats. - 3
Clean and prep surface
Remove dirt, grease, and loose coatings. Yes to a dry, clean surface improves adhesion. Repair cracks with suitable filler and sand smooth for a uniform finish.
Tip: Mask edges and protect nearby surfaces to prevent accidental splatter. - 4
Repair and prime as needed
Fill cracks or holes with a compatible filler; let it dry fully. Apply a compatible primer to improve adhesion and reduce topcoat absorption, especially on porous surfaces.
Tip: Test a small area first to confirm primer compatibility with the water proof paint. - 5
Mix, thin (if required), and strain
Stir product thoroughly to ensure an even pigment and resin distribution. If thinning is recommended, follow the manufacturer’s ratios and strain the paint to remove lumps.
Tip: Avoid over-thinning which can compromise film integrity and moisture resistance. - 6
Apply first coat
Apply a thin, uniform coat using long, steady strokes. Maintain a consistent film thickness across all surfaces and avoid stopping in the middle of a stroke.
Tip: Keep a wet edge to prevent lap marks and ensure even color. - 7
Apply second coat
After the first coat dries to the recommended tack-free time, apply a second coat for full moisture barrier and color depth. Inspect for uniform coverage and address any thin spots.
Tip: Use a slightly different angle for the second coat to improve film uniformity. - 8
Clean up and cure
Clean tools according to the paint type; dispose of waste properly. Allow the coating to cure fully before exposure to moisture or traffic, following the product’s cure time and environmental conditions.
Tip: Ventilate during curing and avoid heavy use until fully cured.
Your Questions Answered
What is water proof paint?
Water proof paint refers to coatings designed to resist moisture and moisture intrusion. They form a protective film that minimizes water penetration and supports longer surface life.
Water proof paint is a coating designed to resist moisture and protect surfaces from water intrusion.
Is water proof paint the same as waterproofing sealant?
Paints are film-forming coatings that seal surfaces as part of their finish. Sealants are separate products designed specifically for moisture blocking, often used in joints or seams. Some products combine both properties, but you should check the product data sheet to confirm.
Paints seal surfaces as a finish, while sealants are dedicated moisture barriers. Check the product sheet for exact properties.
Can interior walls be painted with water proof paint?
Yes, many water proof paints are formulated for interior use in humidity-prone areas like bathrooms and kitchens. Choose products with mold inhibitors and appropriate finish for interiors.
Yes, you can use water proof paint indoors, especially in humid spaces like bathrooms or kitchens.
How long does water proof paint take to dry and cure?
Drying and curing times vary by product and environment. Follow the manufacturer’s recommended drying times between coats and overall cure time before exposure to moisture or heavy use.
Dry times depend on the product and conditions; check the label for exact times and cure durations.
Do I need a primer with water proof paint?
Primer often improves adhesion, coverage, and durability, especially on porous or previously painted surfaces. Use a primer compatible with both the substrate and the chosen water proof paint.
In most cases, yes—primer helps coatings stick and last longer.
Watch Video
Quick Summary
- Choose the correct coating type for your surface
- Prepare the surface thoroughly before painting
- Ventilate well during application and cure
- Apply thin coats for durability and uniform finish
- Follow cure times to maximize moisture resistance