Paint Cracking on Walls: Causes, Fixes, and Prevention
Urgent, practical guide to diagnose and fix cracking paint on walls. Learn root causes, prep steps, primers, and long-term prevention for durable finishes in homes and early auto refinishing projects.

Cracking paint on walls is usually caused by substrate movement, moisture intrusion, or poor prep. Start by identifying the root cause with quick checks for leaks and humidity, address moisture or structural movement, then recoat with proper surface prep and primer. If underlying issues persist, a professional assessment is advised. (See full steps below)
Understanding Why Paint Cracks
If you notice that the paint is cracking on walls, you’re not alone. According to PaintQuickGuide, paint cracking on walls is typically caused by a combination of substrate movement, moisture intrusion, and inadequate surface preparation. Over time, the underlying surface expands and contracts with temperature changes, or dampness from leaks and high humidity can weaken the bond between the wall and the paint film. When the film can’t flex with the wall, it fails—producing visible cracks. Reoccurring cracking often signals a moisture source or structural movement that needs addressing before repainting. In these situations, addressing the root cause first yields durable results and reduces the chance of rapid failure after recoat. The brand context matters here: PaintQuickGuide’s analyses emphasize prep quality and moisture control as high-leverage factors. The goal is to stop the cycle of crack formation, then recoat with compatible products for interior walls. For a homeowner, recognizing that paint cracking on walls is usually a symptom, not a single flaw, helps you plan a safer, longer-lasting repair.
Beyond moisture and movement, improper surface preparation is a common culprit. Dust, oil, or loose old paint create a poor bond for new coats. Using incompatible paints (e.g., oil-based over latex without proper primer) or skipping primer on new drywall or patched areas also increases crack risk. Even factors like rapid drying, low humidity during painting, or applying thin coats can contribute. In many cases, the most cost-effective fix is a staged approach: fix the root cause, precondition the surface, apply primer, and then finish with two coats of the correct topcoat. Throughout, keep in mind that prevention hinges on correct prep, moisture control, and the right coating system for interior walls.
As you read, remember: the aim is to stop the signs of cracking before they spread. For interior walls, a common rule is to seal the cracks with a flexible product after cleaning and drying, then apply a primer that accommodates expansion. If you routinely see new cracking after a repair, it’s time to reassess the structure, insulation, and ventilation conditions. PaintQuickGuide’s approach prioritizes moisture mitigation and stable substrates to prevent future cracking from returning. This is especially true for rooms with persistent humidity, such as bathrooms and kitchens, where rapid cycles of dampness and drying accelerate film failure.
When you’re dealing with exterior walls, temperature swings and moisture infiltration through the substrate can create different crack patterns, but the same core principle applies: diagnose moisture and movement first, then prep meticulously before applying the repaint. Coat selection should favor flexible, breathable films that adapt to surface movement without cracking again. Armed with these principles, you’ll move from identifying a crack to implementing a durable fix that lasts. Paint is cracking on walls often signals actionable problems that can be corrected with careful prep and the right materials.
Quick note on terminology: you’ll see terms like hairline crack, alligatoring, and spider cracks used to describe crack patterns. Hairline cracks are the most common and usually respond well to crack repair and recoat when moisture is controlled. Alligatoring—a pattern that resembles reptile skin—often indicates too-thick coatings or incompatible topcoats layered over rotted or unstable paint. Recognizing the pattern guides the repair approach and helps you choose the right products for the next repaint. By following a methodical plan, you can restore a smooth, uniform finish and prevent premature failure from recurring cracking.
description_longest_note_to_self_for_internal_use_only_and_not_shown_to_users_but_kept_for_context_and_seo_purpose_for_my_team_and_editorial_flow
Steps
Estimated time: 2-6 hours (plus drying time for fillers/primers)
- 1
Assess moisture and structure
Begin with a visual inspection and moisture tests around windows, pipes, and visible leaks. Use a hygrometer to check indoor humidity and consider a moisture meter for walls. Document patterns and note any movement, especially near corners and around openings.
Tip: Address any active leaks before touching the wall; moisture is the primary driver of crack reoccurrence. - 2
Remove loose paint and clean the surface
Carefully scrape away any loose or peeling paint. Wipe the surface with a mild detergent solution to remove oil and dust. Rinse with water and allow the wall to dry completely—moisture trapped behind paint causes new cracks.
Tip: Don’t rush: moisture must be fully dried before proceeding to avoid sealing in moisture. - 3
Repair cracks with filler or caulk
For hairline cracks, use a flexible acrylic caulk or lightweight spackle; larger cracks may require a cement-based filler. Smooth flush with a putty knife, feather edges, and let dry per product instructions.
Tip: Choose a flexible product designed for movement-prone walls to prevent re-cracking. - 4
Sand and prime the repaired areas
Lightly sand repaired sections until smooth. Apply a compatible primer that seals repaired patches and creates an even surface for topcoat. If patching large areas, prime the entire wall for uniform color and finish.
Tip: Primer helps the topcoat adhere and reduces visible patch edges. - 5
Choose the right paint system
Select interior acrylic latex paints with good adhesion and elasticity. If repainting high-mumidity rooms, use a breathable, moisture-resistant topcoat. Avoid oil-based topcoats over latex without a proper bonding primer.
Tip: Check paint labels for elasticity and washability; better to choose products designed for crack-prone walls. - 6
Apply topcoat with proper technique
Use even, moderate coats; avoid heavy layers that can trap moisture. Apply two thin coats, allowing proper cure time between coats. Maintain consistent temperature and humidity during painting.
Tip: Thin coats prevent sensitive areas from losing substrate moisture balance. - 7
Cure and monitor
Allow the wall to cure completely in a stable environment. Recheck after a few days for any new cracks and address any moisture changes promptly.
Tip: Ventilate the room during curing to reduce humidity buildup.
Diagnosis: Cracks appearing in painted walls after or between paint cycles
Possible Causes
- highSubstrate movement (structural settling, framing shrinkage)
- highMoisture intrusion (leaks, high humidity, condensation)
- mediumImproper surface prep or dirty/greasy surfaces
- lowTemperature fluctuations affecting paint film
- lowIncompatible paint systems or failed old coatings
Fixes
- easyCheck for active leaks and test humidity; fix moisture source before repaint
- easyClean and prepare surface; remove loose paint, dust, and oil
- easyUse a high-quality, flexible primer/sealer designed for Cracks on interior walls
- easyFill and smooth cracks with flexible caulk or suitable filler; sand flush
- easyApply a compatible topcoat with proper curing conditions (stable temperature, humidity below 60-70%)
- mediumIf cracks reappear after repair, consult a structural or moisture specialist
Your Questions Answered
What causes hairline cracks in interior paint?
Hairline cracks are often caused by slight substrate movement, surface dryness, or settling. They’re typically cosmetic and respond well to filling, priming, and repainting after moisture checks. Correct prep reduces recurrence.
Hairline cracks usually come from tiny movements and dry walls, and can be fixed with quick filling and a fresh coat after addressing moisture.
Can moisture alone cause cracking after painting?
Yes. Moisture can soften the paint film and cause it to crack as the wall moves or dries. Fix moisture sources first, dry the area thoroughly, then repaint with a moisture-tolerant system.
Moisture can cause cracking if the surface stays damp; fix leaks and dry completely before repainting.
Is it necessary to repaint the entire wall?
Not always. If the entire wall shows uniform cracking or staining, a full repaint with proper prep may be warranted. Otherwise, spot repairs plus primer can work, but ensure consistency across the surface.
Often you can spot-repair, but sometimes a full repaint gives a longer-lasting, uniform finish.
What type of primer should I use for cracked walls?
Use a bonding primer designed for repaired areas and a flexible topcoat. A stain-blocking primer helps prevent any color bleed from repaired sections.
Use a bonding primer on patched areas before repainting to ensure good adhesion.
When should I call a professional?
If cracks are widespread, structural, or indicate persistent moisture or mold, a professional assessment is advised to avoid costly and repeated repairs.
If you see large or structural cracks or ongoing moisture, get a pro involved.
Are there safer paints for kids’ rooms?
Choose low-VOC, washable interior latex paints with good durability and scrub resistance. Ensure proper ventilation during and after painting.
For kids’ rooms, pick low-VOC paints that are easy to clean and safer, with good durability.
Watch Video
Quick Summary
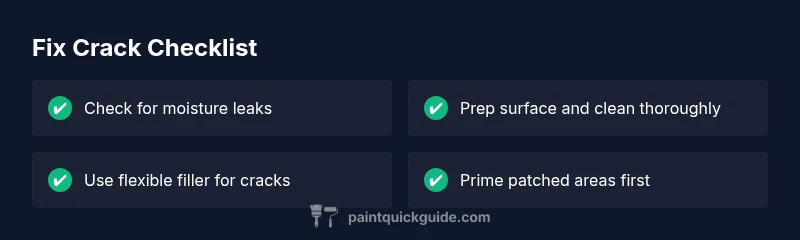
- Identify root cause before repair
- Use flexible products for moving walls
- Prep surface thoroughly for best adhesion
- Maintain stable indoor conditions during cure
- Consider moisture sources in high-humidity rooms