Is paint and primer in one good for new drywall? A practical guide
Discover whether paint-and-primer-in-one products work on new drywall. We compare pros, cons, prep steps, and offer a step-by-step approach for a smooth, lasting finish—tailored for homeowners and DIYers.

Is paint and primer in one good for new drywall? In many cases, it’s convenient but not ideal for the first coat. Paint-and-primer-in-one products can save time on fresh gypsum, especially in low-porosity spaces or when you plan a single color and finish. However, for best coverage and long-term durability, use a dedicated primer to seal drywall and create a uniform surface.
What is paint-and-primer-in-one?
Paint-and-primer-in-one products blend binder, pigment, and sealing agents in a single can. They promise to simplify projects by skipping a separate priming coat. For new drywall, these formulas can work when the surface is very smooth, dust-free, and not heavily textured. Fresh gypsum is porous and can suck up water unevenly, so even a one-coat solution may appear inconsistent if you don’t choose the right product and technique. From the PaintQuickGuide perspective, the main question isn't merely whether a product claims to prime, but whether it provides adequate sealing and adhesion for your walls. In practice, many DIYers appreciate the convenience in mild-traffic rooms and lighter color transitions, especially when budget or time is tight. Yet if you demand a uniform finish with deep color saturation or if the drywall has challenging edges and texture, a dedicated primer is usually the safer bet. For auto refinishing enthusiasts who dabble in body shop painting, the same rule applies: surface prep and primer choice drive the final result, even when a one-step product is available.
New drywall: why sealing matters
New drywall is highly porous and has fine gypsum dust that can interfere with paint adhesion. The surface often needs to be sealed so that the finish coats go on evenly and the color turns out true. A primer does two things: it reduces porosity so that paint uses less pigment and water, and it improves adhesion so subsequent coats stick longer. If you skip sealing, you may experience peeling, spottiness, or uneven sheen, especially along joints and around trim. PaintQuickGuide's practical guidance emphasizes recognizing that drywall can drink up moisture unevenly, which often reveals itself as blotchy patches after the first coat. For homeowners working in rooms with moderate humidity, a dedicated primer is typically a safer bet, because it creates a uniform, ready-to-paint surface that makes the final color appear consistent from corner to corner. If your project is a quick refresh in a low-traffic space and you’re using a compatible one-coat formula, you might still get satisfactory results, but expect more re-coats or touchups in the future.
Pros and cons of using paint-and-primer-in-one on new drywall
Pros:
- Convenience and faster project completion: single coat plus color; reduces steps.
- Cost savings on materials in small projects.
- Useful for low-traffic spaces and light colors.
Cons:
- Possible uneven coverage on highly porous drywall without extra coats.
- Limited color options; deeper color may require more coats.
- Durability and stain resistance may be lower than with separate primer.
The decision should weigh room usage, traffic, color depth, and finish quality. In spaces such as kitchens or bathrooms with moisture, dedicated primer plus an top coat tends to outperform one-step products. PaintQuickGuide's real-world testing indicates that the difference is most noticeable on new drywall with heavy joint compound or irregular surfaces.
How to decide between combined products and separate primer
- Porosity check: If drywall is very smooth vs very porous, separate primer yields better sealer; if smooth, paint-and-primer-in-one may suffice.
- Color depth and sheen: For deep colors or high gloss, primer is more predictable.
- Surface texture and repairs: In areas with repaired joints, a primer helps even out absorption.
- Budget and time: A one-coat option saves time; a primer adds cost but reduces coats later.
- Climate and humidity: More humidity requires longer drying times; ensure product compatibility.
Practical rule: For new drywall in rooms with normal use, a dedicated primer is often worth the extra step; for rapid refreshes or small patches, a proven paint-and-primer-in-one can work if you follow proper prep and let each coat cure.
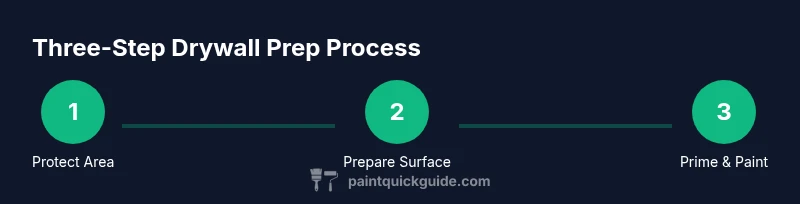
Step-by-step prep for new drywall before painting
- Protect the area: Move furniture, cover floors with drop cloths, and tape around trim and outlets. This prevents splashes and keeps nearby surfaces clean. Pro tip: use painter’s tape that’s rated for delicate surfaces to avoid peeling. Widen your coverage to ensure any accidental drips are captured before they dry.
- Repair defects: Fill dents and joint gaps with lightweight joint compound. Let it dry fully, then sand flush with the wall. Pro tip: apply thin coats and sand between rounds for a seamless finish.
- Clean and dust: Wipe surfaces with a damp microfiber cloth to remove gypsum dust. A clean surface improves primer adhesion and color uniformity. Pro tip: wipe in a circular motion to lift dust without grinding it into the drywall paper.
- Decide on primer strategy: If the drywall is new and very smooth, you may opt for a paint-and-primer-in-one for a quick finish; otherwise, plan for a dedicated primer to seal porosity and improve adhesion. Pro tip: verify drying times on the product label to ensure proper recoat windows.
- Apply primer or one-step product: Use a roller for large areas and a brush for edges. Apply even coats, following manufacturer directions for thinning if required. Pro tip: back-roll to reduce roller texture and ensure uniform absorption.
- Finish with color coats: After the primer dries, apply the first coat of paint or color coat. Assess coverage; apply a second full coat if needed. Pro tip: maintain consistent pressure on the roller to avoid lap lines and keep a wet edge.
Aftercare and tips for color and finish
- Allow full cure between coats: Most paints and primers require a dry time; do not rush re-coats if humidity is high. Pro tip: use a fan to improve airflow, but avoid direct, hot heat that can cause uneven drying.
- Choose finish wisely: Eggshel/ satin sheens hide imperfections better on drywall; gloss finishes reveal more texture, so reserve gloss for accents or trim. Pro tip: test color at a small hidden area to confirm appearance under room lighting.
- Monitor for blotching or sheen changes: If you see blotches after the first coat, apply a second coat of primer or switch to a dedicated primer for better uniformity. Pro tip: always prime repaired areas to minimize color variations.
Quick tips for color and finish selection
- Start with a small sample board to preview color and sheen before committing to walls.
- Use low-VOC, water-based products for better indoor air quality.
- Always label and store paint and primer in a cool, dry place to maintain performance.
Common mistakes to avoid on new drywall
- Skipping dust removal and walking away after mudding; dust reduces adhesion.
- Skipping a dedicated primer when porosity is high or joints were repaired; this leads to blotching and two-step color issues.
- Overworking mudded joints; this can cause surface texture that shows through paint.
- Not allowing adequate drying time between coats; moisture entrapment causes finish issues.
- Selecting a finish that doesn’t suit the room’s lighting and traffic; a wrong sheen highlights imperfections.
Tools & Materials
- Drop cloths or sheets(Protect floors and furniture; use thick fabric or poly.)
- Painter’s tape(Mask edges around trim and outlets.)
- Tack cloth or damp microfiber cloth(Dust removal before painting.)
- Sandpaper (120-220 grit)(Smooth joints and edges before primer.)
- Putty knife and joint compound(Fill joints and defects; ensure flush.)
- Sanding block or pole sander(Smooth dried mud; remove dust.)
- Roller frame and 3/8 inch nap roller(For smooth walls; use extension pole.)
- Angled brush (2-2.5 inches)(Cut in around corners and trim.)
- Primer (separate or paint-and-primer-in-one)(Select based on porosity and finish goals.)
- Paint (matching color)(Choose low-odor latex if possible.)
- Paint tray and liners(For rolling; reuse tray.)
- Mask/respirator with P100 filter(Safety during sanding.)
- Ventilation setup (fans/windows)(Improve air exchange during painting.)
Steps
Estimated time: 2-4 hours
- 1
Protect the area
Move furniture away, cover floors with drop cloths, and tape around trim and outlets. This prevents splashes and keeps nearby surfaces clean.
Tip: Use painter’s tape rated for delicate surfaces to avoid peeling. - 2
Repair defects
Fill dents and gaps with lightweight joint compound. Let it dry fully, then sand flush with the wall.
Tip: Apply thin coats and sand between rounds for a seamless surface. - 3
Dust and clean
Wipe surfaces with a damp microfiber cloth to remove gypsum dust. A clean surface improves primer adhesion.
Tip: Dust first, then wipe to avoid pushing dust into the drywall paper. - 4
Decide on primer strategy
Choose between a dedicated primer or a paint-and-primer-in-one based on porosity and finish goals.
Tip: Check drying times on the product label to ensure proper recoat windows. - 5
Apply primer or one-step product
Roll large areas and brush edges. Apply even coats and maintain a wet edge to avoid lap marks.
Tip: Back-roll after applying to smooth texture and improve coverage. - 6
Finish with color coats
Apply the first coat of paint or color coat. Assess coverage; apply a second full coat if needed.
Tip: Let each coat cure according to product guidelines before handling the walls.
Your Questions Answered
Is paint-and-primer-in-one good for new drywall?
It can be convenient for small, low-traffic areas, but new drywall often benefits from a dedicated primer to seal porosity and ensure uniform adhesion. If you choose a one-step product, plan for extra coats and follow the manufacturer's guidance.
It can be convenient for small areas, but dedicated primer is usually better for new drywall to seal porosity and ensure adhesion.
Do I need to prime fresh drywall before painting?
Yes. Priming helps seal the gypsum, reduces porosity, and improves adhesion for the paint color. This is especially important if the drywall has joints or repairs.
Yes, priming helps seal the drywall and improves paint adhesion.
How long does primer dry on new drywall?
Drying times vary by product and conditions, but most primers require drying within a few hours and allow recoat within a typical window stated on the label. Always follow the product’s instructions.
Dry times vary; check the label and allow the indicated recoat window.
Can I skip sanding after mudding?
No. Light sanding helps flatten joints and remove ridges, which produces a smoother finish and better paint adhesion.
No—sanding is essential for a smooth finish and good adhesion.
What finishes look best on new drywall?
Eggshell or satin sheens balance durability and concealment of minor imperfections; gloss finishes reveal surface texture and are best for trim or high-traffic accents.
Eggshell or satin finishes are usually a good balance for walls.
What if blotching appears after the first coat?
Apply a second coat of primer or switch to a dedicated primer to even absorption; ensure the surface is clean and dry between coats.
If blotching appears, prime again or switch primers and allow proper drying.
Watch Video
Quick Summary
- Start with surface prep before any coating.
- New drywall benefits from proper sealing; primer choice matters.
- Paint-and-primer-in-one can save time but may require more coats on porous walls.
- Follow manufacturer guidelines for drying and recoating times.
- Choose finish and sheen that suit room usage and lighting.