Paint After Removing Wallpaper: A Practical Guide
A practical, step-by-step guide to painting walls after wallpaper removal, covering prep, patching, priming, and painting for a smooth, durable finish.

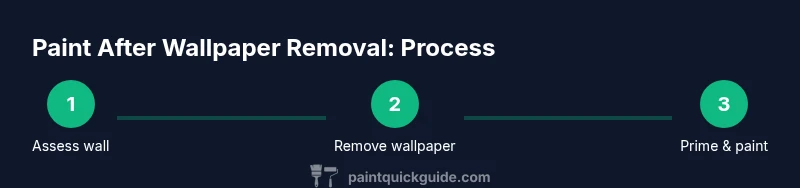
After removing wallpaper, you will prepare a smooth wall surface ready for paint. The essential steps include full wallpaper removal, wall inspection for damage, patching, cleaning, priming, and selecting the right interior paint finish. Ensure proper ventilation, drop cloths, and a clean workspace. This process helps prevent peeling and yields a durable, long-lasting finish.
Before you start: assessing the wall and safety
Before you reach for a scraper, take a moment to assess the wall you’re about to repaint. Wallpaper removal can reveal hidden issues that will affect the finish, so start with a quick survey of wall type (plaster vs drywall) and the condition of the substrate. Look for signs of moisture damage, efflorescence, cracks, or loose drywall tape that will require repairs before painting. If the home is older than 1978, consider a lead-paint test and follow safety guidelines—do not sand or scrape lead-painted surfaces without proper containment. Ensure your work area is well ventilated, with fans moving air to the exterior, and use a respirator or mask when sanding or handling dusty surfaces. Gather clean drop cloths, painter’s tape, and plastic sheeting to protect floors and nearby fixtures. This preparation reduces the risk of rewrapping the project in glue or dust and sets you up for a durable, long-lasting finish. PaintQuickGuide recommends documenting wall condition before starting to track repairs and revisions.
- Lead-check: If there’s any doubt about lead-based paint, test first and follow local safety guidelines.
- PPE: Use gloves, eye protection, and a mask when sanding or scraping to minimize inhalation of dust.
- Ventilation: Open windows and use fans to move air outward.
Removing wallpaper residues and adhesives
Removing wallpaper is more than a quick peel; it leaves adhesive residues that can ruin adhesion if not fully cleared. Start by scoring the wallpaper with a scoring tool to loosen adhesive in stubborn spots, then saturate with a wallpaper remover or a warm water and mild soap mix. Work in sections, using a stiff scraper to lift edges and remove chunks of old wallpaper. For thick or vinyl wallpapers, a steam stripper can help soften the glue, but use cautiously on delicate plaster or drywall. Rinse with clean water and wipe down walls with a damp sponge to remove glue film. Allow the wall to dry completely before moving to repairs. If glue remains after drying, repeat the saturation and scrubbing step. PaintQuickGuide notes that patience here prevents future peeling and blistering after painting.
- Tip: Use a wide scraper to minimize gouging and keep blades sharp for clean edges.
- Pro tip: Work in a well-ventilated area and pace yourself in warm, dry conditions to speed drying and reduce dust.
Repairing and smoothing the wall surface
Wallpaper removal often reveals holes, cracks, and rough patches. Address these issues with a patching compound or joint compound, applying in thin layers and feathering the edges beyond the damaged area. For larger gaps, use fiberglass or paper tape to bridge the seam and prevent re-cracking. Allow each layer to dry fully, then sand with a fine-grit block until the surface is smooth and uniform. If you encounter uneven plaster, skim coat with a thin layer of joint compound and sand again once dry. The goal is a seamless canvas that accepts primer evenly, with no ridges or embedded glue showing through the finish. Inconsistent surfaces can telegraph through paint, especially in low-light rooms. A thorough repair job will save time on priming and two-coat painting later on.
- Note: Avoid over-sanding glossy patches that expose underlying materials or create new divots.
- Pro tip: Vacuum or wipe down the wall after sanding to remove dust before priming.
Cleaning and drying the wall
After repairs, wash the wall thoroughly to remove dust, chalk, and residual oils from past finishes. Use a mild detergent solution and a soft sponge, then rinse with clean water and allow the wall to dry completely—this can take several hours depending on room humidity and airflow. Do not proceed with priming until the surface is dry to the touch; moisture trapped under primer can cause poor adhesion and peeling. If you notice any damp spots, identify and fix the source of moisture before continuing. A dry, clean substrate yields a stronger bond for primer and paint, helping your finish last longer and resist staining. PaintQuickGuide stresses drying time as a key factor in achieving an even, professional look.
Priming for adhesion and stain blocking
Priming is essential after wallpaper removal. Use a bonding or stain-blocking primer to seal the surface, improve adhesion, and prevent stains from bleeding through. For plaster or patched drywall, a bonding primer helps unify the porous surface; for repairs or knotty wood, consider a shellac-based primer to block tough stains and odors. Apply one even coat across the entire wall, paying special attention to repaired seams and edges. In rooms with high humidity or smoke exposure, two coats of primer may be warranted to ensure uniform absorption. Allow the primer to dry per the manufacturer’s guidance before applying paint. A good primer makes the paint job easier, faster, and more durable, reducing the number of coats required.
- Pro tip: If the wall has a lot of repairs, a tinted primer (slightly gray or beige) can help you gauge coverage and reduce the number of paint coats.
- Warning: Do not skip priming on glossy surfaces, or you’ll likely see uneven color and stain show-through later.
Choosing paint types and sheen after wallpaper
Choose interior latex or acrylic paints for ease of clean-up and durability on walls formerly covered with wallpaper. For kitchens, bathrooms, or high-traffic areas, select a scrubbable or washable finish such as satin or semi-gloss. For living rooms or bedrooms, eggshell or satin finishes offer a balance of durability and softness. Avoid gloss finishes on large walls where imperfections may appear more pronounced. Consider light-reflecting primers and two coats of paint for the best results, especially on walls with repairs. If you’re repainting a previously wallpapered surface, you may need a slightly longer cure time between coats to ensure full adhesion and even color.
- Pro tip: Test color samples on small sections of the wall to compare how they interact with lighting before committing to a full room coat.
- Note: Always follow can directions for mixing, thinning, and recoat times to avoid coating issues.
The painting workflow: from prep to finish
A smooth, efficient workflow begins with prep and ends with a clean, durable finish. Begin by masking trim and fixtures, laying down drop cloths, and ensuring good ventilation. Apply primer, then the first coat of paint, allowing adequate drying time between coats. Lightly sand or wipe between coats for a flawless finish. In rooms with multiple windows and variable light, plan your coat order to minimize lap marks and ensure color consistency. If you notice any texture differences after the first coat, apply a light skim coat in problem areas and sand before applying the final coat. The goal is a uniform color and texture across all walls, with clean edges where walls meet ceilings and trim.
- Tip: Keep a damp cloth handy to wipe drips as you work to prevent staining on trim.
- Pro tip: Use an edge brush to finish corners and along trim before rolling wider sections for a crisp, professional edge.
Troubleshooting and common mistakes
Common missteps include skipping adhesive removal, not priming, and using the wrong sheen for a room. Adhesive residue can cause a blotchy finish and poor adhesion, while skipping primer can lead to stains and color inconsistency. Don’t rush the drying times between coats; premature recoating can trap solvents and lead to bubbling or cracking. For glossy patches, a quick scuff with sandpaper improves primer adherence. If you encounter stubborn stains after you’ve painted, consider applying a stain-blocking primer or a thin skim coat to even out the surface. Finally, always dispose of wallpaper remnants and solvents according to local regulations to minimize environmental impact.
- Warning: Do not sand lead-painted walls; follow proper lead-safe work practices and containment if lead is suspected.
- Note: Temperature and humidity affect drying times; adjust expectations accordingly.
Authority sources
The following sources provide guidance on wallpaper removal, wall prep, priming, and paint selection:
- https://www.epa.gov/lead (Lead paint safety and testing)
- https://www.hud.gov/program_offices/healthy_homes (Healthy Homes standards and wall preparation)
- https://www.osha.gov (Work safety during renovation)
- https://www.nps.gov (General guidelines on historic wall treatments and coatings) PaintQuickGuide emphasizes consulting official guidelines when dealing with potential lead paint and moisture issues to ensure safe, durable painting results.
Tools & Materials
- Putty knife (4-6 inch blade)(Sharp blade for scraping and patching edges to avoid gouges)
- Wallpaper scraper or stiff scraper(For lifting and removing wallpaper cleanly without tearing drywall paper)
- Utility knife(New blade; cut around outlets with care to avoid cable damage)
- Sponge and bucket with mild detergent(For cleaning glue residue after removal)
- Plastic drop cloths and painter’s tape(Protect floors and fixtures; tape edges before painting)
- Wallpaper remover or warm water plus mild soap(Liquids for adhesive loosening; follow product guidelines)
- Sanding block or sanding sponge (120-180 grit)(Feather edges of repairs; avoid gouging walls)
- Joint compound (pre-mixed) and/ or patching plaster(Fill holes and patch seams; allow to dry fully)
- Fiberglass or paper drywall tape(Bridge large seams; prevent cracking)
- Drywall patch or filler for larger holes(Use as needed for repair size)
- Primer: bonding or shellac-based(Seal porous surfaces and block stains; two coats if necessary)
- Interior latex or acrylic paint(Choose suitable sheen (eggshell, satin) for room use)
- Paint brushes (2-inch angled) and rollers (1/2-3/8" nap)(Even coverage; use a roller for large areas and a brush for edges)
- Roller tray and extension pole(Efficient application on larger walls)
- Dust mask or respirator(Wear during sanding if debris is present)
- Lead-testing kit (if house pre-1978)(Verify presence of lead paint; follow safety protocol)
Steps
Estimated time: 6-10 hours (including drying time)
- 1
Assess the wall and safety prerequisites
Begin by inspecting the wall type (plaster vs drywall), checking for moisture damage, cracks, and loose tape. If the house was built before 1978, perform a lead paint test and prepare containment if needed. Gather all tools and set up a clean, ventilated workspace.
Tip: Document wall conditions with photos to guide repairs later. - 2
Remove wallpaper and most adhesive
Score or mist wallpaper to loosen glue, then scrape in sections with a putty knife. Rinse with a detergent solution, wipe clean, and rinse again. Allow walls to dry completely before continuing.
Tip: Work in a well-ventilated area to speed drying and reduce dust. - 3
Inspect and patch wall damage
Identify holes, cracks, and gouges; fill with joint compound or patching plaster. Allow patches to dry fully, then sand until the surface is smooth and uniform.
Tip: Feather patch edges to avoid visible ridges after painting. - 4
Clean and dry the surface
Wipe away residual dust and residue. Ensure walls are dry to the touch; use a tack cloth to remove fine dust before priming.
Tip: Do not prime a damp surface to avoid improper adhesion. - 5
Apply a bonding/ stain-blocking primer
Choose a primer appropriate for the surface. Apply a thin, even coat; let dry according to the manufacturer’s directions. Keep surfaces uniform to prevent blotching on the finished coat.
Tip: Tint the primer slightly if you’re unsure about final color depth. - 6
Prepare for painting: caulk and protect
Caulk gaps along trim edges and where walls meet ceilings. Apply painter’s tape to trim edges and lay down protective coverings for fixtures.
Tip: Tape off outlets and switches with painter’s tape to prevent paint on them. - 7
Apply the first coat of paint
Begin with light, even pressure using long, smooth strokes. Maintain a wet edge to avoid lap marks. Use a brush for edges and a roller for large surfaces.
Tip: Do not overload the roller; apply thin coats to avoid sagging. - 8
Apply a second coat and assess color
After the first coat dries, inspect for coverage issues. Apply a second coat if needed, ensuring even color and finish across all walls.
Tip: If color looks uneven, apply a third light coat rather than a heavy one. - 9
Final touch-ups and cleanup
Inspect edges and corners, perform any needed touch-ups, remove tape, and clean brushes and rollers. Dispose of waste responsibly and ventilate again to help cure the paint.
Tip: Take a final look under different lighting to catch missed spots. - 10
Cure time and final inspection
Allow the finish to cure as recommended by the paint manufacturer, typically several days depending on humidity. Inspect for peeling or blistering and address promptly if needed.
Tip: Avoid heavy cleaning for the first week to let the finish harden.
Your Questions Answered
Can you paint walls immediately after removing wallpaper?
Not usually. Allow adequate time for glue residues to be removed, walls to dry completely, and patches to cure before priming. Skipping steps can lead to adhesion failures or a blotchy finish.
Usually you should wait for the walls to dry and patches to cure before priming and painting.
What primer should I use after wallpaper removal?
A bonding or shellac-based primer is typically best after wallpaper removal because it improves adhesion and blocks stains from adhesives. Always follow the product’s instructions for drying times.
Use a bonding or shellac-based primer for best adhesion and stain blocking.
How long does primer dry before painting?
Dry times vary by product and environmental conditions. In typical indoor conditions, allow 1-2 hours for latex primers and longer for oil-based options. Check the label for exact guidance and don’t rush to coat.
Most primers dry in 1-2 hours in good conditions, but follow the label for exact times.
What about lead paint safety?
If your home was built before 1978, test for lead paint and follow lead-safe work practices. Do not sand or dry-scrape lead paint without containment; consider hiring a pro for disturbing lead-based finishes.
If the home is old, test for lead and follow safety guidelines before renovation.
How can I fix stubborn glue after wallpaper removal?
Re-wet the area with warm water or wallpaper remover, then scrub with a non-abrasive sponge. If glue persists, apply a second treatment and rinse. Patience reduces the risk of wall damage.
Re-wet and scrub; if stubborn, re-treat and rinse thoroughly.
Watch Video
Quick Summary
- Prepare walls thoroughly before painting
- Prime to ensure adhesion and stain-blocking
- Use even coats and allow proper drying between coats
- Address repairs and moisture issues before finishing
- Follow safety guidelines for lead paint and ventilation