How to Open a Paint Can: A DIY Guide
Learn to open a paint can safely and efficiently with our step-by-step guide. Get the right tools, prevent spills, and prep for your next DIY painting project with PaintQuickGuide.

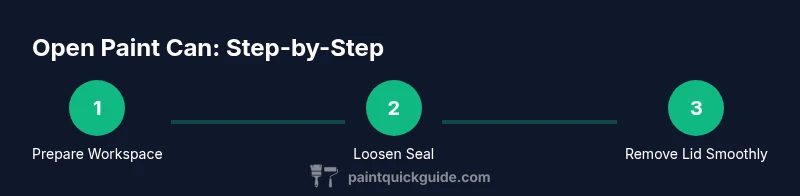
To open a paint can safely, start by inspecting the lid and rim for damage. Tap around the edge to loosen the seal, then slip a flat-head screwdriver or paint can opener under the lip and pry upward evenly. Wipe off drips, set the lid aside, and stir the contents briefly before use to ensure a smooth, uniform finish.
Safety and Setup
Paints contain solvents and pigments that can irritate skin and eyes. If you're learning how to open a paint can, begin with safety as your first step. According to PaintQuickGuide, a calm workspace and basic PPE dramatically reduce spills and splatters. Put on gloves and eye protection, protect your clothing, and ensure the room is well-ventilated. Clear a sturdy surface large enough to accommodate the can and a few cleanup rags. Have paper towels within reach. Consider turning off fans that blow toward your working area to prevent dust or paint particles from migrating. By establishing these precautions, you’ll lower the risk of accidents, which makes lid removal easier and cleaner, and it sets the stage for a smooth paint job. In 2026, paints are often water-based, which reduces fumes but does not eliminate the need for ventilation. A thoughtful setup also minimizes cleanup later, saving time and frustration.
Workspace Preparation and Cleanup
Before you touch the can, protect the surrounding area with a drop cloth or old sheet. Move furniture away, lay down washable mats, and place a tray near the can to catch any drips. Have a damp rag handy for quick cleanup and a separate dry rag for wiping the lid and rim. Keeping the area tidy reduces the chance of accidental spills, which is especially important when working with bright colors or dark finishes. If you’re painting in a tight space, open a window or use a small fan to move air without blowing paint splatter toward you. A clean, organized workspace makes the actual lid removal faster and safer, and it helps you finish your project with professional-looking results. PaintQuickGuide recommends a dedicated space for paint-related tasks to minimize cross-contamination with other household items.
Inspecting the Can and Lid
Start by inspecting the can’s body, lid, and rim for dents, rust, or punctures. A damaged rim can cause an improper seal or lid misfit, which increases spill risk. If you notice a crushed edge, do not force the lid; instead, set the can aside and choose another container or contact the supplier. Look at the label for warnings and safety data, and check the contents for separation or unusual clumps, which can indicate spoilage or improper mixing. A clean lid matters: if paint has dried around the rim, it can prevent a proper seal. Wipe the lid edge with a damp cloth to remove film, oils, or dust before opening. The goal is to ensure you can remove the lid smoothly without creating splashes or damaging the can.
Loosening the Seal Without Spills
Loosening the seal around the rim is the core skill in how to open a paint can safely. Start by lightly tapping the rim all around the edge with the handle of a flat-head screwdriver or a dedicated can opener. The goal is to break the inner seal without causing a sudden pop that could fling paint. Work slowly, especially if the paint has settled or thickened. If you feel resistance, pause and recheck the rim for debris or dried film. For stubborn cans, you can run a warm cloth around the rim to soften any dried paint or sealant. Avoid prying too hard in a single spot; distribute pressure evenly to reduce the risk of bending the lid or damaging the can.
Lifting the Lid Properly
With the seal loosened, insert your tool under the lip and slowly pry upward. Maintain a steady angle and work your way around the lid so you lift evenly rather than jutting from one side. A common mistake is to twist too aggressively, which can bend the lid or spill paint. If the lid sticks, try rotating the can slightly to reposition the tool and use gentle, incremental pressure. Once the lid begins to lift, switch to using your other hand to support the lid and keep it level as it comes free. Set the lid on a clean surface with the outer edge facing up to prevent drips.
Cleaning, Storing, and Re-Sealing
After removing the lid, wipe the rim and the outside of the can to remove any splatters. A dry cloth or paper towel is ideal for this step. If you anticipate storing the paint, wipe the inner edge of the lid and the inside rim as well to remove film or residue that can prevent a tight seal. When resealing, place the lid squarely on the can and press down gently around the edge to re-create the seal. If you plan to store for an extended period, consider placing a small piece of plastic wrap between the lid and the rim to help maintain a airtight seal in humid environments. Label the can with date and color for future reference.
Stirring and Color Checking
Before you begin painting, give the paint a quick stir to re-suspend pigments that may have settled. Use a clean stir stick or paddle and avoid introducing air bubbles. Check the color and consistency on a small, inconspicuous test patch on a scrap surface or cardboard. This ensures the shade matches the sample or swatch and avoids surprises once you start applying it to walls or trim. If the color has changed significantly or shows separation, thoroughly mix or re-pour as needed. This step helps ensure a smooth, uniform finish when you actually paint.
Troubleshooting Common Scenarios
If the lid refuses to budge, don’t force it. Take a moment to re-check for dents, dried paint, or stubborn seal residues. Use warm water or a mild solvent on the rim edge to soften film and try again with even pressure. A can opener or lid tool with a wider wedge can help distribute leverage more evenly and prevent lid deformation. For extremely tight seals, consider allowing the can to rest for a few minutes, then try again with the tool positioned at a different angle. Always wear gloves and eye protection, and keep your workspace clean to prevent slips.
Oil-Based vs Water-Based Paints: Handling Differences
The basic lid-removal technique is similar for both oil-based and water-based paints, but safety considerations and cleanup differ. Oil-based paints often require mineral spirits or paints thinner for cleanup, and their fumes can be more pungent, so ensure good ventilation. Water-based paints are generally easier to manage, with less odor and quicker cleanup. Regardless of the formula, keep lids and rims clean and store cans upright to prevent leaks. If you’re unsure about the correct solvent or disposal method, consult the product label or local regulations.
Tools & Materials
- Flat-head screwdriver (small to medium blade)(Use the flat edge to slip under the lid lip and loosen the seal evenly)
- Paint can opener / lid tool(Specialized tool designed for paint cans; can substitute with a flat-head if needed)
- Rag or paper towels(For wiping spills and cleaning the lid rim)
- Gloves(Protect skin from paint and solvents)
- Drop cloth or old sheet(Protect surrounding surfaces from drips)
- Warm water or mild solvent(Useful for softening dried film around the rim)
Steps
Estimated time: 10-15 minutes
- 1
Prepare and protect the workspace
Clear the area, lay a drop cloth, and put on gloves and eye protection. Ensure good ventilation and have towels within reach. A tidy workspace reduces the chance of spills and makes lid removal safer.
Tip: Position the can on a stable surface to prevent tipping during lid removal. - 2
Inspect the can and lid
Check for dents, rust, or damage on the rim and lid. Damaged rims can prevent a proper seal and complicate opening. Clean the rim if you see any film or dust before continuing.
Tip: If the rim is severely damaged, consider transferring paint to another container to avoid leaks. - 3
Loosen the rim seal
Gently tap the rim all around with the handle of your tool to break the inner seal. Do not jab or twist in a single spot. Work gradually to avoid splashing.
Tip: Keep a steady hand and maintain even pressure around the circumference. - 4
Pries the lid evenly
Insert the tool under the lip and lift in a circular motion, moving around the lid until it starts to detach. Stop as soon as the lid lifts to avoid bending it.
Tip: Support the lid with your other hand as it comes loose. - 5
Wipe and set the lid aside
Wipe the lid’s rim and the can’s edge to prevent drips. Place the lid upright on a clean surface to protect the interior and avoid contamination.
Tip: Have a damp cloth ready to clean any lingering film on the rim. - 6
Stir and check color
Give the paint a brief stir to re-suspend pigments. Test on a scrap surface to confirm shade and consistency before you start painting.
Tip: Use a clean stir stick to avoid introducing impurities.
Your Questions Answered
What is the safest way to open a paint can without spilling?
Loosen the seal evenly around the rim with a tool, then pry the lid up slowly to avoid splashes. Wipe the rim and keep the lid level as it comes off.
Loosen the seal evenly, then lift the lid slowly while keeping it level to prevent spills.
Can I reuse the lid after opening?
Yes, if the lid and rim are clean and undamaged. Re-seal tightly after use and store upright. If the lid shows damage, consider replacing it.
Yes, as long as the lid and rim are clean and undamaged, reseal tightly for storage.
What should I do if the lid won’t budge?
Pause and inspect for dents or dried film. Try warming the rim with a damp cloth or gentle heat and use a broader wedge to apply even pressure. Do not force the lid.
If the lid won't budge, inspect for damage, warm the rim slightly, and try again with even pressure.
Is there a difference opening oil-based vs water-based paints?
The opening method is similar, but oil-based paints may require stronger solvents for cleanup and better ventilation due to fumes. Follow the label for safety guidance and disposal.
The method is similar, but oil-based paints need good ventilation and proper cleanup solvents.
How do I prevent dried paint from clogging the lid?
Wipe the rim after use, store upright, and reseal promptly. If paint dries on the rim, clean it before attempting to reseal.
Wipe the rim after use and reseal promptly to avoid drying on the lid.
What tools can substitute if I don’t have a dedicated lid opener?
A small flat-head screwdriver can substitute a lid opener in a pinch. Use care to avoid bending the lid and ensure even leverage around the rim.
If you don’t have a lid opener, a small flat-head screwdriver works—just be gentle and even with leverage.
Watch Video
Quick Summary
- Prepare the workspace and wear PPE before opening.
- Loosen the seal evenly to prevent spills.
- Remove the lid carefully and wipe the rim first.
- Stir paint and check color before use.