How to Paint a Wall: A Complete DIY Guide
A thorough, step-by-step approach to painting interior walls, covering prep, priming, cutting in, rolling, drying times, and cleanup for a professional-looking finish.

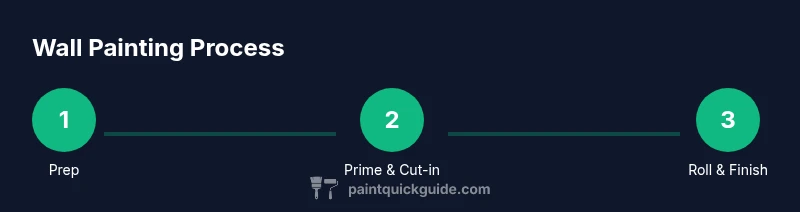
Embarking on a successful wall paint project starts with solid prep and the right supplies. This guide shows how to paint a wall from setup to cleanup, including choosing finishes, protecting floors, and applying coats for a smooth, durable finish. Follow step-by-step instructions to minimize drips and ensure even color when you paint a wall.
Surface preparation: the foundation of a flawless finish
According to PaintQuickGuide, proper surface prep is the single most important step in achieving a long-lasting paint job. Start by clearing the room, removing or covering furniture, and protecting floors with drop cloths. Inspect the walls for repairs, such as cracks, holes, and chipped paint. Patch defects with spackle or patching compound, then lightly sand until the surface feels smooth to the touch. Dust the walls and allow any patching compound to dry completely before moving on. The goal is a clean, dry, and even surface that accepts paint evenly. When you learn how to paint a wall, you set the stage for a durable, uniform finish that hides flaws rather than highlighting them.
Selecting paint and finish types
Walls in living rooms, bedrooms, and kitchens perform differently under various lighting and humidity. For interior walls, most DIYers choose matte or eggshell finishes for a soft look that hides minor imperfections, while satin offers a bit more durability in high-traffic areas. When you decide how to paint a wall, consider the room’s function, lighting, and cleaning needs. Higher sheen finishes are easier to wipe but show brush marks; lower sheens look smoother but aren’t as scrub-friendly. Always buy sample quantities to test color and finish under your lighting conditions.
Assessing wall condition and repairs
Cracks, nail pops, and water damage require proper repair before painting. Use a putty knife to apply patching compound, feathering the edges so the repair blends with the surrounding wall. Allow it to dry completely, then sand flush. If you detect peeling paint, remove loose material and spot-prime the repaired area. These steps help prevent peeling and ensure the new color adheres evenly, which is especially important when you’re learning how to paint a wall and aiming for a professional result.
Protecting floors, furniture, and trim
Protective measures save time during cleanup and prevent distressing accidents. Lay down drop cloths that cover the entire floor area and secure with painter’s tape along baseboards. Move furniture away from walls or into the center and cover with plastic. Tape edges of trim with 1-2 inch tape to create crisp lines, and remove light fixtures if possible to avoid splatters. The more you protect, the less retouching you’ll have to do later.
Priming when needed
Primer helps color coverage and adhesion, especially on patched areas, glossy surfaces, or stains. Choose a stain-blocking primer for any water or smoke damage and a basic primer for general walls. Apply a thin, even coat and let it dry according to the manufacturer’s instructions before painting. Priming is a small extra step that yields big gains in finish quality, particularly when you’re new to how to paint a wall.
Cutting in: edges and corners
Cutting in with a brush around ceilings, corners, and trim creates a crisp boundary before rolling. Dip the brush lightly and use long, smooth strokes to lay down a clean edge. Work in small sections, overlapping slightly with the rolling area to minimize visible seams. Proper cutting in reduces the risk of missed spots after rolling and improves the overall appearance of your finished wall.
Rolling technique for even coverage
Start rolling in a W pattern to distribute paint evenly, then fill in the gaps with horizontal strokes. Keep a light touch and avoid pressing too hard, which can cause lap marks or uneven color. Re-dip the roller occasionally to maintain consistent coverage and keep the paint from drying on the roller. With practice, your technique will produce a smooth, uniform texture that looks professional.
Applying coats and drying times
Most interior walls require two coats for full color and even coverage, especially with lighter colors or dramatic shifts. Allow the first coat to dry fully before applying the second, and avoid rushing the process. Temperatures and humidity affect drying times, so stay patient and plan for proper curing. When you paint a wall, a second coat helps hide underlying disparities and yields a more durable finish.
Common mistakes and how to fix them
A few common missteps can ruin a project, such as over-wetting the wall, using low-quality tools, or skipping primer. If you see drip runs, feather the edge into surrounding areas and let the paint dry before applying a touch-up. Lap marks can be minimized by maintaining a wet edge and continually working in sections with consistent pressure. Learn from these issues to improve your next attempt.
Clean up and maintenance
Clean brushes and rollers promptly with water or paint thinner as appropriate for the paint type. Wipe splatters and spills while fresh, and store leftover paint in labeled containers for future touch-ups. Ventilate the room during cleanup to reduce fumes, and store tools in a dry place to prevent rust or mold. Proper maintenance makes future projects faster and easier.
Final inspection and touch-ups
Once the wall is dry, inspect for missed spots, drips, or uneven coloration. Lightly sand any rough spots and apply a final touch-up coat where needed. Remove painter’s tape carefully, pulling away from the painted surface at a sharp angle. This final check ensures a polished finish and a sense of accomplishment when you learn how to paint a wall properly.
Tools & Materials
- Drop cloths or plastic sheeting(Cover floors and furniture; choose 6-8 mil thickness)
- Painter's tape (3-4 inch)(Seal edges; press firmly to avoid bleed)
- Patch material (spackle or joint compound)(Use lightweight compound for easier sanding)
- Putty knife(Smooths patches; feather edges)
- Sandpaper or sanding block(Fine grit (180-220) for walls)
- Primer(Choose stain-blocking or general-purpose primer)
- Wall paint (your color)(Ensure color and finish match)
- 4-inch angled sash brush(For cutting in edges and corners)
- Roller frame, 9-inch tray, and 3/8-inch nap roller(Use a compatible roller cover for walls)
- Ladder or step stool(Stable height for reaching ceilings)
- Dust mask and safety goggles(Protect lungs and eyes from dust and fumes)
- Paint thinner or brush cleaner(Only if using oil-based paints)
Steps
Estimated time: 2-4 hours
- 1
Prepare the room
Move furniture out or to the center and cover with drop cloths. Remove wall fixtures if possible. This keeps items safe and minimizes cleanup later. Taking time to prepare reduces surprises once you start painting.
Tip: Pro tip: Tape off outlets and light switches to protect them during painting. - 2
Protect and tape
Lay down protective coverings, then apply painter’s tape to trim, baseboards, and adjacent walls. Press tape firmly to avoid paint bleed and remove it after the paint has set but not fully cured, for crisp edges.
Tip: Pro tip: Use a magic eraser for stubborn tape residue after removal. - 3
Patch and sand
Fill holes and cracks with patch material, then sand smooth once dry. A flush surface prevents dimples and ensures even color absorption.
Tip: Pro tip: Lightly dampen dust with a tack cloth before painting to pick up fine particles. - 4
Prime if needed
Apply primer to patched areas, glossy surfaces, or stains. Let it dry fully; priming improves coverage and color uniformity, especially when switching from dark to light colors.
Tip: Pro tip: Use a bonding primer on slick surfaces for better adhesion. - 5
Cut in edges
Use a 4-inch angled brush to paint around ceilings, corners, and trim. Use slow, even strokes and maintain a wet edge to reduce lap marks.
Tip: Pro tip: Always paint a 2-3 inch border before rolling to maintain control. - 6
Roll the wall, start mid
Dip the roller and remove excess paint. Roll in a W pattern to distribute paint, then fill in with horizontal strokes. Repeat in sections, overlapping slightly.
Tip: Pro tip: Roll from top to bottom in a steady, light pressure to avoid splatter. - 7
First coat drying
Allow the first coat to dry per manufacturer guidelines, room conditions permitting. Avoid touching or reworking until dry to prevent pulling paint.
Tip: Pro tip: Increase airflow with a fan to speed drying without creating gusts. - 8
Second coat
Apply a second coat for even color and sheen. Check for thin spots and adjust technique as needed. Two coats provide durable coverage and richer color.
Tip: Pro tip: Maintain a wet edge between strokes to prevent lap marks. - 9
Address flaws
Inspect for drips or missed spots and touch up accordingly. Feather touch-ups into surrounding paint to blend edges.
Tip: Pro tip: Lightly sand any raised spots before touch-ups. - 10
Cleanup
Remove tape carefully while paint is tacky to crisp lines. Clean brushes and rollers promptly and seal paint cans properly for storage.
Tip: Pro tip: Label cans with color and date to simplify future touch-ups. - 11
Final inspection
Look for even tone, consistent sheen, and clean edges. Make any last touch-ups and enjoy your newly painted wall.
Tip: Pro tip: Step back and view the wall from different angles in both bright and dim light.
Your Questions Answered
What prep is essential before painting a wall?
Essential prep includes cleaning the surface, repairing any cracks or holes, sanding smooth, and priming as needed. Skipping prep can lead to poor adhesion and uneven color.
Start with cleaning, patching, and sanding, then prime.
How long does paint take to dry between coats?
Drying times vary with temperature and humidity. Plan for several hours of drying between coats and avoid applying the second coat on a damp surface.
Dry times vary; ensure the first coat is dry before applying the second.
Do I need to prime before painting a wall?
Priming is recommended if the wall is patched, glossy, or stained. It improves adhesion and color uniformity, especially when switching from dark to light colors.
Yes, prime patched or glossy areas for best results.
What is the best interior finish for walls?
Eggshell or satin finishes are common for living spaces due to balance of durability and appearance. They’re easier to clean than flat finishes but show flaws less than high-sheen options.
Eggshell or satin is a good balance of look and durability.
Can I paint over wallpaper?
Painting over wallpaper is possible with proper prep and a bonding primer. If the wallpaper is peeling or textured, removing it yields better results.
It can be done, but preparation matters—prime and seal first.
Watch Video
Quick Summary
- Prepare the surface thoroughly before painting
- Protect floors and trim to reduce cleanup
- Apply primer when needed for better coverage
- Use cutting-in and rolling techniques for crisp edges and even color
- Inspect and touch up after the final coat