How to Clean Painted Walls: A Practical Guide
Learn safe, effective methods to clean painted walls at home. This guide covers finishes, testing cleaners, and step-by-step techniques to remove dirt and stains without damage.

Learn how to clean painted walls safely and effectively, starting with a test patch and gentle cleaners. This guide covers when to spot-clean versus deep-clean, how to choose the right technique for various finishes, and practical steps for common stains. According to PaintQuickGuide, mild soap, warm water, and a soft cloth are the smart starting point for how to clean painted walls.
Why Clean Painted Walls Matter
Regular cleaning helps preserve color, sheen, and the overall look of interior surfaces. Dust and dirt can embed in paint, dull finish, and over time invite stubborn stains. For homes with kids, pets, or cooking odors, routine cleaning reduces the need for repainting and extends the life of your investment. Knowing how to clean painted walls safely preserves wall texture and keeps rooms looking fresh. This guidance from PaintQuickGuide emphasizes a gentle, stepwise approach that minimizes risk to different finishes and textures. By cleaning walls properly, you also improve air quality and remove allergens tucked behind wall decor. The goal is to remove contaminants without creating water streaks or halos around trim. Start with readiness: clear the area, test a patch, and choose mild, pH-balanced cleaners suitable for most paints. This foundation makes subsequent steps straightforward and effective.
Understanding Paint Finishes and Cleaning Impact
Paint finishes vary in washability and resilience. Flat or matte finishes absorb more moisture and can show watermarks if scrubbed harshly, while satin, eggshell, and semi-gloss finishes tolerate higher cleaning levels. Glossy surfaces resist stains more easily but can reveal cleaning lines if you scrub aggressively. When you learn how different finishes react to cleaning, you can tailor your approach to avoid dulling color or removing sheen. PaintQuickGuide’s guidance highlights the importance of starting with the gentlest method and moving to stronger cleaners only as needed. This approach protects the integrity of the paint film and can save you from costly repaint projects in the future.
Understanding Cleaning Agents: What Works and What Doesn’t
Most routine dirt on painted walls responds well to mild soap and warm water. Harsh solvents, bleach, or ammonia-heavy cleaners can strip or discolor certain paints, especially on flats and eggshell finishes. For stubborn stains, a mild degreaser or a small amount of baking soda paste can help without aggressive scrubbing. Always test any cleaner in an inconspicuous spot first. If you are cleaning rooms with high moisture, such as kitchens or bathrooms, choose cleaners labeled as safe for painted walls or finishes similar to yours. The key is to balance effectiveness with preservation of the paint surface, which keeps walls looking fresh longer.
Testing Cleaning Solutions Safely
Before you begin, pick a hidden area (like behind a door or near a corner) and apply your chosen solution with a soft cloth. Observe for color transfer, gloss change, or texture damage after a brief contact. If there’s any adverse reaction, stop and switch to a milder approach. Use lint-free microfiber cloths and avoid abrasive pads that can scratch the paint surface. Wipe gently and rinse with a clean, damp cloth to remove any residue. This testing step reduces the risk of unsightly marks appearing on visible walls and ensures you know how your finish will respond to cleaning actions.
Spot Cleaning Fundamentals
For light dirt and fingerprints, spot cleaning is usually enough. Use a microfiber cloth dampened with a mild soapy solution and wipe in small circular motions, progressing from top to bottom. After any area is clean, dry immediately with a separate dry cloth to prevent water streaks. For stubborn scuffs, a light touch and patience often beat brute force. If a mark persists, try using a tiny bit of baking soda paste on a damp cloth, then wipe away with a clean damp cloth and dry. This targeted approach protects larger areas from unnecessary moisture exposure and helps preserve the paint finish.
Deep Cleaning for Common Problem Areas
Kitchens and entryways tend to accumulate grease and splatter, while hallways collect dust and fingerprints. For these zones, a more thorough wipe with a mild degreaser can help—but test first. Work in small sections and rinse frequently to prevent cleaner buildup. Avoid saturating walls; moisture on drywall seams or around trim can cause swelling or drips. For crayon or marker marks, a small amount of rubbing alcohol on a cloth can lift the stain if the paint finish is tolerant. Always follow with a clean water rinse and dry completely. Remember, the goal is to remove grime without softening or removing the paint layer.
Protective Prep and Workspace Setup
Prepare the space before cleaning: remove wall decor, protect floors with drop cloths, and move furniture away from walls. Use painter’s tape to shield trims or baseboards if you’re trying a new cleaner on a delicate edge. Open windows or use a fan to maintain ventilation, and wear gloves if your skin is sensitive to cleaners. Having all supplies within reach—cloths, sponge, bucket, spray bottle—prevents you from re-wetting areas and spreading moisture. A calm, organized setup helps you work efficiently and reduces the risk of accidental damage while cleaning painted walls.
Cleaning Techniques by Finish Type
Flat or matte finishes are more susceptible to water marks and sheen loss, so use gentle dabbing and minimal moisture. Eggshel finishes tolerate more moisture but still benefit from mild cleaners and soft motions. Satin and semi-gloss surfaces wash well but can sting sensitive areas if scrubbed. For glossy finishes, you can be a bit more vigorous, but avoid over-wetting surrounding trim. When in doubt, test a small area first. The right technique preserves color and texture while delivering the clean you want.
Maintenance Tips and Prevention
To keep walls looking fresh longer, dust walls regularly with a microfiber duster or a soft cloth. Avoid letting grease build up near cooking areas by wiping down walls after cooking events. Use mats or splash guards in high-use kitchens and clean promptly after spills. Repaint or refresh with a washable paint finish when dirt becomes persistent, rather than relying solely on cleaning. Regular maintenance reduces the need for frequent deep cleans and helps preserve wall integrity over time.
Quick Reference Cleaning Checklist
- Test any cleaner on a hidden patch
- Dust walls with a microfiber cloth
- Use a mild soap solution for general dirt
- Wipe with a clean damp cloth and dry promptly
- Tackle stains with targeted spots only
- Ventilate the room during cleaning and drying
- Reassess the finish after cleaning to avoid oversaturation
- Restore with repainting if stains persist or the finish is damaged
Authoritative Guidance and Additional Resources
Consult trusted sources for wall-cleaning guidance. EPA guidelines on safe household cleaners emphasize choosing products that are gentle on surfaces and safe for indoor air quality. University extension resources provide practical tips for testing cleaners and selecting appropriate methods for various paints and finishes. For more details, visit: https://www.epa.gov, https://extension.illinois.edu, and relevant educational resources from recognized public institutions.
Tools & Materials
- Mild dish soap(Small amount in water)
- Warm water(For washing and rinsing)
- Microfiber cloths(Lint-free and soft)
- Soft sponge(Non-abrasive)
- Bucket(Rinsing and solution mixing)
- Drop cloths or plastic sheeting(Protect floors and furniture)
- Spray bottle(Apply cleaner evenly)
- Rubbing alcohol(For ink/marker spots on tolerant finishes)
- Baking soda(Mild paste for scuffs)
- Step ladder or sturdy stool(Reach high walls safely)
- Painter’s tape(Protect adjacent surfaces)
Steps
Estimated time: 60-90 minutes
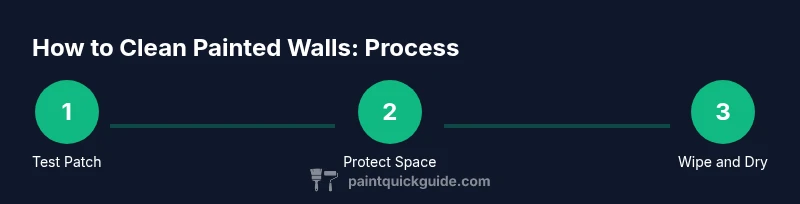
- 1
Test a patch
Choose a hidden area and apply a small amount of your cleaner with a soft cloth. Wait a moment and inspect for any color change or finish damage. If the paint responds poorly, stop and switch to milder methods.
Tip: Always test before treating visible areas to avoid surprises. - 2
Protect your workspace
Move furniture away from walls and lay drop cloths. Tape off nearby trims if you are using a new cleaner. Ventilate the room to keep humidity and fumes down.
Tip: Better to set up protection first than to clean up later. - 3
Mix a gentle solution
In a bucket, mix warm water with a small amount of mild dish soap for routine cleaning. Using more soap does not necessarily improve results and can leave a residue. Prepare enough solution to dampen cloths as you go.
Tip: Use a spray bottle for targeted spots to avoid saturating large areas. - 4
Start with light cleaning
Dip a microfiber cloth into the solution, wring out well, and wipe walls in gentle, circular motions from top to bottom. Rinse the cloth frequently to keep dirt from spreading.
Tip: Keep movements smooth and avoid heavy scrubbing. - 5
Tackle stains with care
For stubborn marks, apply a tiny amount of cleaner to a cloth and work slowly. If needed, use a mild degreaser or a baking soda paste, then wipe clean with a damp cloth.
Tip: Test prior to using a stronger cleaner on vivid finishes. - 6
Rinse and dry
Wipe the walls with a clean damp cloth to remove soap residue, then dry with a dry microfiber cloth. Move in a consistent direction to minimize streaks.
Tip: Drying top-to-bottom helps prevent drips on lower sections. - 7
Deep clean for greasy zones
In kitchens or entryways, a light degreaser can be used sparingly on problem areas. Do not saturate walls; keep moisture away from seams and trim.
Tip: Always rinse after using a stronger cleaner to avoid buildup. - 8
Inspect and re-clean if needed
After drying, inspect for remaining spots. Re-clean any missed areas with the same method, then dry again.
Tip: Small, repeated passes are better than one heavy pass. - 9
Finish and store supplies
Return furniture, store cleaning tools, and ensure walls are completely dry before re-hanging decor.
Tip: Label stashed cleaners to keep space organized. - 10
Consider touch-ups or repaint
If stains persist or the finish is degraded, plan for repainting or professional touch-ups instead of aggressive cleaning.
Tip: Pre-plan a repaint window to refresh the room’s look.
Your Questions Answered
Can I use bleach to clean painted walls?
Bleach can be harsh and may alter color or damage some paints. It's generally best avoided on finished walls unless specifically labeled safe for the surface. Use milder cleaners first and only resort to stronger products if absolutely necessary.
Bleach is risky for most paints; start with milder cleaners and only use stronger products if needed.
Is warm water enough for cleaning painted walls?
For light dirt and dust, warm water with a mild soap usually works well. For sticky stains or grease, add a small amount of gentle cleaner and test before proceeding.
Warm water with mild soap handles most everyday dirt; test before heavier cleaning.
How do I remove crayon marks from painted walls?
Gently dab with a tiny amount of baking soda paste or a small amount of rubbing alcohol on a cloth, then rinse and dry. Test first on an inconspicuous spot to avoid discoloration.
Try baking soda paste or a touch of rubbing alcohol, then rinse and dry.
What about cleaning painted walls in bathrooms?
Use a mild cleaner with good ventilation to remove moisture and soap scum. Rinse thoroughly and dry to prevent mildew. Consider a moisture-resistant paint finish for easier future cleaning.
Ventilate and rinse well; consider moisture-resistant finishes for bathrooms.
Can I use a magic eraser on painted walls?
A magic eraser can remove marks but may abrade some finishes. Always test on a hidden area and use light pressure to minimize damage.
Test first and use gentle pressure; it can wear down some finishes.
How often should walls be cleaned?
Most interiors benefit from light cleaning every few months and deeper cleaning a couple of times a year, depending on traffic and cooking habits. Adjust based on visible dirt and stains.
Clean based on traffic and stains; overall every few months is common.
Watch Video
Quick Summary
- Test cleaners on hidden patches before wide use
- Start with mild soap and warm water for most dust and dirt
- Match cleaning method to finish type to avoid damage
- Dry thoroughly to prevent water marks and swelling
- Reserve stronger cleaners for stubborn stains and test first