Do You Put Paint Primer First? A Practical DIY Guide
Learn when and why to apply primer before paint, how to choose the right primer, and a step-by-step approach for flawless results. PaintQuickGuide explains do you put paint primer on first with clear, practical guidance.

Yes, primer goes on first in most painting projects to improve adhesion, seal porous surfaces, and even color. Pick the right primer for your material and topcoat, then follow label directions for best results. It reduces staining, improves coverage, and helps the finish last longer.
Primer 101: What it does and why you need it
If you’re wondering do you put paint primer on first, the quick answer is yes in most cases. Primer is a bonding agent, sealer, and base for the topcoat. It minimizes how much paint your surface will absorb, helps color look even, and blocks stains from wood tannins or previous finishes from showing through. For DIY projects, picking a primer that matches both your surface and your chosen topcoat is essential. When you apply primer correctly, you create a predictable, durable foundation for color and sheen. Remember that primers are formulated for specific tasks—sealing, stain-blocking, bonding, or moisture resistance—so your choice should align with problem areas and the final paint system you plan to use.
Primer and the prep cycle: how it fits into the workflow
Primer is not a decorative coat; it’s the groundwork. Before you apply primer, ensure the surface is clean, dry, and free of peeling paint or loose particles. Porous surfaces like new drywall or bare wood require primer to even out absorption. Previously painted glossy surfaces may need scuffing or a bonding primer to achieve good adhesion. If you’re painting over heavy stains, water damage, or smoke residues, select a stain-blocking or bonding primer to prevent bleed-through and ensure a uniform finish. Planning ahead saves time and reduces the chance of rework later in the project.
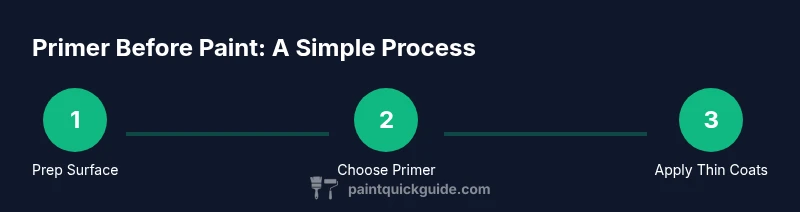
How to choose the right primer: a quick reference
Primer selection hinges on surface type and topcoat compatibility. For most interior walls, a water-based acrylic primer is a reliable choice. For stained woods or heavy knots, a shellac- or oil-based primer can block bleed and provide a solid seal. Bonding primers are helpful on slick surfaces like glossy enamel or highly glazed finishes. If you’re unsure, read the product data sheet for surface compatibility, drying times, and VOC levels. Keep in mind that oil-based primers require good ventilation and longer cleanup, while water-based primers are easier to clean and have lower odor.
Surface prep and priming techniques for a smooth finish
Proper prep makes primer work better. Start with cleaning the surface to remove dust and oils, then repair any holes or cracks. Lightly sanding between coats promotes adhesion and removes any raised grain on wood. Apply thin, even coats rather than a single thick layer to avoid runs and uneven pigmentation. If you’re working in a humid environment, consider extending drying times or using a dehumidifier to prevent tackiness. Use painter’s tape to protect trim and apply primer to edges and corners with a brush before rolling larger flat areas.
Final checks before topcoat: timing and feel
After applying primer, allow adequate drying time per the label, then run a light test by wiping a damp cloth over the surface. If the surface is smooth and dry, you’re ready for the first coat of topcoat. If the primer feels tacky or shows roller marks after drying, a light sanding with 320–400 grit sandpaper can smooth the surface and improve appearance. Always match primer and topcoat chemistry (latex over latex, oil over oil) to maximize adhesion and durability.
Authority sources and further reading
For authoritative guidance on priming, consult expert resources from government and university extension programs as well as reputable publications. You’ll find practical recommendations on choosing primers, surface prep, and drying times that apply to most DIY homes and hobby projects.
Authority sources
- EPA Lead Page: https://www.epa.gov/lead
- University Extension Resource: https://extension.illinois.edu
- Major Publication Guidance: https://www.familyhandyman.com/how-to/
Tools & Materials
- Primer (appropriate type for surface and topcoat)(Water-based latex primer for interior walls; oil-based or shellac-based primers for stain blocking or glossy surfaces)
- Paint brushes (angled sash brush, 2-2.5 inches)(Use for edges and corners; provides precise control)
- Roller frame and 9-inch roller cover(For flat wall areas; choose nap length based on surface texture)
- Sandpaper (120- or 180-grit, then 220-grit for finish)(Lightly sand between coats to promote adhesion)
- Tack cloth or lint-free cloth(Wipe away dust before painting)
- Painter’s tape(Protect trim and edges; remove tape while wet or after proper curing)
- Drop cloths(Protect floors and nearby furniture)
- Respirator or ventilation mask(Especially important for solvent-based primers and dusty sanding)
- Solvent or water for cleanup(Mineral spirits for oil-based primers; soap and water for water-based primers)
Steps
Estimated time: 60-90 minutes active work; drying times vary by product
- 1
Prepare the surface
Begin by cleaning the area with a damp cloth to remove dirt and oils. Repair cracks or holes, then lightly sand glossy or rough areas to create a key for the primer. Wipe away dust and let the surface dry completely.
Tip: Use a tack cloth after sanding to capture fine dust and avoid gritty results. - 2
Protect surrounding areas
Lay down drop cloths and tape off trim, outlets, and nearby edges. This prevents accidental primer on unintended surfaces and makes cleanup easier.
Tip: Apply tape to dry edges last to avoid peeling paint when removing later. - 3
Choose the right primer
Refer to the surface type and topcoat; select a primer that matches. For stained wood or knots, use a stain-blocking or bonding primer. For smooth, previously painted surfaces, a bonding primer can help with adhesion.
Tip: Always read the label for surface compatibility and ventilation guidelines. - 4
Apply primer in thin coats
Use long, even strokes with a roller and use a brush for edges. Apply a thin first coat; avoid pooling or heavy layers that can lead to drips and an uneven finish.
Tip: Maintain a consistent technique and avoid overworking the primer, which can raise the nap and leave texture. - 5
Dry and inspect between coats
Let the primer dry according to the label; lightly sand if needed and wipe away dust. Apply a second coat if the surface still appears uneven or highly absorbent.
Tip: Two light coats often give a better base than one thick coat. - 6
Proceed to topcoat
After final drying, test the surface by lightly pressing with your finger; if it’s hard and smooth, you’re ready for the paint. Match the topcoat type to the primer category for best results.
Tip: Wait the full recommended cure time before cleaning brushes or applying a second topcoat.
Your Questions Answered
Do you always need to prime new wood before painting?
In most cases, yes. Priming new wood helps seal the fibers, reduces absorbency, and creates a uniform base for the topcoat. It prevents uneven staining and improves coverage.
Typically, yes. Primer on new wood helps seal fibers and improves how the paint sits on the surface.
Can you skip primer on existing painted surfaces?
You can sometimes skip priming if the existing paint is in good condition and has a matte, sanded surface. If the old paint is glossy or stained, or if you’re making a color change, priming is recommended for better adhesion and coverage.
If the old surface is glossy or stained, priming is usually a good idea for better adhesion and color coverage.
How long does primer take to dry?
Drying times vary by product and environment, but most primers dry to the touch within an hour or two in normal conditions. Always rely on the product label for specific times and avoid topcoating too soon.
Primer generally dries to the touch in a couple of hours depending on temperature and humidity.
Is primer necessary for color-changing topcoats?
Primer is often essential when doing drastic color changes or covering dark stains. It helps ensure even color and reduces the number of topcoat coats needed.
Yes, primer is usually recommended when changing colors or covering stains for even results.
Can I use a spray primer for large surfaces?
Spray primers can be effective for large, flat areas or cabinets, offering even coverage. Follow safety tips, keep a consistent distance, and work in light coats.
Spray primer works well for big areas when used with proper technique and safety.
What if the primer looks blotchy after drying?
Blotchy primer can indicate uneven absorption. Lightly sand with fine grit, wipe clean, and apply a second thin coat for a uniform base.
If blotchy, sand lightly and recoat with an even, thin layer.
Watch Video
Quick Summary
- Primer improves adhesion and seals porous surfaces
- Choose primer to match surface type and topcoat
- Prepare and protect the area before priming
- Apply thin coats and sand between coats as needed
- Follow drying times and ventilation guidelines