Concrete Primer and Paint: A Practical Guide
A practical, step-by-step guide to selecting concrete primer and paint, preparing surfaces, applying coats, and maintenance for durable concrete finishes in homes and garages.

This guide shows homeowners and DIYers how to choose concrete primer and paint—covering surface prep, selecting primers, choosing paints for interior/exterior concrete, application steps, drying times, and cleanup. You'll learn best practices to ensure a durable, long-lasting finish on bare or previously painted concrete. This article also notes safety tips, cost considerations, and common mistakes to avoid.
Overview: Why concrete primer matters
Concrete is porous and moisture-vulnerable. Without a primer, paint can soak unevenly, leading to peeling, staining, and uneven color. A high-quality concrete primer improves adhesion, blocks moisture migration, and seals the surface dust that can prevent film formation. For interior spaces such as basements and garages, as well as exterior walks and slabs, choosing the right primer is essential. According to PaintQuickGuide, surface preparation and primer compatibility are the two most important decisions in the early stage of any concrete coating project. This primer logic applies whether you’re refinishing a concrete floor, a basement wall, or a sun-drenched outdoor patio. The right primer creates a uniform surface that helps color and finish coats look their best, and it can prevent costly failures down the line. In short, primer is not optional on concrete – it is the foundation for durability and aesthetic appeal.
Surface prep fundamentals
Before any primer or paint touches concrete, you must clean and prep the surface to ensure optimal adhesion. Start by sweeping away dust and debris, then wash with a degreasing detergent to remove oils from traffic or machinery. For smooth, sealed concrete, remove slick coatings with a stiff-bristle brush or a wire brush. If moisture is present, address it with a moisture barrier or a breathable primer designed for damp substrates. Etching or profiling the surface increases mechanical bonding, especially on glossy or old coatings. In environments with wide temperature swings, ensure the surface is fully dry and free of efflorescence or standing water. Patch cracks with compatible filler and allow full cure before priming. The goal is a clean, dry, and slightly abraded surface that bonds readily with primer and paint.
Primer compatibility: water-based vs epoxy
Primers come in many chemistries, but two main categories drive most concrete projects: water-based acrylic and epoxy-based primers. Water-based primers are forgiving, quick to dry, and low-odor, making them ideal for interior walls or light-foot-traffic floors. Epoxy-based primers offer superior moisture resistance and stronger adhesion on rough or porous concrete, but they require careful mixing and longer cure times. When applying primer, match it to the topcoat you plan to use. If you anticipate high moisture, intermittent contact with water, or heavy wear, a bonded epoxy primer paired with an epoxy or acrylic-epoxy topcoat often delivers the best long-term performance. Always follow manufacturer recommendations for cure times and recoat windows. No matter the choice, ensure compatibility with your concrete type and the paint system you will use.
Paint types for concrete: latex, epoxy, or acrylic
Concrete paints span several chemistries, with latex (acrylic) and epoxy being the most common options. Latex concrete paints are affordable, easy to apply, and clean up with water. They perform well on interior floors or walls with light traffic. Epoxy paints provide exceptional wear resistance, chemical resistance, and moisture protection, making them popular for garages, basements, and exposed outdoor surfaces, but they are generally more expensive and require stricter surface preparation. Acrylic paints combine features from both camps and can be a good compromise for many spaces. Regardless of the type, make sure the paint is formulated for concrete and compatible with your primer. Surface prep remains the most critical factor for durability, followed by proper application technique and the correct number of coats for your environment.
Finishes and color choices
Color and finish influence both aesthetics and maintenance. Satin and semi-gloss finishes hide minor imperfections better than flat paints and are easier to clean, which matters in garages or workshops. Gloss levels should be chosen based on traffic and moisture exposure; high-gloss finishes are durable but show surface flaws more readily. When choosing color, test a small area first to confirm appearance under natural light, especially in basements or rooms without windows. Consider UV exposure for exterior concrete; lighter colors reflect heat and can reduce surface temperatures, while darker tones may emphasize texture. Keep in mind that primer tint, paint color, and finish will interact with the surface texture, so plan for visual outcomes across the entire space.
Priming for interior floors vs walls
Interior floors demand a tougher, often water- and oil-resistant primer to withstand foot traffic, spills, and cleaning. Walls, by contrast, benefit from primers that block stains, control porosity, and provide a uniform base for color. If you’re coating both surfaces, choose a primer designed for multi-surface use or apply different primers tailored to each substrate. For garages or basements with higher humidity, a moisture-mitigating primer improves long-term adhesion and reduces the risk of peeling. Always allow primers to reach their specified tack-free state before applying topcoats to avoid issues with adhesion or film formation.
Step-by-step priming technique
Preparing and applying primer correctly sets up your topcoats for success. Step 1: Protect adjacent surfaces with tape and drop cloths. Step 2: Stir the primer thoroughly and pour into a tray. Step 3: Apply a consistent, thin coat using a roller or wide brush, avoiding puddling. Step 4: Allow the primer to dry completely per the manufacturer’s instructions. Step 5: Inspect for missed spots or rough patches and touch up as needed. Step 6: Lightly sand any tacky spots once the primer is dry to promote better adhesion for the paint. Step 7: Clean brushes and rollers promptly after use.
Step-by-step painting technique
After the primer has cured, begin painting with a similar level of discipline. Step 1: Choose a suitable topcoat and confirm it’s compatible with your primer. Step 2: Stir the paint well and pour into a tray. Step 3: Cut in edges with a brush to create clean lines, then switch to a roller for broad areas. Step 4: Apply in even, overlapping passes, maintaining a consistent thickness. Step 5: Allow the first coat to dry completely before applying a second coat to ensure depth and even color. Step 6: Inspect the surface for pinholes or holidays and fill or recoat as necessary. Step 7: Clean tools and ensure the room is ventilated to speed curing.
Curing, drying, and recoat windows
Concrete finishes require adequate curing to reach peak hardness and adhesion. Drying times depend on humidity, temperature, and air movement. In typical conditions, expect 24-72 hours to reach a touch-dry state and 7-14 days for full cure for most interior applications, while exterior or epoxy-based systems can take longer. Respect the recoat window provided by the manufacturer; applying a second coat too soon can trap solvents and compromise adhesion. If temperatures drop or humidity rises, extend curing times accordingly. Protect freshly coated surfaces from foot traffic, moisture, and dust during cure.
Maintenance and cleaning after painting concrete
Maintenance is key to extending the life of concrete finishes. Use mild detergents and non-abrasive pads to remove dirt. Avoid harsh solvents that can degrade certain topcoats, especially epoxy. Place mats or rugs in high-traffic entryways to reduce wear. For outdoor concrete, check for UV fading, chipping, or cracking over time and schedule inspections. Reapply or refresh color and sealer as needed to maintain moisture resistance and aesthetics. With proper care, your concrete primer and paint system can remain vibrant for years.
Cost considerations and budgeting
Concrete primer and paint projects can vary widely in cost based on the surface condition, scale, climate, and materials chosen. Primer and topcoat prices range by chemistry and performance—water-based systems tend to be more affordable, while epoxy-based products are pricier but offer superior durability. In most cases, calculating material needs by square footage plus a contingency for waste helps prevent mid-project shortages. Don’t forget safety gear, masking supplies, and surface prep tools in your budget. Finally, consider long-term maintenance costs: higher-quality primers and paints often save money by extending intervals between re-coats.
Troubleshooting and common issues
Even well-planned projects can encounter issues. Common problems include poor adhesion due to moisture or dust, uneven drying from temperature fluctuations, and lap marks from inconsistent brushing. If you notice peeling, re-clean the surface, remove loose material, and reseal before reapplying primer. For cloudy or milky appearances on epoxy systems, evaluate curing conditions and ensure proper venting. Always verify product compatibility and follow the manufacturer’s guidelines for recoat windows and surface preparation to prevent recurring problems.
Safety, ventilation, and cleanup
Paint products emit vapors that can irritate eyes and lungs; ensure proper ventilation and wear appropriate PPE. Use a respirator or mask when sanding or applying coatings with strong solvents and keep containers sealed when not in use. Store materials in a cool, dry place and dispose of leftovers according to local regulations. After completion, clean tools with water for latex paints or solvent as required by the product. A well-ventilated space and proper cleanup will make the project safer and reduce lingering odors.
Tools & Materials
- PPE: respirator or mask(NIOSH-approved for paint fumes; add eye protection)
- Safety goggles(Protect eyes from splashes and dust)
- Nitrile gloves(Chemical resistance for cleaners and primers)
- Stiff-bristle brush(For cleaning and etching as needed)
- Broom and vacuum(Remove dust and debris before cleaning)
- Detergent and degreaser(Use a concrete-safe cleaner)
- Concrete crack filler/epoxy(For repairing cracks prior to priming)
- Putty knife(Smooth filler and patch areas)
- Painter's tape(Protect edges and create clean lines)
- Drop cloths or plastic sheeting(Contain debris and spills)
- Mixing buckets(For primers and topcoats)
- Stir sticks and mixing paddle(Evenly blend products)
- Concrete bonding primer(Choose for porous or chalky surfaces)
- Concrete-safe topcoat (latex or epoxy)(Match primer chemistry; use for final coat)
- Paint rollers with extension pole(Cover large surfaces quickly)
- Angled brush(Edges, corners, and patches)
- Paint tray and liner(Keep paint tidy and reduce waste)
- Moisture meter (optional)(Assess damp areas before priming)
- Fine-grit sandpaper (optional)(Scuff surfaces for better bonding)
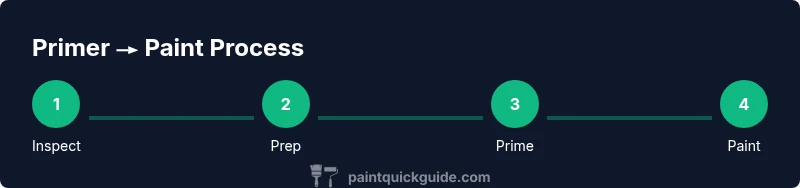
Steps
Estimated time: Total time: 12-24 hours active, plus 24-72 hours cure
- 1
Inspect surface and plan
Survey the concrete for moisture, cracks, and contaminants. Decide where primer and topcoat will be applied and note any repairs or patching needed before prep begins.
Tip: Take photos and mark areas requiring extra attention. - 2
Clean and degrease
Thoroughly remove dirt, oils, and residues with a stiff brush and a concrete-safe cleaner. Rinse well and allow to dry completely.
Tip: Use a moisture meter to confirm the surface is dry before proceeding. - 3
Repair cracks and defects
Fill cracks with compatible filler or epoxy; allow full cure per product instructions. Lightly sand high spots and dust away.
Tip: Only apply filler to sound, clean edges for best adhesion. - 4
Etch or profile the surface if needed
For very smooth or glossy concrete, use a mild etch or mechanical abrasion to create a profile that helps primer grip.
Tip: Follow safety guidelines and product directions when using etchants. - 5
Choose primer type
Select a primer compatible with your topcoat and suited to moisture and porosity. Bonding primers are ideal for slick or chalky concrete.
Tip: When in doubt, consult product technical data sheets for compatibility. - 6
Mask and protect surroundings
Apply tape around edges and cover nearby surfaces to prevent spray or splatter.
Tip: Lay drop cloths on the floor and use plastic at doorways to minimize dust intrusion. - 7
Apply primer evenly
Use a roller for large areas and a brush for edges; aim for a uniform coat with minimal runs. Allow the primer to dry completely.
Tip: Avoid overloading the roller; thin, even coats perform best. - 8
Select and prepare topcoat
Choose a latex or epoxy concrete paint based on use and exposure. Stir thoroughly and pour into a tray.
Tip: Test a small patch to confirm color and finish before full application. - 9
Apply base coat
Begin with edges and corners, then cover large areas with a roller in uniform strokes. Maintain a wet edge to avoid lap marks.
Tip: Work in sections to keep a fresh edge. - 10
Apply finish coat and edge checks
If a second coat is needed, apply only after the first is fully tack-free. Inspect for pinholes and even coverage, then complete final touches.
Tip: Control temperature and humidity to avoid longer cure times.
Your Questions Answered
Do I need to etch concrete before priming?
Etching can improve adhesion on smooth or sealed concrete by increasing surface roughness. If the surface feels glossy or has failed adhesion resistance, a light etch or mechanical profile is recommended. Always follow the primer and topcoat manufacturer’s guidance on surface preparation.
Etching can help with adhesion on smooth concrete. If the surface is glossy or aged, a light mechanical profile helps primers grip better. Always follow the product instructions.
Can I use latex paint over concrete primer?
Yes, latex (acrylic) paints can be used over concrete primers when the primer is compatible with the topcoat. Ensure the primer seals porosity and provides a good base for color and wear resistance. For high-traffic areas, an epoxy or hybrid system may offer better durability.
Yes, you can use latex paint over a compatible primer. If the area sees heavy use, consider epoxy or a hybrid topcoat for better durability.
How long should I wait between coats on concrete?
Wait for the first coat to reach the manufacturer’s tack-free state before applying the second coat. Drying and curing times vary with temperature, humidity, and ventilation, so follow the product data sheet. In general, plan for at least 4-6 hours between coats in normal indoor conditions.
Wait until the first coat is tack-free before applying the next coat. Follow the product's data sheet for exact times. It’s usually several hours in good conditions.
What if the surface is damp after priming?
If the surface remains damp, postpone painting. Moisture can prevent good adhesion and cause blistering or peeling. Address moisture sources, dry the area thoroughly, and test again before proceeding with primer or topcoat.
If the surface is damp, don’t paint yet. Fix moisture issues, dry completely, and retest before continuing.
Is epoxy paint worth the extra cost for concrete?
Epoxy paints offer superior durability, chemical resistance, and moisture protection, especially on garage floors or outdoor slabs. They come with higher material and labor costs and longer cure times. For high-traffic or chemical-exposure areas, epoxy often provides better long-term value.
Epoxy paints are more durable and resistant to chemicals, but cost more and take longer to cure. For garages or outdoor surfaces, they can be worth it.
Can I apply paint directly to new concrete?
New concrete typically requires sealing or curing and a compatible primer before topcoats. Fresh concrete can be very porous and may suck up coatings quickly. Use a breathable primer designed for new concrete and follow cure times before applying color.
Yes, but you should use a primer suited for new concrete and allow it to cure according to the product guidelines.
Watch Video
Quick Summary
- Prep thoroughly before priming.
- Choose primer and paint with proven compatibility.
- Follow cure windows to maximize adhesion and durability.
- Protect surrounding surfaces throughout the project.