Concrete Paint: A Practical Guide for Surfaces
A practical, step-by-step guide to choosing, prepping, applying, and sealing concrete paint for floors, walls, and outdoor surfaces. Learn about finishes, primers, tools, and maintenance for durable, long-lasting color.

Concrete paint can transform floors, walls, or patios with durable, affordable color. In this guide, you’ll learn how to prep, prime, apply, and seal concrete surfaces for long-lasting results. You’ll also compare finishes, choose the right products, and estimate costs for DIY projects around the home or shop.
What is concrete paint and when to use it
Concrete paint is a pigmented coating designed to adhere to concrete surfaces and provide color, durability, and a protective layer. It’s ideal for basements, garages, patios, and driveways that see foot and vehicle traffic. Unlike decorative stains, concrete paint sits on top of the surface and forms a film that wears gradually with use. When choosing a product, look for a resin base (acrylic or epoxy) and a finish that matches your traffic level and environment. For exterior concrete, choose products labeled for UV resistance and water resistance; for interiors, low odor formulas are preferable. In this section we’ll cover surface prep, priming, and layering strategies that maximize adhesion and color uniformity.
Types and finishes for concrete surfaces
Concrete paint comes in latex-based (water-based) and epoxy-based formulations. Latex-based paints are easier to apply, have lower odor, and dry quickly, making them great for walls and light-traffic floors. Epoxy-based paints offer higher durability and chemical resistance, ideal for garages and workshops. Finishes range from matte to satin to gloss; choose based on safety and visibility: matte hides imperfections but can be harder to clean, while gloss is easier to wipe but shows imperfections. For floors, a semi-gloss or satin finish often provides the best balance of appearance and cleanability. Always select UV-stable formulas for exterior applications to prevent color fade.
Surface prep and cleaning for best adhesion
Successful painting starts with a clean, dry surface. Remove all loose debris, oil, and grease with a degreaser, then scrub and rinse. If the surface is smooth or very dense, consider light mechanical profiling (scuffing with a grinder or a stiff brush) or a concrete etch solution to improve adhesion. Allow the surface to dry completely—this can take 24 hours or more depending on humidity. Repair cracks or pitting and feather edges so the paint can layer evenly. Finally, remove dust with a damp cloth and let the surface dry again before priming.
Primers and sealers: choosing the right products
A bonding primer designed for concrete improves adhesion and helps color uniformity. For porous surfaces, a penetrating primer reduces suction that can cause peeling. If you’re applying epoxy-based paint, use a compatible epoxy primer to optimize film formation. After painting, a clear acrylic sealer can add moisture and stain resistance, especially on floors. For areas with heavy traffic, select a sealer rated for abrasion resistance and slip resistance. Always follow the manufacturer’s cure times and ventilation recommendations for primers and sealers.
Application techniques: rolling, brushing, or spraying
Rollers work well for large flat surfaces, while brushes are useful for edges and corners. When painting floors, use a long-nap roller to push product into the texture without creating roller marks. Work in manageable sections and maintain a wet edge to avoid lap lines. If you use a sprayer, dilute according to the product guidelines and apply in even passes to prevent spraying buildup. Cross-coat for uniform coverage, typically with a second coat after the first has dried, especially on porous concrete. Keep a damp sponge handy for quick touch-ups during the process.
Curing times, ventilation, and safety considerations
Ventilate the work area thoroughly and wear appropriate PPE, including gloves and a respirator if recommended by the product. Drying times vary with humidity and temperature; plan to stay off treated areas for at least 24 hours for light foot traffic, and longer for full curing before heavy use or vehicles. Keep pets and children away from the work zone. If you notice bubbling, delamination, or unusual odor, pause and consult the product’s technical data sheet. Proper curing is essential for durability and color stability.
Cost, maintenance, and color strategies
Costs vary with surface size, product quality, and prep requirements. Expect higher upfront costs for epoxy-based systems and thorough surface profiling, but gain in durability and chemical resistance. For typical DIY projects, material costs climb based on square footage and paint type, while labor remains your main savings. Maintenance is straightforward: clean with mild detergents, avoid harsh solvents, and recoat when color or adhesion degrades. Choose colors that help hide dirt on floors and complement interior or exterior design goals.
Troubleshooting and common issues
Peeling or poor adhesion usually signals inadequate surface preparation or incompatible primers. Fish-eyes (tiny craters) can result from overly oily surfaces or contaminants; re-clean and reprime before repainting. Color inconsistency often arises from inconsistent application or uneven surface porosity—stir thoroughly and apply evenly in thin coats. If moisture is present, address it before repainting, as trapped moisture leads to blistering. Use small test areas to preview color and finish before committing to the entire surface.
Tools & Materials
- Concrete paint (latex-based or epoxy-based)(Choose for floors, walls, or exterior use; ensure UV and moisture suitability)
- Concrete primer(Bonding primer for porous surfaces or a penetrating primer for dense surfaces)
- Etch solution or cleaner(To create sufficient roughness on very smooth concrete)
- Degreaser(Removes oils and contaminants before painting)
- Paint trays and liners(For easy loading of rollers)
- Rollers (4-6 inch) for walls / 9-inch for floors(Nap length depends on concrete texture)
- Extension pole(Reduces fatigue and improves reach)
- Painter's tape and drop cloths(Protect adjacent areas)
- Respirator or protective mask(Follow product safety guidance)
- Gloves and eye protection(Prevent skin and eye exposure)
- Sander or grinder (optional)(For smoothing rough areas; use hearing protection)
- Soft-bristle brush for edges(Edges and corners near walls)
- Clear acrylic sealer (optional)(Add protective topcoat for high-traffic areas)
- Solvent or water-based cleaner for cleanup(Clean tools according to product type)
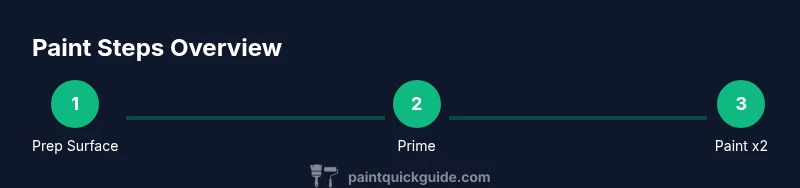
Steps
Estimated time: 24-48 hours total (including cure)
- 1
Inspect and plan the surface
Walk the area and note any cracks, moisture, or damage. Decide whether you’ll paint floors, walls, or exterior paths, and choose the right product type and finish. Mapping the area helps you estimate material needs and timing.
Tip: Document any repairs before you begin; plan for a second coat in high-traffic zones. - 2
Deep-clean and degrease
Remove all debris, oil, and dust. Use a degreaser on oily spots and scrub the surface thoroughly. Rinse with clean water and allow to dry completely.
Tip: Check porosity after drying; damp spots can indicate residual moisture that affects adhesion. - 3
Etch or roughen the surface if needed
For very smooth concrete, use an etch solution or mechanical profiling to create micro-roughness that improves bonding. Rinse well and dry fully.
Tip: Test a small area first to gauge the needed roughness before committing to the entire surface. - 4
Mask and protect surrounding areas
Apply painter’s tape to edges and cover adjacent surfaces with drop cloths. Ensure doors and vents are protected to avoid accidental overspray.
Tip: Use a wide masking technique to prevent paint seepage into crevices. - 5
Prime for adhesion
Apply an appropriate bonding primer; allow full dry time per manufacturer's guidelines. Primer reduces suction and promotes uniform color uptake.
Tip: If the surface is very porous, consider a second thin primer coat to ensure full coverage. - 6
Apply the first coat of concrete paint
Roll or brush in even, thin coats, working in segments. Maintain a wet edge to avoid lap marks. Allow the coat to dry as recommended.
Tip: Avoid thick coats; multiple thin coats yield a smoother, more durable finish. - 7
Apply a second coat and finish
Apply a second coat per product instructions. Check for even color and texture. If needed, touch up edges last.
Tip: Crosshatch with parallel strokes on the second coat for even coverage.
Your Questions Answered
Can concrete paint be used on outdoor patios and driveways?
Yes, concrete paint can be used outdoors on patios and driveways, provided you choose a UV- and water-resistant product and prepare the surface properly for weather exposure.
Yes, outdoor use is fine when you select a UV- and water-resistant paint and prepare the surface correctly.
Is epoxy-based concrete paint more durable than latex-based?
Epoxy-based paints generally offer higher durability and chemical resistance, especially in garages or workshops, but latex-based paints are easier to apply and lower in odor for interior walls.
Epoxy paints tend to be more durable, while latex paints are easier to apply indoors.
Do I need to etch the concrete before painting?
Etching or roughening the surface is recommended if the concrete is very smooth. It improves adhesion and reduces peeling risk, but follow product instructions carefully.
Etching helps paint stick, especially on smooth surfaces.
How long before I can walk on a freshly painted floor?
Most concrete paints allow light foot traffic after 24 hours, but heavy use or vehicle traffic may require longer cure times as per product guidelines.
Wait at least a day for light use, longer for heavy traffic.
Can I tint or color-match concrete paint to existing décor?
Yes. Many concrete paints are tintable or come in a wide range of colors. Test color on a small area to ensure it matches your design goals.
You can tint or choose from many colors; test a spot first.
Is a sealer necessary after painting concrete floors?
Sealers add moisture resistance and durability, especially in high-traffic areas. Choose a sealer compatible with your paint and environment.
A sealant helps with durability; pick one that works with your paint.
Watch Video
Quick Summary
- Prepare thoroughly to maximize adhesion and color uniformity.
- Choose primers and sealers compatible with your concrete paint.
- Apply thin coats and allow complete curing for best durability.
- Ventilate, wear PPE, and avoid traffic until cured.
- Test in a small area before committing to the whole surface.