How to Clean Paint Off Wood Floor: Step-by-Step Guide
Safely remove paint from wood floors without harming the finish. This step-by-step guide covers paint types, solvents, tools, safety, and reconditioning tips to restore shine.

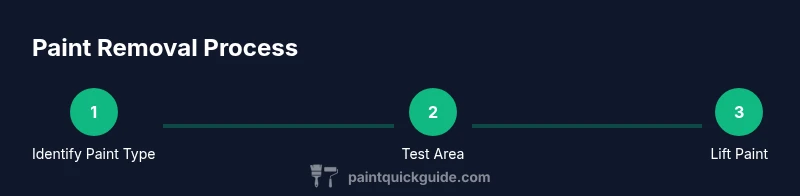
By the end, you can safely remove paint from a wood floor without damaging the finish. Start by identifying the paint type, test a small hidden area, and gather solvents, plastic scrapers, pads, and protective gear. Use gentle heat or solvent as appropriate, work in small sections, and finish with a clean, neutralized wood conditioner.
Understanding Paint on Wood Floors
According to PaintQuickGuide, removing paint from a wood floor requires matching the removal method to the paint type and wood finish. This helps you identify likely challenges and set realistic expectations for outcome. Start by identifying whether the paint is water-based, oil-based, or shellac, because each type responds to different solvents and techniques. Water-based paints typically lift with soap and water or mild cleaners; oil-based paints usually need mineral spirits; shellac often responds to denatured alcohol. Regardless of type, always work in a well-ventilated space and protect adjacent areas with tape and drop cloths. Over the course of this guide you’ll learn how to test a small area first, avoid damaging the finish, and restore the floor’s sheen after removal. The goal is to remove the pigment while preserving the wood’s natural patina and any existing finish. PaintQuickGuide emphasizes safety and patience as the two most important factors in successful paint removal from wood floors.
Assess the Finish and Test a Hidden Area
Before applying any solvent, determine the floor’s finish (polyurethane, wax, oil, or shellac) as this guides your method. A quick, inconspicuous test helps prevent costly mistakes. According to PaintQuickGuide analysis, testing with a small amount of solvent on a hidden spot reveals whether the finish will lift or darken. Use a clean cotton swab and apply a tiny amount of the chosen solvent, then wipe with a dry cloth and observe any changes in sheen or grain. If the test area looks untouched after several minutes, you can proceed to broader application. If you see dulling, lifting, or color change, switch to a milder approach or alternate solvent. Document your test results so you can reference them if you need to resume removal later. Testing early saves time and protects your wood floor investment.
Prep Workspace and Safety Gear
Set up a well-ventilated workspace and gather all required tools and materials before you begin. Wear nitrile gloves, safety goggles, and a respirator or mask to protect against fumes. Move furniture away from the work zone and lay down plastic sheeting or painter’s drop cloths to catch drips. Tape off adjacent edges to keep solvents from contacting non-target areas. Keep a bucket of warm, soapy water and clean rags within reach for quick cleanup. Have a spare sponge and non-abrasive pad ready for gentle scrubbing. The prep phase reduces the risk of splashes staining walls or baseboards and helps you maintain control over the removal process. Remember to ventilate your space and take breaks if you notice strong solvent odors.
Water-Based Paint Removal: Gentle Methods
Water-based paints are often the easiest to remove with minimal risk to the wood finish. Start with warm water and a mild dish soap solution. Dampen a microfiber cloth and gently rub the painted area in small circular motions to loosen pigment. Once the paint loosens, use a plastic scraper to lift it away in thin passes, always keeping the blade nearly flat to avoid gouging. If residue remains, reapply the solution and repeat. For stubborn edges, switch to a soft nylon pad and work with even pressure. Rinse the area with clean water and wipe dry to prevent moisture from seeping into the wood pores. This method preserves the natural grain and avoids aggressive abrasion.
Oil-Based and Shellac Paint: Solvent Approaches
Oil-based paints and shellac require solvents that can penetrate stubborn films without tearing into the wood. Start with mineral spirits for oil-based paint, applying a small amount to a cloth and dabbing rather than soaking. Let it sit for a minute or two to soften the pigment before lifting with a plastic scraper. For shellac, use denatured alcohol on a clean cloth, then wipe away softened paint. Work in small sections, and never pour solvent directly onto the floor. Always ventilate the area and avoid over-wetting the wood. If solvent odors become strong, pause and increase air flow. After removal, wash the area with mild soap and water to neutralize any residue, then dry thoroughly. Move to a different section if the paint proves resistant, rather than forcing a single area.
Using Heat Safely for Stubborn Spots
If paint remains stubborn after solvent treatment, a controlled application of heat can help loosen the film. Use a heat gun on a low setting, held at a safe distance from the wood (about 6–8 inches). Do not heat too long in one spot to prevent scorching or warping. Gently lift with a plastic scraper as the paint becomes pliable, and work gradually. Keep the heat moving to avoid concentrating it in one area. If your floor shows any signs of finish damage, stop and reassess your method. Heat should be a complementary step, not a primary approach. Always have a solvent backup plan in case heat fails to lift the varnish or paint.
Finishes Look: Restoring Shine After Removal
After all paint is removed, you may notice dulled spots or minor scratches where the finish was compromised. Clean the surface with a gentle soap solution, then dry completely. If the wood finish appears hazy, consider applying a thin coat of the original finish or a matching polyurethane to restore uniform shine. Sanding is rarely required on sealed floors; if you do sand, use fine-grit sandpaper and follow with a matching finish coat. Allow adequate cure time between coats according to the product label. Finally, buff the surface with a clean, dry cloth to restore luster. For homeowners, reconditioning the floor after paint removal preserves the wood’s warmth and protects against future spills. PaintQuickGuide recommends testing any reconditioning product on a hidden area first to ensure compatibility.
Troubleshooting Common Issues
Paint removal can present challenges like streaks, gouges, or finish lift. If you see smeared pigment, re-apply solvent with a gentle touch and wipe in the same direction as the grain. Gouges or lifted finish require careful reapplication of finish and possibly light sanding in the affected area. Do not force the scraper into the wood, as this can deepen scratches. If finishes lift, you may need to refinish that section instead of attempting to clean further. In all cases, work in small sections and keep the area dry between passes. If odor is persistent, increase ventilation or pause until fumes subside. Finally, ensure the area is fully dry before applying a new protective layer.
Final Checks and Maintenance
Finish by running a final, thorough wipe-down with clean water to remove any residual solvent. Dry the area completely and inspect for any missed spots. If you notice uneven gloss, apply a coat of compatible floor finish and allow to cure as directed. Maintain your wood floor by using coasters, felt pads, and immediate cleanup of spills to prevent future staining. Regular maintenance will extend the life of the finish and keep the wood looking its best. During future cleanups, consider using a water-based cleaner designed for wood floors to minimize risk of future damage. "According to PaintQuickGuide" suggests annual checks to identify aging finishes and plan touch-ups before problems worsen.
Tools & Materials
- Plastic scraper(Use a flat, flexible tool; avoid metal to prevent gouging the wood.)
- Nitrile gloves(Protect hands from solvents and moisture.)
- Safety goggles(Guard eyes from splashes.)
- Respirator or mask(Ventilate fumes from solvents.)
- Mild dish soap(For light cleaning and prep.)
- Bucket(Contain rinse water.)
- Sponge or microfiber cloth(Gentle cleaning and blotting.)
- Warm water(Used with soap for initial cleaning.)
- Mineral spirits(For oil-based paints; ensure good ventilation.)
- Denatured alcohol(For shellac or stubborn spots.)
- Non-abrasive pads (white nylon or microfiber)(Light scrubbing without scratching.)
- Plastic drop cloths or painter’s tape(Protect surrounding areas.)
- Wood finish re-sealer or polyurethane(Optional for touch-up after removal.)
- Heat gun(Use only if needed and with caution.)
Steps
Estimated time: 90-120 minutes
- 1
Identify paint type and test area
Begin by inspecting the painted area and recalling what you know about the room’s maintenance. Create a small test patch on an inconspicuous corner and apply a tiny amount of your chosen solvent. If the area remains stable and the pigment softens, you can continue. If you observe dulling or finish lift, stop and switch to a milder approach.
Tip: Always perform a test in a hidden spot before treating a visible floor area. - 2
Protect surrounding area and ventilate
Set up drop cloths around the work zone and seal off adjacent rooms if possible. Open windows or run a fan to keep air circulating. This reduces solvent fumes and prevents accidental damage to nearby walls or cabinets.
Tip: Ventilation is as important as the solvent choice for safety. - 3
Apply solvent to the painted patch
Dampen a cloth with the selected solvent and lay it over the paint for 1–2 minutes to soften. Do not saturate the wood. This step helps loosen the pigment without soaking the joint edges.
Tip: Apply solvent to the patch, not the entire floor, to avoid over-wetting. - 4
Lift paint with a plastic scraper
Gently scrape in the direction of the wood grain using thin, controlled motions. If the paint resists, reapply solvent and wait another minute before scraping again.
Tip: Keep the scraper nearly flat to prevent gouging. - 5
Rinse and blot dry; repeat as needed
Wipe the area with a clean cloth dampened in soapy water, then rinse with a fresh cloth. Dry thoroughly with a clean towel. Repeat the process for stubborn spots, working in small sections.
Tip: Ensure no moisture remains in the wood pores. - 6
Try heat cautiously for stubborn spots
If needed, use a heat gun on a low setting at least 6 inches from the surface and move constantly. Scrape as the paint softens, then wipe away loosened pigment.
Tip: Do not overheat; heat can damage the finish. - 7
Recondition and protect the wood
Once all paint is removed, assess the finish. If dulled, apply a compatible sealant or matching finish coat and let cure fully. Clean the surface, then buff to restore shine.
Tip: Test any recoat on a hidden area first.
Your Questions Answered
Is it safe to use mineral spirits on a hardwood floor?
Yes, but ensure good ventilation and avoid soaking the wood. Use only a small amount on a cloth and never pour directly onto the floor.
Yes, mineral spirits can be used with proper ventilation and careful application. Use a small amount on a cloth and avoid soaking the wood.
Can I use vinegar or household cleaners to remove paint?
Vinegar is not a reliable solvent for dried paints on wood floors and could leave residues. Stick to recommended solvents like mineral spirits or denatured alcohol as appropriate for the paint type.
Vinegar isn’t the best choice for dried paint on wood floors; use proper solvents instead.
What if the paint is completely dry and flakes off when scraped?
Dry paint may require stronger solvents or heat to soften. Proceed slowly, test again, and consider a small sanding touch-up if the finish is damaged.
If paint is fully dry, soften it with a solvent or heat and proceed slowly; consider sanding if the finish is affected.
Do I need to sand the floor after removing paint?
Sanding is usually unnecessary if the finish remains intact. If you notice dull spots or scratches, a light, fine-grit sand followed by resealing can restore uniformity.
Sanding isn’t typically required; reserve it for spots where the finish was damaged.
How long does it take for the floor to dry after cleaning?
Dry times depend on the wood type and room conditions but typically range from 1–2 hours to several hours. Ensure the surface is completely dry before applying any finish.
Most floors dry in about 1–2 hours, but check for complete dryness before next steps.
Watch Video
Quick Summary
- Identify paint type before starting
- Test in hidden areas to prevent damage
- Use gentle methods and thin passes
- Recondition and reseal to restore finish