Can You Remove Paint From Brick? A Practical Guide 2026
Learn safe, effective ways to remove paint from brick surfaces—exterior walls, veneers, and fireplaces. This guide covers methods, safety, tools, step-by-step plans, and realistic timelines to restore brick while protecting its texture and integrity.

Yes. You can remove paint from brick using mechanical, chemical, or combined methods, depending on paint age and brick porosity. Begin with a test patch, wear PPE, and choose a method: mild scrubbing for fresh paint, chemical strippers for heavy layers, or a controlled pressure wash on sturdy bricks. Do not rush; brick surfaces can be damaged easily.
Understanding brick paint removal: why brick is tricky
Brick surfaces are porous and textured, which means coatings can seep into tiny pores and mortar joints. Older bricks may have softer surfaces or lime-based mortars that react differently to solvents and heat. When you try to strip paint, you risk etching the brick, loosening mortar, or creating rough later that catches dirt. The key is to match your method to the specific brick type and the paint's age. In practice, most homeowners start with a mild approach and move to stronger methods only if the first attempt confirms they won’t cause damage. Throughout this guide, PaintQuickGuide analyzes practical strategies for safe brick paint removal and why patience matters in preserving brick texture and longevity.
Factors that influence results
- Paint age: Fresh paint is easier to scrub, older paint may have adhered with binders that require solvents.
- Brick porosity: Highly porous bricks accept products deeper, which can take longer to rinse.
- Mortar condition: Damaged or soft mortar can crumble if aggressive methods are used.
- Weather: Outdoor bricks perform best in dry, moderate conditions; humidity can slow drying and complicate cleanup.
- Finish: Some bricks have textured surfaces or decorative creases that trap paint and solvents; these areas need extra attention.
Understanding these variables helps you plan a safer removal path and avoid costly repair later.
Commonly used methods at a glance
- Mechanical scrubbing with brushes and scrapers for fresh or thin coatings.
- Chemical strippers designed for masonry for heavier layers, followed by thorough rinsing.
- Pressure washing with caution, suitable only for sturdy bricks and low pressures.
- Heat tools are generally not recommended on brick due to potential mortar damage and hazard.
Each method has trade-offs between effectiveness, speed, and brick integrity. The goal is to remove paint with minimal impact on brick and mortar while keeping the surface even and ready for sealing or repainting if desired.
Preparing for success: safety and planning
Before you lift a tool, set up a clean workspace with drop cloths and protective coverings for nearby plants or concrete. Wear PPE: safety goggles, chemical-resistant gloves, and a respirator if solvents are involved. Test a small, inconspicuous patch to gauge how the finish responds to your chosen method. Document what you observe (paint type, reaction to the solvent, ease of removal) so you can adjust your plan before committing to the entire surface. Planning reduces surprises and helps you predict cleanup needs and timelines.
A practical workflow for most projects
A typical workflow begins with assessments (paint age and brick type), then patch testing, followed by an incremental removal approach combining gentle mechanical action and solvent-based steps. Rinse frequently to prevent residue buildup, and stop if you notice mortar damage or brick spalling. After removal, clean the surface to remove chemical residues, dry thoroughly, and consider sealing to protect brick from future coatings and weathering. This approach balances effectiveness with brick preservation.
Maintenance after removal: finish options and care
Once paint is removed, you may decide to seal or repaint. If sealing, choose breathable masonry sealers that allow moisture to escape; avoid overly glossy finishes that trap moisture. If repainting, select masonry paint designed for brick and repoint damaged mortar as needed. Regular maintenance—clear water rinses, gentle cleaning, and periodic inspection—helps extend the life of brick surfaces and keeps them looking uniform and clean.
Tools & Materials
- Safety goggles(Chemical splash protection; fit over eyes securely)
- Nitrile gloves(Chemical-resistant; length up to mid-forearm)
- Respirator or dust mask(For solvent vapors or dusty work; use organic vapor cartridges if required)
- Drop cloths or plastic sheeting(Protects adjacent surfaces and vegetation)
- Painter's tape(To mask edges and mortar joints)
- Putty knife or stiff scraper(Use plastic or wooden tool to avoid gouging brick)
- Wire brush (soft copper preferred)(Gentle abrasion for stubborn edges; avoid aggressive metal brushes)
- Nylon scrub brush(For moderate scrubbing without damaging brick surface)
- Masonry-compatible chemical stripper(Follow label instructions; test for compatibility)
- Plastic spray bottle and bucket(For applying water or neutralizing rinse)
- Garden hose with spray nozzle(Gentle rinse; avoid high pressure on fragile brick)
- Mild dish soap(For final rinse and debris cleanup)
- Sponges or rags(Wipe residues; keep brick damp during steps)
Steps
Estimated time: 2-5 hours (plus drying time)
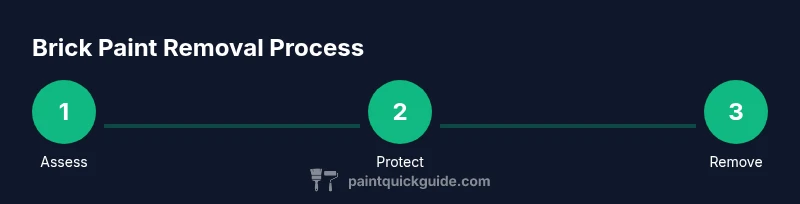
- 1
Assess paint and brick readiness
Inspect the surface to determine paint age, level of flaking, and brick/mortar condition. This initial assessment helps you pick the safest removal strategy and prevents over-aggressive methods that could damage the brick.
Tip: Take photos and note areas that look fragile; plan to test those first. - 2
Protect the workspace
Lay down drop cloths to cover nearby plants, sidewalks, and any windowsills. Use painter's tape to mask mortar joints or edges that you don’t want touched.
Tip: Secure coverings with weights or heavy objects to prevent wind displacement. - 3
Test a small patch with your chosen method
Apply a small amount of stripper or perform a gentle scrub on a hidden area. Observe how the paint responds within 5-10 minutes, and check for brick etching or mortar damage.
Tip: If the paint resists or the brick shows chalking, reduce force or switch methods. - 4
Apply chemical stripper (if needed)
Follow the product label precisely; apply a thin, even layer over the test patch or the identified area. Keep within the masked region and avoid puddling near joints.
Tip: Work in small sections and avoid leaving stripper on too long if brick looks dry. - 5
Gently lift paint with scrapers and brushes
After the stripper has softened the paint, use a plastic scraper to lift the coating. Use a nylon brush for stubborn edges; avoid aggressive metal tools that can gouge brick.
Tip: Work from top to bottom to prevent paint from running onto cleaned areas. - 6
Rinse and neutralize
Rinse the treated area with a garden hose using a gentle spray. If required by the stripper, neutralize with the recommended solution and rinse again to remove all residues.
Tip: Rinse thoroughly until water runs clean; residue can re-adhere if not removed. - 7
Dry, assess, and decide on finish
Allow the brick to dry completely and evaluate remaining paint spots. Decide whether to repeat steps, seal, or repaint depending on the result and project goals.
Tip: Avoid sealing damp brick; moisture can trap and cause issues later.
Your Questions Answered
Can you remove paint from brick without damaging it?
Yes, with careful assessment and method selection. Start with patch testing and use gentle mechanical actions or masonry-safe chemical strippers. Avoid aggressive tools and high pressures that can harm brick or mortar.
Yes. Start with a patch test and use gentle methods to protect brick and mortar while removing paint.
What is the best method for exterior brick paint removal?
The best method depends on the paint age and brick condition. A combination of chemical stripper for heavy layers and careful scrubbing often works well, followed by a thorough rinse. Avoid high-pressure washing on fragile mortar.
A mixed approach with a chemical stripper and careful scrubbing is common for exterior brick paint removal; avoid harsh pressure washing on weak mortar.
Can old lead-based paint be removed safely from brick?
If lead-based paint is suspected, follow local regulations and consider professional abatement. Use proper PPE and avoid sanding bare lead paint. Professional contractors can ensure safe containment and disposal.
If lead paint is suspected, contact a licensed professional to ensure safe removal and proper disposal.
How long does brick paint removal take?
Time varies with paint type and surface. Prepare for several hours of work plus drying time between passes, especially with chemical strippers. Plan for a multi-day project on large surfaces.
It can take several hours plus drying time, often spanning across days on larger jobs.
Is it safe to use a power washer on brick?
Power washers can damage mortar and brick if misused. If you must, use a very low pressure and a wide spray pattern on sturdy masonry, testing on a hidden area first.
Avoid high pressure; if you must, use low pressure and test first on a hidden area.
Should I hire a pro for brick paint removal?
For large exterior surfaces or tricky finishes, a professional may save time and prevent damage. They understand masonry, coatings, and safe disposal requirements.
For big jobs or uncertain finishes, consider hiring a masonry pro to ensure safe, effective removal.
What finishing options follow paint removal on brick?
You can seal with breathable masonry sealer, or repaint with compatible masonry paint. Ensure the brick is completely dry before applying finishes to prevent moisture trapping.
Seal with breathable masonry sealer or repaint; ensure bricks are dry before finishing.
Watch Video
Quick Summary
- Test a patch before full-scale removal
- Protect surrounding areas and wear PPE
- Choose method based on paint age and brick condition
- Rinse thoroughly and let brick dry completely
- Consider sealing for future protection