Removing Paint From Brick: A Step-by-Step Guide
Learn proven methods to remove paint from brick, from testing patches to mechanical and chemical stripping, and how to finish with a clean repaint. Safety, time, and cost tips included.

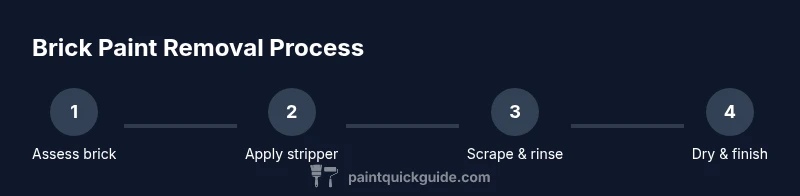
You can usually remove paint from brick using a combination of mechanical scraping and chemical strippers, followed by thorough washing and drying. Start with a patch test to choose the right approach for your brick type and paint age, protect nearby surfaces, and proceed methodically to minimize damage to mortar.
Why brick surfaces trap paint and how removal works
Brick is porous and rough, with cement-based mortar that can soak in paint. This combination makes adhesion strong, especially for older paints. The key question—can paint be removed from brick—depends on paint type, brick porosity, and how well you manage the surface during treatment. In many cases, a blend of mechanical tools and chemical strippers yields the best results, while preserving the integrity of the brick and mortar. According to PaintQuickGuide, brick porosity and rough texture influence how easily paint lifts away, which is why a patch test is essential before a full removal attempt. Expect varying results across brick faces, especially where joints are recessed or where coatings have aged unevenly.
Understanding paint types and how they cling to brick
Latex or water-based paints tend to respond differently from oil- or alkyd-based coatings. On brick, latex can dry hard but is often easier to remove with milder solvents and mechanical work. Oil-based paints adhere more stubbornly and may require stronger stripping products and longer dwell times. The bricks’ texture, mortar composition, and previous cleaning history all affect outcomes. The takeaway is simple: identify the paint type first, then tailor your method so you don’t over-scrape or scar the brick. PaintQuickGuide’s guidance emphasizes that recognizing the interaction between paint and brick is the foundation of a successful removal project.
Planning and safety: patch tests, ventilation, and protection
Before diving in, plan by selecting a small, inconspicuous patch for testing. This reveals how the brick reacts to heat, scrubbing, and chemical strippers. Ensure good ventilation, especially when using solvents, and wear safety gear—gloves, goggles, and a respirator as needed. Cover nearby plants and surfaces with drop cloths or plastic sheeting. If you’re working indoors, seal off the area to minimize dust and chemical exposure. This preparatory phase reduces risk and helps you choose the right combination of tools and products for the job.
Mechanical removal techniques: scraping, brushes, and cautious grinding
Mechanical methods include plastic scrapers, stiff bristle brushes, and occasional light use of a grinder with a masonry wheel on very stubborn spots. Always test on a small area first and avoid aggressive grinding that could damage mortar or chip brick edges. Work in gentle, steady motions to lift paint from the brick’s crevices without etching the surface. For textured brick, a wire brush can remove loose paint but may leave a roughened surface; accept a bit of texture if that’s the brick’s character. Remember, safety comes first: wear a dust mask and eye protection during all grinding or brushing.
Chemical strippers: choosing the right product and application
Chemically stripping paint from brick should be done with products designed for masonry and low-risk on mortar. Gel-based strippers tend to stay put in crevices, while liquid formulas can run into mortar joints. Apply according to the manufacturer’s directions, maintaining dwell time to soften coatings before mechanical removal. Neutralize or wash residual chemical traces afterward to prevent future adhesion of dust or new paint. If you’re dealing with lead-based paint, follow regulatory guidelines for safe removal and disposal.
Cleaning, rinsing, and drying: restoring a clean brick surface
After stripping, rinse thoroughly with clean water using a brush or low-pressure spray to remove residue. Allow the brick to dry completely before evaluating how much paint remains. In some cases, multiple passes are needed to reach a clean surface, especially on deep crevices. A final rinse with a mild soap solution can help neutralize residues from strippers. Drying time will vary with climate and brick porosity, but plan for at least 24–48 hours in humid or cool environments to prevent moisture entrapment that could affect future coatings.
Mortar joints and brick integrity: what to watch for during removal
Paint may cling to mortar joints differently than the brick faces. Scraping too aggressively near joints risks loosening mortar or widening cracks. If mortar shows signs of damage, pause, and consult a masonry professional. After removal, inspect joints for hollow spots, flaking, or large cracks. Repair or repointing may be required before repainting or sealing to ensure the installation remains sound and weather-resistant.
Finishing options after removal: sealers, paints, and color ideas
Once brick is clean and dry, you must decide whether to seal or repaint. If you want a natural brick look, consider a breathable masonry sealer to protect against moisture. If repainting, select a breathable exterior masonry paint and apply in thin, even coats. For a modern aesthetic, matte or satin finishes often work well on brick. Plan color justice with sunlight exposure and surrounding architecture, and remember that darker colors emphasize texture whereas lighter tones highlight detail.
Time, cost, and labor planning for brick paint removal
A typical brick paint removal project can take anywhere from a few hours to several days, depending on brick size, paint thickness, and whether multiple passes are needed. Costs include protective gear, strippers, brushes, and disposal. Budget for unexpected setbacks, such as stubborn spots or mortar repairs. Effective planning reduces wasted time and ensures you complete the project with a clean brick surface ready for sealing or repainting.
Troubleshooting and common mistakes to avoid
Common missteps include using overly aggressive grinding, skipping patch tests, and neglecting ventilation. Another pitfall is not protecting adjacent surfaces or underlying landscaping from chemical runoff. If you see chalky or powdery texture returning after a wash, you may have residual paints or efflorescence requiring another pass. Patience is essential; rushing can damage brick or mortar and lead to more work later.
Tools & Materials
- Personal protective equipment (PPE)(Gloves, safety goggles, and a respirator or organic vapor mask as needed)
- Plastic scrapers(Wide edge for lifting paint without digging into brick)
- Stiff nylon/bristle brushes(For agitating paint and debris in crevices)
- Painter's tape and drop cloths(Protect adjacent surfaces and plants)
- Chemical stripper suitable for masonry(Gel-based preferred for vertical surfaces)
- Neutralizer/soap solution(Rinse residues to stop chemical action)
- Garden sprayer or spray bottle(Apply stripper and rinse solution evenly)
- Bucket and clean water supply(Rinse work area and tools)
- Hose with nozzle(For boundary rinsing where allowed)
- Dust mask or respirator(Respirator preferred for solvent use)
- Masonry sealant or exterior masonry paint (for finish)(Choose breathable products; plan for repainting)
Steps
Estimated time: 4-8 hours (plus drying time)
- 1
Prepare the workspace
Clear the area, lay down drop cloths, and seal nearby plants or furniture. Put on PPE and ensure good ventilation. This first step reduces exposure and protects surfaces from chemical splashes.
Tip: Ventilation is crucial—open windows or run a fan if indoors. - 2
Test a small patch
Apply stripper to a discreet patch and monitor the reaction for 15–30 minutes. If the coating softens, you’re on the right track; if not, adjust dwell time or switch methods.
Tip: A patch test prevents unexpected brick damage. - 3
Protect surrounding areas
Cover all visible edges, joints, and nearby masonry with tape and plastic to prevent chemical seepage. Keep containers away from heat sources or open flames.
Tip: Double-check that exposed mortar isn’t directly contacting living spaces. - 4
Apply chemical stripper
Follow manufacturer directions; apply an even coat and maintain recommended dwell time. Strippers work best on vertical bricks if you pile enough product to prevent runs.
Tip: Avoid thick piles that dry unevenly. - 5
Scrape and agitate
Using a plastic scraper, lift softened paint and rinse or wipe away debris. For tough spots, switch to a nylon brush and reapply a light layer of stripper.
Tip: Work in small sections to prevent re-adhesion. - 6
Rinse and neutralize
Rinse thoroughly with clean water; apply a neutralizing solution as directed to halt chemical action. Repeat until runoff is clear of residue.
Tip: Rinsing reduces post-removal staining and future paint adherence. - 7
Inspect and assess
Check for remaining paint on crevices or joints. Decide if one more pass is needed or if you should move to sealing or repainting.
Tip: Residual chips may indicate deeper penetration requiring mortar repair. - 8
Address mortar and texture
If mortar is damaged, limit further scraping and plan for repointing. Texture differences may persist, but a clean base improves finish quality.
Tip: Don’t skip mortar repairs; failing to address joints undermines durability. - 9
Finish preparation
Ensure brick is completely dry before applying sealant or paint. Pre-warm days and moderate humidity help the curing process.
Tip: Drying times vary—don’t rush to coat while damp.
Your Questions Answered
Can all brick surfaces be stripped without damaging the brick or mortar?
Most brick surfaces can be stripped, but results vary with brick texture, mortar type, and paint age. Always patch test and proceed with care to minimize damage.
Most brick surfaces can be stripped, but patch test first and proceed slowly.
What method is fastest for removing paint from brick?
There’s no single fastest method; a combination of mechanical removal and chemical stripper often yields the quickest, safest results depending on the coating and brick porosity.
Usually a combo of mechanical and chemical methods works fastest.
Is chemical stripper safe to use on brick?
Chemical strippers designed for masonry are generally safe when used according to instructions, with proper ventilation and PPE. Avoid overuse near joints and follow disposal guidelines.
Yes, when used as directed with proper ventilation and PPE.
Do I need to seal the brick after removing paint?
Sealing is optional but recommended if you want moisture protection or to prepare for repainting. Choose breathable masonry products to maintain brick health.
Sealing depends on your plan; breathable sealers are often best.
How long does brick paint removal typically take?
Time varies with area size, paint thickness, and drying times. Plan for several hours to a full day, plus extra time for any repairs.
Usually several hours to a day, depending on conditions.
Watch Video
Quick Summary
- Test patch first to gauge brick reaction
- Start with mechanical removal; add chemicals only as needed
- Protect surrounding areas to prevent collateral damage
- Rinse thoroughly and neutralize after stripping
- Plan for sealing or repainting to finish cleanly