Brick Paint: A Practical Guide for Masonry Surfaces
Learn how to paint brick surfaces—prep, primers, paints, and application tips. This practical guide from PaintQuickGuide explains costs, durability, and maintenance for brick paint projects.

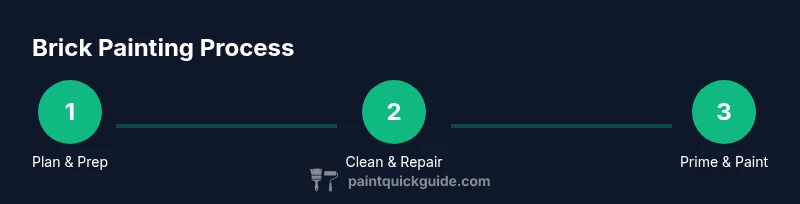
By following proper prep, primers, and masonry-friendly paints, you can transform brick surfaces for long-lasting color. The goal is to remove grime, seal the masonry, and apply durable latex or acrylic brick paint with multiple thin coats. This guide from PaintQuickGuide explains steps, materials, and best practices to ensure even coverage and minimal peeling.
Why brick paint matters
Brick surfaces offer timeless curb appeal but present unique challenges for color changes. Brick paint, when applied correctly, can rejuvenate facades, interior accents, or masonry features while maintaining breathability. The right brick paint finish protects against moisture intrusion, reduces efflorescence visibility, and helps resist chalking and fading in sunlight. Importantly, you should pursue a finish that sticks to brick with good elongation and flexibility, because masonry expands and contracts with temperature changes. The PaintQuickGuide approach emphasizes selecting breathable, masonry-grade products and performing proper surface prep before any color change. When done well, brick paint can deliver a durable, low-maintenance look that lasts years rather than months.
Throughout this guide, you’ll see terms like masonry primer, acrylic latex brick paint, and elastomeric alternatives discussed in practical terms. If you’re repainting brick on a home exterior, remember that curb appeal matters, but so does performance in rain, sun, and freeze-thaw cycles. The goal is a finish that remains intact, looks even, and can be cleaned without harsh scrubbing. This is especially important for brick surfaces near entryways or outdoor living spaces where dirt and mildew accumulate more quickly.
Surface prep essentials for brick
Surface prep is the single most important step in brick painting. Thorough cleaning removes dirt, moss, and efflorescence that can prevent adhesion. Begin with a broad sweep using a stiff-bristle brush, then wash with a masonry cleaner or diluted detergent solution. For stubborn deposits, a gentle pressure wash (on a low setting) or a scrub with a nylon brush can reveal clean brick pores ready to accept primer.
After cleaning, inspect for cracks, loose mortar, and damaged bricks. Repair with appropriate masonry caulk or epoxy mortar if needed, and allow ample curing time. Before you commit to color, test a hidden area for adhesion and moisture. If you detect moisture behind the brick, postpone painting or address drainage and flashing first. Finally, protect nearby surfaces with taped edges and drop cloths, and plan the project for dry, mild weather.
Primer and paint selection for brick
Choosing the right primer is as important as picking brick paint itself. A high-quality masonry primer improves adhesion to porous brick and helps balance color. For most projects, an acrylic latex masonry primer provides good breathability and clean-up, while avoiding heavy solvents. If your brick has previous paint that is peeling, a bonding primer can help. For the topcoat, use a brick-friendly acrylic latex paint rated for exterior masonry if the surface is outdoors, or a latex-brick compatible paint for interiors. Elastomeric coatings can be used for very porous surfaces or areas requiring extra waterproofing, but note they may trap moisture in some conditions and can crack with extreme movement; test in a small area first.
Test compatibility by brushing a small area of primer and final paint on a sample brick to observe adhesion, color uniformity, and any texture changes. Always follow label recommendations for dry and cure times between coats, and verify the product works on brick specifically rather than generic wall paint. The right primer plus the right topcoat creates a strong foundation for a long-lasting brick paint job.
Application methods: roll, brush, and spray
Brick paint can be applied with a brush, roller, or spray equipment depending on the area and texture. For rough brick, a roller with a ¾-inch nap helps achieve even coverage, while brushes work well for recessed mortar lines and edges. Spraying can speed up larger surfaces but requires masking of adjacent areas and protective gear to avoid inhalation of overspray. Apply thin, even coats; multiple light coats deliver better adhesion and color consistency than a single thick coat.
Begin with a cut-in around edges and recessed areas, then roll across larger flat surfaces. Allow adequate drying time per label instructions between coats. If you notice lap marks or uneven texture, feather the edges and apply a third coat only where needed. Maintain a steady pace and keep a wet edge to prevent lines from forming. For interior brick, ensure good ventilation and consider a roller suitable for textured surfaces to minimize sags and crinkles.
Pro tip: If you’re using a spray method, practice on scrap brick or a test panel to refine your technique before tackling the main project.
Finishes and color choices for brick
Color choices for brick paint range from traditional warm whites and earth tones to bold, saturated hues. Lighter colors tend to highlight imperfections less than dark colors, while darker shades may emphasize surface texture. Matte finishes can hide minor flaws, whereas satin or low-sheen options are easier to clean and maintain on exterior walls. For interior brick, consider heat resistance and humidity tolerance if near kitchens or bathrooms. Breathable finishes are recommended on old brick to reduce moisture buildup behind the coating.
A good practice is to test two color options on small panels to compare how the shade interacts with real light, shadows, and adjacent materials. If you’re adding color to a historic brick or a house with multiple brick tones, you can select a unifying color or coordinate with trim and stone to achieve a cohesive look. Brand consistency, weather durability, and maintenance requirements should guide final choices. When in doubt, lean toward a breathable, masonry-grade paint with excellent UV resistance.
Maintenance and long-term care
Once brick paint is applied, maintenance helps extend its life. Regular cleaning with a soft-bristle brush and mild detergent prevents dirt buildup; avoid using harsh cleaners that could degrade the coating. Inspect annually for cracks or peeling; promptly repair any damaged areas with appropriate filler and re-coat as needed. Good drainage around brick walls, gargoyle-like water dispersion patterns, and proper flashing reduce moisture exposure and slow deterioration. If you notice efflorescence after rain, rinse gently and recoat if necessary after the surface dries fully.
Seasonal checks are valuable—extreme heat or cold can alter paint performance, so plan touch-ups before peak seasons. For exterior brick, recoat every few years depending on climate and sun exposure. This proactive approach saves money and keeps brick surfaces looking fresh.
Troubleshooting common issues
Peeling or blistering brick paint usually indicates poor adhesion, moisture, or improper surface prep. Stop painting if you detect damp brick and allow extra drying time or address underlying moisture sources. Efflorescence, a white powdery residue, can indicate moisture intrusion; remove residual salts and re-prime before repainting. Fading and chalking are common on brick surfaces exposed to harsh sun—choose UV-resistant finish and consider applying a clear masonry sealer after a full cure period if recommended by the product.
Cracks in bricks or mortar may require filling and structural assessment; repaint once repairs are solid. Lifting paint around windows and doors can be caused by poor sealing; ensure caulking is intact and use a flexible paint system. If color appears uneven on rough brick, re-sand the surface lightly or apply a slightly more robust nap roller for better coverage. The key is identifying root causes, addressing them, and avoiding a rushed, thin topcoat.
Cost and time planning for brick painting
Brick painting costs vary with surface size, access difficulty, and product selection. Typical factors include masonry primer, brick paint quality, tools, and labor if you hire a pro. Plan for surface prep time as a major portion of the job, plus dry and cure times. Weather conditions influence project duration; aim for several dry days with moderate temperatures for best results. Budget for two coats of topcoat and a primer layer to ensure durability, plus a potential sealant if you expect heavy rain exposure or high humidity.
In short, a well-planned brick paint project combines thorough prep, quality masonry products, and careful application. While costs can fluctuate, investing in proper primers and paints often saves maintenance time and extends the life of your brick finish.
DIY project plan: timeline and budgeting
To help readers visualize a brick paint project, create a rough timeline with milestones. Week 1 focuses on prep, cleaning, and repairs. Week 2 covers priming and the first coat, followed by a full cure window before applying the final coat. Budget for materials, protective gear, and tools; include a small contingency for unexpected repairs. Document your progress with photos to compare color development as the project progresses. A surface that has been prepped well, primed, and coated with two even layers will typically deliver a durable, attractive brick finish that withstands daily wear.
Tools & Materials
- stiff-bristle brush(for scrubbing loose paint and mortar dust)
- masonry cleaner(follow label; use protective gloves)
- pressure washer (optional)(use on low setting to avoid damage)
- scraper or stiff putty knife(remove loose material from bricks)
- masonry primer(acrylic latex or bonding primer recommended)
- brick-appropriate exterior/interior paint(choose acrylic latex or masonry paint designed for brick)
- paint trays and rollers(3/4-inch nap for textured brick)
- paint sprayer (optional)(practice on scrap brick first)
- masking tape(protect adjacent surfaces)
- drop cloths(cover ground and nearby items)
- caulk for cracks(silicone or acrylic caulk for masonry joints)
- caulking gun(ease and control during application)
- sandpaper 120-grit(lightly scuff glossy areas for better adhesion)
Steps
Estimated time: 2-3 days active work; additional 24-48 hours cure time depending on climate
- 1
Inspect and plan
Survey the brick surface for damage, moisture, and extents of cleaning needed. Photograph areas of concern and decide on color direction. This upfront planning prevents mid-project surprises and helps you estimate time accurately.
Tip: Create a simple plan with color samples and a taped-off test area to compare options. - 2
Clean and prepare
Scrub bricks with a stiff brush and masonry cleaner, then rinse thoroughly. Allow bricks to dry completely; moisture can cause poor adhesion and peeling.
Tip: If efflorescence returns after cleaning, rewash and dry before priming. - 3
Repair and seal cracks
Fill cracks with compatible masonry caulk and smooth with a putty knife. Let caulk cure per manufacturer instructions. Repairing cracks before painting prevents future peeling and water intrusion.
Tip: Test the filled area for paint adhesion before proceeding. - 4
Moisture test and climate check
Conduct a moisture test on brick where feasible. Schedule painting for dry days with temperatures within product guidelines to ensure optimal cure.
Tip: Avoid painting if rain is forecast within 24–48 hours of coat application. - 5
Prime the brick
Apply a masonry primer using a brush along edges and a roller on flat surfaces. Allow primer to dry completely before topcoating. A good primer improves adhesion and color uniformity.
Tip: Use a bonding primer on older, flaking brick for better grip. - 6
First coat of brick paint
Apply the first thin coat evenly, working in small sections. Avoid pooling and keep a wet edge to prevent lap marks. Let the first coat dry fully before evaluating coverage.
Tip: Back-brush along horizontal mortar lines to ensure pigment reaches all pores. - 7
Second coat and touch-ups
Apply a second coat for even color and improved durability. Address any thin spots or variation by targeted touch-ups rather than a full recoat.
Tip: If color looks uneven on test areas, sand lightly and recoat the affected zones. - 8
Seal and cure
If you’re using a sealant or additional protective layer, apply after the final paint coat once it has cured. Curing times vary by product; avoid heavy cleaning for several days after painting.
Tip: Check product guidelines for curing times and recoat windows.
Your Questions Answered
Do I need to remove all old paint from brick before repainting?
No, you don’t have to strip all existing paint. Focus on removing loose paint, cleaning the surface, and repairing damaged areas. If a large portion is peeling, consider more extensive prep or consulting a pro.
You don’t have to strip every inch of old paint. Clean, repair, and ensure the surface is sound before priming.
What primer should I use for brick?
Use a masonry primer designed for brick. A bonding or acrylic latex primer helps with adhesion and color uniformity. Avoid generic interior primers that aren’t rated for masonry.
Choose a masonry primer designed for brick to ensure good adhesion and even color.
Can brick be painted indoors?
Yes, brick can be painted indoors, but ensure proper ventilation and humidity control. Indoor applications require compatible interior masonry paints and careful masking to protect surrounding surfaces.
Indoor brick painting is possible with good ventilation and the right interior masonry paint.
How many coats of brick paint should I apply?
Typically, one primer coat plus two topcoats provides durable coverage and color depth. Thin, even coats reduce the risk of peeling and create a smoother finish.
Usually one primer and two coats of topcoat yield the best results.
How long does brick paint last?
Durability depends on climate, prep quality, and product choice. With proper guidance and maintenance, brick paint can look good for several years before touch-ups are needed.
Durability varies with climate and prep; expect several years before maintenance is needed.
Can I use spray paint on brick?
Spray painting brick is possible but requires masking, PPE, and practice. For larger areas, rolling or brushing often delivers a more even finish with less waste.
Spray painting is doable but requires care; roll or brush for even coverage on larger areas.
Watch Video
Quick Summary
- Plan and prep thoroughly before painting brick.
- Choose a masonry primer and breathable brick paint.
- Apply thin coats with proper drying time between layers.
- Address moisture and cracks before final coats.
- Maintain and recoat as needed for longevity.