What Is Wrong with Painting Brick? A Troubleshooting Guide
Discover what is wrong with painting brick and how to fix adhesion, moisture, and prep issues. An urgent, practical guide from PaintQuickGuide for durable brick finishes.

Most painting brick problems start with adhesion: brick's porous, dusty surface and efflorescence salts reduce grip. Quick fix: scrub the wall with a stiff brush and a masonry cleaner, rinse well, and let it dry completely. Prime with a breathable masonry bonding primer, then apply a high-quality acrylic exterior brick paint, keeping moisture out and avoiding latex on damp surfaces.
What is wrong with painting brick: common failures and symptoms
What is wrong with painting brick? The phrase captures a frequent frustration among homeowners and DIYers. The most common failures are poor adhesion, premature peeling, and visible efflorescence or dust that makes the finish look dull. Brick is porous and uneven, and traditional interior paints don’t seal it the way surface-prep demands. If you notice powdery residue on the surface, a ghostly white bloom around mortar joints, or spots that bubble after rain, you’re seeing classic signs that the brick substrate is not ready for paint. In addition, moisture trapped behind a new coat can cause cracking, mold growth, and accelerated wear. Before you repaint, it’s essential to identify whether the brick needs deeper cleaning, moisture mitigation, or a different coating strategy. The PaintQuickGuide team emphasizes that understanding your brick’s condition is the first step toward long-lasting color. According to PaintQuickGuide, implementing proper surface prep is the single best predictor of lasting results.
Surface preparation steps you must not skip
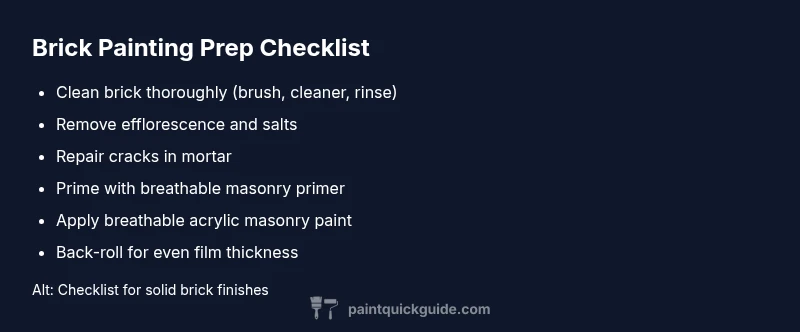
Before any paint touches brick, surface preparation is non-negotiable. Begin with a thorough cleaning to remove dust, dirt, and old flaking paint. Use a stiff nylon brush and a masonry cleaner or diluted detergent; rinse completely and allow ample drying time depending on weather. Efflorescence salts will push paint away if left untreated; scrub with a solution of water and a poultice of baking soda or a commercial salt remover, then rinse again. If you see powdery laitance or cement dust, remove it until the brick feels clean and dry to touch. Visual checks: a clean brick surface should feel roughly gritty but not damp. Finally, test moisture by tapping a small area with a damp finger; if moisture is released or chalk appears, rewash. This careful approach minimizes adhesion problems and sets the stage for a durable finish.
How to choose the right primer for brick surfaces
Primer choice is where many failures originate. For brick, a breathable masonry primer is essential to allow moisture to escape without lifting the paint. Some projects benefit from a bonding primer if the brick has very glossy or stubborn patches, but avoid sealers that trap moisture. Apply primer in a thin, even coat and let it cure according to the manufacturer’s guidance. Remember: paint may look uniform in the can, but brick is irregular; you may need two light coats rather than one heavy coat. PaintQuickGuide recommends testing primer on a small area first. Our analysis shows that breathability and proper curing time are more important than color matching at this stage.
Selecting paint types: breathable acrylic vs elastomeric
The paint you choose determines long-term performance. Breathable acrylic masonry paints are generally best for brick because they allow moisture to escape and resist cracking. Elastomeric coatings can bridge small cracks but often trap moisture and cause blistering if brick joints are not perfectly sealed. Use paints labeled for masonry that are designed for exterior brick surfaces and avoid thick-film or solvent-based enamels on damp brick. When in doubt, consult a PaintQuickGuide guide or your local retailer about products that specifically mention brick and masonry on the label.
Application techniques that prevent peeling and cracking
Apply in calm, mild weather and work in small sections for control. Use a masonry brush or roller for even film thickness, then back-roll to smooth the surface and remove pinholes. Maintain a wet edge and avoid letting primer or paint dry on the surface between coats. For textured brick, spraying can speed coverage, but you still need a back-roll to verify uniform thickness. Two thin coats are typically better than one thick coat, and you should let each coat cure fully before applying the next. Protect adjacent surfaces and landscaping from splatter.
Common mistakes to avoid during brick painting
Common errors include using non-breathable sealers, painting over damp brick, and skipping primer. Avoid indoor wall paints on exterior brick, which lack exterior durability and moisture tolerance. Do not seal the brick with a film-forming coating that traps moisture in the brick and mortar; instead, opt for breathable finishes. Neglecting to seal or caulk cracks and gaps in mortar will allow water intrusion that undermines adhesion. Never rush a repaint; missed cure times reduce adhesion and color uniformity.
Maintenance and re-coating schedule for brick paint
Maintenance is about watching for signs of wear rather than waiting for peeling. Clean the brick periodically with a soft brush and mild cleaner, avoiding high-pressure washing that can scar mortar joints. Address any efflorescence or dampness sources immediately. When color starts to fade or you notice chalking on the surface, plan a re-coat with breathable exterior masonry paint. A practical maintenance plan keeps your brick looking fresh and protects the substrate from moisture intrusion.
When to call a pro and cost considerations
If brick is heavily cracked, the wall has persistent moisture, or the surface is covered in recurring efflorescence, professional inspection is wise. A contractor can identify substrate movement, hidden rot, or mortar issues that require masonry restoration before painting. Costs vary by square footage, surface condition, and region, but proper prep and breathable products can dramatically extend the life of a brick paint job. Request a moisture test and a detailed written plan before committing to a color change.
Quick comparison: brick painting vs brick staining
Brick painting offers a solid color and a protective film, while brick staining preserves the brick’s texture and breathability with a subtler color change. Painting hides mortar lines more completely, but can require more maintenance; staining is often more forgiving and better for historic brick. Climate, exposure, and goals should guide your choice, and always favor breathable products to prevent moisture issues.
Steps
Estimated time: 1-2 days
- 1
Inspect for moisture and damage
Visually inspect brick and mortar for cracks, damp spots, and efflorescence. Note any areas needing repair before cleaning.
Tip: Start with the worst affected area to gauge adhesion risk. - 2
Clean the brick thoroughly
Use a stiff brush and masonry cleaner to remove dirt and loose material. Rinse until water runs clear and allow surfaces to dry completely.
Tip: Avoid high-pressure washing on fragile mortar joints. - 3
Treat efflorescence and salts
If white salt blooms appear, scrub with a salt remover or baking soda solution, then rinse well and dry.
Tip: Salt issues can recur if moisture remains. - 4
Repair cracks and damaged mortar
Fill small cracks in mortar with non-corrosive filler suitable for masonry. Let cure as directed before painting.
Tip: Use a matching color filler to minimize visual risk. - 5
Prime with breathable primer
Apply a thin, even coat of breathable masonry primer to all brick and mortar. Allow to cure fully before painting.
Tip: Test a small patch first to ensure no tackiness. - 6
Apply the paint in thin coats
Use two light coats of breathable exterior masonry paint with back-rolling to smooth the film and avoid pinholes.
Tip: Maintain a wet edge to prevent lap marks. - 7
Cure and inspect
Let coats cure fully in favorable weather, then inspect for missed spots or uneven color. Touch up as needed.
Tip: Don’t rush the second coat; proper curing matters. - 8
Maintain and monitor
Regularly clean and monitor for moisture issues, recoat as needed with breathable products.
Tip: Keep an eye on joints and sealant integrity.
Diagnosis: Paint peels, bubbles, or chalks after exposure to moisture or after rain
Possible Causes
- highMoisture trapped behind fresh paint
- highEfflorescence salts on brick surface
- mediumNon-breathable primer or paint used
- highPoor surface prep or dirty brick
Fixes
- easyAllow surface to dry completely, remove salts, and rewash if needed
- easyReprime with breathable masonry primer and select a breathable paint
- mediumAddress moisture sources (drainage, gutters) before repainting
Your Questions Answered
Do I need to remove existing paint from brick before repainting?
In many cases you can repaint over existing paint if it's well-adhered; if it’s peeling, remove the loose paint and sand glossy spots, then prime. Always test adhesion on a small area first.
If the old paint sticks well, you can prime and repaint. If it peels, remove loose paint and prime before painting.
Is latex paint suitable for brick?
Yes, but use a breathable masonry latex/acrylic paint specifically labeled for brick and exterior use. Avoid non-breathable sealers that trap moisture.
Yes, use a breathable masonry latex or acrylic paint designed for brick, not a blocking sealer.
How long does brick paint last?
Durability depends on prep and climate. With proper breathable products and good maintenance, a brick paint job can maintain color and protection for many seasons.
If you prep properly and use breathable products, the color lasts for many seasons.
Can I paint brick indoors?
Interior brick requires moisture management and a breathable finish. Ensure the space is well-ventilated and the brick is dry before painting.
Paint interior brick only after ensuring it's dry and well-ventilated.
Should I use a sprayer or brush for brick?
Both work. Sprayers speed coverage but back-rolling helps uniform thickness and avoids missed spots. PPE is essential.
Sprayers are fast, but back-roll to even out the coat—wear protective gear.
What’s the best way to test color on brick?
Apply a small sample area in a representative location and inspect under different lighting before full application.
Try a patch first to confirm color and finish under real light.
Watch Video
Quick Summary
- Start with thorough cleaning and moisture assessment
- Use breathable masonry primers and paints
- Seal cracks and address efflorescence before painting
- Apply multiple thin coats with proper curing
- Monitor and maintain for lasting results