Where to Paint Interior Doors: A Practical Guide
Discover practical guidance on where to paint interior doors, including workspace setup, surface prep, primer and finish choices, and a clear step-by-step workflow for durable, smooth results.

Goal: Learn precisely where to paint interior doors for a durable, even finish. This guide shows the best workspace setups, surface prep, and step-by-step painting workflow, including priming, finish choices, and cleanup. Whether refinishing a single door or multiple doors, follow these practical steps and avoid common mistakes for professional results.
Why location matters for interior door painting
Choosing where to paint interior doors affects finish quality, odor management, and cleanup ease. If you paint in a cramped bathroom or cluttered garage, fumes can linger and dust can settle on your work. The PaintQuickGuide team found that a dedicated, well-ventilated space yields the best results for smooth coats and color accuracy. Set up a flat, stable surface for the door to rest, or remove the door and work on sawhorses to keep all edges accessible. Ensure lighting is even so you can see color consistency and prevent lap marks. Many homeowners use a spare bedroom with a window or a garage with a dedicated work area to minimize dust exposure and protect floors. If you must work in a busy room, shield surrounding surfaces with drop cloths and use a gentle cross-breeze to avoid blowing dust onto wet paint.
PaintQuickGuide analysis, 2026, emphasizes maintaining a stable temperature and humidity level, which helps achieve even adhesion and cure. For projects with multiple doors, designate a staging zone and a drying zone to keep the workflow smooth and avoid interruptions. This spatial planning reduces rework and makes it easier to apply two-coat finishes with uniform sheen.
id_on_block_1
Prep and workspace setup
Preparation is half the job. Remove the door from hinges if possible, or work with the door flat in place. Protect floors with drop cloths, tape off surrounding trim with painter's tape, and remove hardware to avoid paint on knobs. Choose a clean, dust-free area and arrange a simple workflow: sanding, priming, painting, drying, reassembling. Ventilation is crucial: open a window or run a exhaust fan, but avoid strong drafts that can cause dust to settle into wet paint. Have all tools within reach: a mini-tray, rollers, angled brushes, sanding blocks, and a small flashlight to check corners. If you cannot remove the door, prop it securely on a pair of sawhorses so you can access both sides. For color testing, keep a sample board handy and create a controlled color check in a well-lit corner.
id_on_block_2
Choosing your finish and paint type
For interior doors, satin or semi-gloss finishes are common because they resist cleaning and handle humidity well. Latex/acrylic paints are easier to clean than oil-based, with less odor and easier cleanup. Primer choice matters: use a stain-blocking or bonding primer depending on door material. If you’re refinishing a previously stained wood, a deglosser and a shellac-based primer can improve adhesion. Consider color and sheen: eggshell may look soft, but satin or semi-gloss creates more durable surfaces for high-traffic doors. If you want spray-ready smoothness, you may opt for a paint with built-in leveling properties or use a sprayer with proper ventilation. Test color at a hidden area to ensure match with trim and adjacent walls.
id_on_block_3
Surface prep: cleaning, sanding, sealing
Start with a thorough cleaning to remove dust, oils, and residue from handling. Wipe the door with a mild degreasing solution, then rinse with a damp cloth and let it dry completely. Lightly sand glossy surfaces with 120- or 150-grit paper to create tooth for primer, wiping away dust between passes. If the door has embossed panels or intricate trim, use a fine-grit block to avoid gouging. Apply a thin coat of primer and let it dry according to the product guidelines. For non-wood surfaces or laminate, use a bonding primer designed for slick surfaces. Seal edges and joints with painter's tape to protect adjacent walls.
id_on_block_4
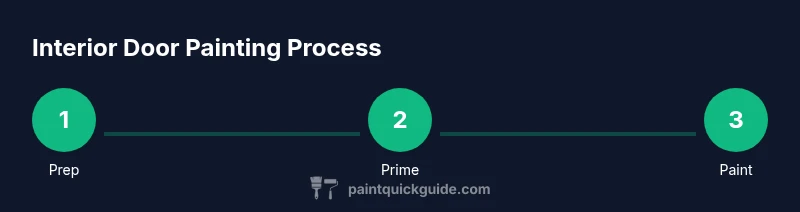
Step-by-step painting workflow
- Remove hardware and place the door on sawhorses or a sturdy work surface. 2) Clean and degloss the surface. 3) Sand slightly to create key for primer, then wipe away dust. 4) Apply primer with even strokes, covering edges and panel details. 5) After primer dries, apply a first coat of paint using long, smooth strokes; cut in around edges with an angled brush for crisp lines. 6) Allow the first coat to dry fully, sand lightly if needed, and apply a second thin coat for best coverage. 7) Reattach hardware and rehang the door once fully cured. Tips: keep coats thin to avoid drips; maintain consistent distance from the surface; and monitor drying times between coats.
Estimated time: active work 60-120 minutes; total project time including drying can run 24 hours or more depending on climate and paint type.
id_on_block_5
Common mistakes and how to avoid them
- Skipping surface prep leads to peeling. Always clean and sand glossy surfaces. - Overloading the brush or roller creates drips and uneven sheen. Apply thin coats and back-roll to even out. - Not protecting surrounding surfaces can ruin trim and floors. Use painter's tape and drop cloths. - Failing to test color in a visible area may result in regret. Always test in a less visible location and compare under room lighting.
id_on_block_6
Maintenance and touch-ups after painting
Store extra paint for touch-ups; label color and finish. For doors in high-traffic areas, keep a small kit of brush and paint to address scuffs. Clean with mild soap and water to avoid discoloration; for stubborn marks, use a lightly damp cloth with a gentle cleaner. If you notice adhesion issues or chips in the first week, touch up promptly and cure fully before wear.
id_on_block_7
Authority sources
- EPA Lead Paint Safety: https://www.epa.gov/lead
- OSHA Workplace Safety: https://www.osha.gov
- CDC Lead Poisoning Prevention: https://www.cdc.gov/nceh/lead/
These sources provide safety and best-practice references for homeowners and professionals working with paint and finishes.
id_on_block_8
Tools & Materials
- Interior door primer(Use stain-blocking or bonding primer suited for your door material.)
- Interior door paint (latex/acrylic, satin or semi-gloss)(Choose color and sheen based on usage and cleaning needs.)
- Sanding blocks or sandpaper (120- and 220-grit)(Gently scuff surface for primer adhesion; wipe dust between passes.)
- Angled brushes (2-inch) and a small round brush(Edge work and panel details.)
- Foam roller (4-inch) or small paint roller(For broad surfaces; avoid heavy coats.)
- Paint tray or tray liners(Keep paint even and container clean.)
- Drop cloths and painter's tape(Protect floor and nearby surfaces.)
- Screwdriver or drill to remove hardware(Label hardware to avoid misplacement.)
- Mild degreasing cleaner and microfiber cloth(Clean before sanding.)
- Mask or respirator and eye protection(Ventilation and safety.)
Steps
Estimated time: Active work 60-120 minutes; total project time including drying 24 hours or more depending on climate and paint type.
- 1
Remove hardware and label components
Take off doorknobs and hinges when possible and store screws in labeled bags or a magnetic tray. This prevents loss and ensures crisp edges when you reassemble. If you must leave hardware on, protect it with masking tape. Time for this step is usually 5-10 minutes for hardware removal, plus plannable labeling.
Tip: Label each screw or plate as you remove them. - 2
Protect surrounding surfaces and set up workspace
Lay drop cloths to protect floors, and use painter's tape to mask adjacent trim. Position the door on sawhorses or a stable table so you can work on all faces without handling a wet surface. Ensure the area has good airflow but avoids direct drafts over wet paint. Drying times will be affected by ventilation.
Tip: Keep the workspace well-lit so you don’t miss thin spots. - 3
Clean and lightly sand the surface
Wipe away oils with a mild degreaser, then rinse and allow to dry. Lightly sand glossy areas (120-150 grit) to create tooth for primer, and wipe away dust. Sanding helps primers grip and reduces the risk of peeling later.
Tip: Use a tack cloth to remove fine dust between passes. - 4
Apply primer
Apply a thin, even coat of primer to all surfaces, including edges and panel details. Let primer dry fully per product guidelines. A second coat is sometimes needed on problematic surfaces. Sand lightly between coats if required.
Tip: Avoid pooling by using long, even strokes. - 5
Paint the edges and panels
Cut in around the edges with an angled brush for crisp lines, then fill in panels with a roller or brush using long, smooth strokes. Apply a thin first coat and let it dry completely before evaluating coverage.
Tip: Keep a consistent distance from the surface to prevent brush marks. - 6
Apply second coat and cure
Apply a second thin coat for best coverage and color depth. Allow full cure time before reattaching hardware or using the door. If a third coat is needed, ensure adequate drying between coats.
Tip: Patience between coats yields a smoother finish.
Your Questions Answered
Do I need to remove the door from the hinges before painting?
Removing the door and hardware provides crisper lines and easier access to edges. If removal isn’t possible, protect hardware and edges thoroughly and work very carefully.
It's best to remove the door and hardware for optimal results, but you can work with it mounted if necessary with extra protection.
What finish is best for interior doors?
Satin or semi-gloss finishes are popular for their durability and easy cleaning. They resist humidity better than flat or matte finishes.
A satin or semi-gloss finish is typically the best choice for interior doors.
Can I spray paint interior doors?
Yes, spraying can produce a very smooth finish but requires proper ventilation, masking of surrounding areas, and a suitable spray technique.
Yes, you can spray, just make sure the area is well-ventilated and protected.
How long does interior door paint take to dry?
Drying times vary by product; plan at least a few hours between coats and allow full cure as recommended on the can.
Drying time depends on the product; check the label and plan for a few hours between coats.
Should I remove hardware before painting?
Removing hardware gives crisper lines and makes it easier to reach edges; reattach after the final coat cures.
Yes, remove hardware if you can, then reattach after curing.
Is priming always necessary on doors?
Priming is usually beneficial, especially on bare wood or previously finished surfaces; it improves adhesion and final appearance.
Priming is usually a good idea for adhesion and even color.
Watch Video
Quick Summary
- Plan a dedicated, well-ventilated workspace.
- Use primers and thin coats for durable adhesion.
- Two thin coats usually beat one thick coat for durability and finish.
- Test color in hidden area before broader application.
- The PaintQuickGuide team recommends a patient, stepwise approach to ensure professional results.