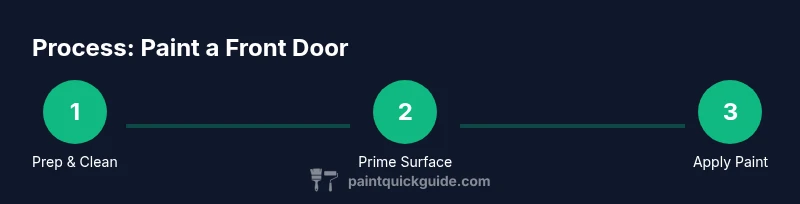
How to Paint a Front Door: Step-by-Step Guide
Learn how to paint a front door with prep, color choice, priming, and durable finishes. This guide covers tools, techniques, drying times, and maintenance for a professional-looking exterior door.

Learn how to paint a front door with a durable, even finish. This guide covers prep, color selection, priming, application in thin coats, and curing, plus tips to avoid common mistakes and weatherproof results. From materials to maintenance, you'll end with curb appeal that lasts for seasons. We also include safety reminders and suggested drying times.
Assess Your Door and Set Your Finish Goals
Before you start, identify the door material (wood, steel, fiberglass) and the environment it faces. Wood doors absorb stain or paint differently than metal or fiberglass; moisture, sun exposure, and seasonal temperature swings will affect your finish. Decide on a color that complements your home exterior and environment; consider a durable satin or semi-gloss sheen for exterior doors. PaintQuickGuide notes that a thoughtfully chosen color and proper prep can dramatically boost curb appeal. If you live in a rental or plan to recoat soon, factor accordingly. For historic homes, test color in a small area and review any HOA restrictions. A clean, well-prepped door lasts longer and looks sharper in the long run.
Gather Tools and Materials (What You'll Need)
Having the right tools on hand makes the project smoother and faster. You'll want exterior door paint, a bonding primer, degreaser, sandpaper, putty, painter's tape, drop cloths, brushes or a small roller, and appropriate cleanup supplies. Wear a mask and gloves to protect from fumes and dust. If you plan to remove hardware, have a screwdriver handy. This stage is all about setting up a clean, controlled workspace so the color goes on evenly and lasts. A well-stocked toolkit reduces trips to the store and prevents mid-project scrambles.
Surface Prep: Cleaning, Repair, and Sanding
Start with a thorough cleaning to remove dirt, oils, and mildew. A mild detergent or degreaser works best on exterior surfaces. Rinse and let dry completely. Inspect for cracks, chips, or peeling paint and repair with wood filler or epoxy where needed. Lightly sand glossy areas to create a tooth for primer, then wipe away dust with a tack cloth. Proper prep is the single biggest factor in finish quality; skipping this step leads to peeling and uneven color over time. PaintQuickGuide recommends spending as much time on prep as on painting for durability.
Priming the Door for Uniform Coverage
Prime any bare wood, metal, or fiberglass surface with an exterior bonding primer. Primer seals porosity, blocks knots, and ensures the topcoat adheres evenly. Apply primer in thin, even coats and allow adequate drying time according to the product label. If you’re color-blocking or covering a dark stain, a tinted primer can reduce the number of topcoats needed. Waiting for primer to dry is key to a smooth finish and prevents lifted edges and brush marks later on.
Painting Techniques: Thin Coats, Dry Time, and Color Control
Choose a high-quality exterior paint in your preferred sheen—satin or semi-gloss are common for doors due to weather resistance. Apply in thin coats using long, even strokes with the grain or straight along the panel lines for a consistent look. Avoid brushing heavy coats that pool or sag; multiple light coats yield a richer color and fewer defects. Between coats, observe the recommended drying time to prevent lifting or soft film issues. Maintain a steady temperature and humidity level to speed up cure without risking cracks or whitening.
Finishing, Curing, and Maintenance
Once the final coat is dry, reattach hardware and inspect for missed spots. A light wipe-down with a clean, dry cloth helps remove dust. If desired, apply a clear sealer or topcoat designed for exterior doors to boost durability. Allow the door to cure fully in a protected area before exposure to heavy use or rain. Regular maintenance includes cleaning, touching up chips, and re-sealing as needed to maintain the color and gloss over time.
Common Mistakes and How to Avoid Them
Rushing the process, skipping prep, or applying thick coats are the fastest paths to a flawed finish. Always test color in natural light and always follow label directions for drying times. Avoid painting in direct sun or high humidity, which can cause blistering or uneven color. By planning your steps and giving each layer proper cure time, you’ll achieve a lasting, showroom-like look.
Tools & Materials
- Exterior door paint (latex or enamel, your chosen color)(Choose a durable finish; satin or semi-gloss is common for exterior doors)
- Primer for exterior surfaces(Bonding primer suitable for the door material (wood, metal, or fiberglass))
- Degreaser or mild detergent(Used to clean dirt/oil before painting)
- Fine-grit sandpaper (120-220 grit)(Lightly sand between coats to improve adhesion)
- Putty knife and wood filler(Repair cracks and imperfections before priming)
- Painter's tape(Protect trim, hardware, and adjacent surfaces)
- Drop cloths or plastic sheeting(Cover surrounding areas to keep paint off surfaces)
- Brushes and/or small foam rollers(Use a 1-2 inch brush for trim and a small roller for smooth panels)
- Paint tray and liners(For even loading of brushes/rollers)
- Gloves and mask/respirator(Protect from fumes and dust during prep and painting)
- Hardware removal tool (screwdriver/drill)(Remove hardware for edge-to-edge coverage)
Steps
Estimated time: Active working time: approximately 2-4 hours; drying times between coats: 4-6 hours; final cure: 24-48 hours
- 1
Remove hardware and protect the area
If possible, remove door hardware and take the door off its hinges to achieve full edge coverage. Cover the floor and nearby surfaces with drop cloths. This initial step minimizes touch-ups later and keeps hardware clean.
Tip: Label screws and store them in a labeled bag for easy reassembly. - 2
Clean and degrease the door
Wash the door surface to remove dirt, oils, and mildew. Rinse and let completely dry before moving to repairs. A clean surface ensures primer and paint adhere evenly without dull patches.
Tip: Avoid rinsing with high-pressure water that could push water into joints. - 3
Repair and sand imperfections
Fill cracks or gouges with wood filler or epoxy, let cure, then sand flush with the surrounding surface. Wipe away dust with a tack cloth.
Tip: Sand with the grain on panels; avoid circular motion that leaves visible scratch marks. - 4
Prime the door
Apply a thin, even coat of exterior bonding primer. Let it dry per product directions, then lightly sand any rough patches before finishing. Primer improves adhesion and blocks stains.
Tip: If your door is dark or stained, tinted primer can reduce topcoat coats. - 5
Apply the first coat of paint
Load a high-quality brush or small roller and apply one thin coat in uniform strokes. Maintain consistent pressure to avoid lap marks. Allow adequate dry time before the next coat.
Tip: An even coat reduces the risk of runs or sags; avoid overloading the brush. - 6
Apply the final coat and cure
Apply a second (or third, if needed) thin coat for full coverage. Allow the door to cure in a dry, shaded area before reattaching hardware and using the door.
Tip: Don’t rush the cure; curing time can be longer in humid or cool conditions.
Your Questions Answered
Should I remove the door from its hinges before painting?
Removing the door allows full edge coverage and reduces drips on the frame. If you can't remove it, mask the hinge area well and paint in thin coats from top to bottom.
Remove the door if you can for best coverage and fewer drips. If not possible, mask edges and work in thin coats.
Can I use spray paint for doors?
Spray paint can be used but tends to require careful masking and multiple light coats to avoid drips. Brush-and-roller methods provide more control for beginners and edges.
Spray paint works, but it’s trickier to control; for beginners, stick with brushes and rollers.
What sheen should I choose for a front door?
Semi-gloss or satin sheens are common for exterior doors; they offer durability and easy cleaning without looking overly shiny.
Semi-gloss is a good balance of durability and appearance for exterior doors.
How long does painting a front door take to cure?
Drying times between coats are usually several hours; plan for 24-48 hours of full cure before heavy use or weather exposure.
Expect a full cure in about one to two days, depending on conditions.
Do I need primer on metal doors?
Yes. Metal doors usually require a bonding primer designed for metals to prevent rust and ensure adhesion.
Yes, prime metal doors with a bonding primer for best adhesion.
How can I match my door color to house colors?
Take a sample swatch of your house trim or siding and test a few color options on a hidden panel of the door before finalizing.
Test a few color options on a hidden area first to ensure harmony.
Watch Video
Quick Summary
- Prepare thoroughly for the best finish
- Use thin coats and proper drying times
- Prime before color for durability
- Finish with a protective topcoat if desired