Where to Paint on iPad: A Practical Digital Painting Guide
Learn where to paint on iPad, how to choose apps, set up your workspace, and export your digital art. A practical, beginner-friendly guide by PaintQuickGuide to help DIY artists start painting digitally.

By the end, you’ll know where to paint on iPad, which apps to use, how to create canvases, manage layers and colors, and how to export final art. This guide covers setup, tools, workflows, and common pitfalls to help homeowners and hobbyists start painting digitally with confidence. Whether you’re a first-time digital painter or coming from traditional media, this article walks you through practical steps to produce polished pieces on an iPad.
Understanding digital painting on iPad
Digital painting on the iPad blends portability with powerful creative tools. With the right setup, you can sketch, color, and refine artworks anywhere you have your tablet. If you're wondering where to paint in ipad, digital painting makes it possible to create expressive pieces directly on the screen using an Apple Pencil. The core of this workflow is choosing a suitable app, configuring the canvas, and establishing a routine that mirrors traditional studios while leveraging the iPad's non-destructive editing features. The main advantages include immediate feedback, unlimited layers, and a broad brush library that emulates real media—from pencil textures to watercolor bleeds. In this section, we’ll explore how to maximize these benefits, avoid common pitfalls, and plan a project from concept to export. PaintQuickGuide’s practical approach emphasizes affordable tools and learn-by-doing strategies suitable for homeowners and DIY artists who want to explore digital painting without breaking the bank.
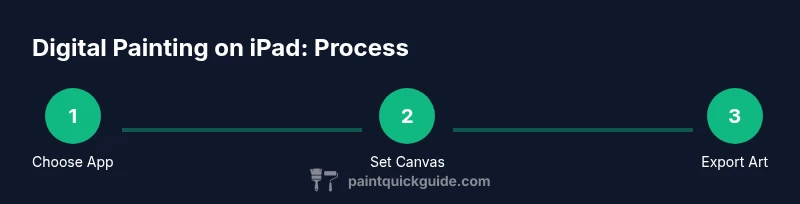
Where to paint on iPad: canvases, apps, and workflows
The key decision points for digital painting on iPad are the canvas, the app, and the workflow that fits your style. The canvas is more than its size; it includes resolution, color profile, and layer management. Start with a high-resolution canvas (at least 2048 px on the long edge for small prints) and a color profile like sRGB for most screens. Use layers to separate rough planning, line work, base colors, shading, and highlights. Different apps offer different workflows, with Procreate’s intuitive layer system and Adobe Fresco’s live brushes providing distinct feels. You can combine apps through file export and re-imports, but the core workflow is usually: sketch, inking, base colors, shading, details, and final polish. Consider your preferred output (screen viewing, printing) when you choose exports and file formats. Painted results benefit from consistent brush behaviors and careful color management across devices.
Choosing the right app for your style
Your choice of app shapes how you interact with brushes, textures, and layers. Procreate is popular for its speed, robust brush engine, and a straightforward purchase model; Fresco offers vector and live brushes; Clip Studio Paint provides deep comic and illustration features. If you want to simulate watercolors or inks, look for brushes that respond to water flow and blending. For beginners, start with Procreate to learn concepts like brush settings, layering, and masking. If you already have a subscription budget and need cross-device syncing, Adobe Fresco can be appealing. PaintQuickGuide suggests trying free trials or starter bundles to compare the feel before committing.
Setting up your workspace for comfortable painting
Comfort matters for longer sessions. Position the iPad at eye level or slightly lower to reduce neck strain. Use a stand or case that holds the device steady, and consider a drawing glove to minimize accidental touches. Lighting matters: avoid glare on the screen by working in a softly lit room; a neutral background behind the iPad helps you see values more clearly. Turn on features like Quick Menu or gesture shortcuts to speed up actions. Keep a dedicated color palette and brush set saved for easy access. If you share screens or create tutorials later, organize your layers and naming conventions early.
Working with layers: structure and non-destructive editing
Non-destructive editing comes from working with layers, groups, and blend modes. Start with a rough sketch layer set to low opacity; place line art on a separate layer above it. Use a color fill layer for base tones, then add shading on new layers with multiply or overlay blend modes. Group related layers (sketch, base colors, shadows, highlights) to keep your canvas tidy. Use clipping masks to confine edits to specific areas. Rename layers regularly to avoid confusion as the project grows.
Color theory and palettes on a digital canvas
Digital color theory relies on understanding hues, values, and saturation. On iPad, you can sample colors directly from artwork, save swatches, and build custom palettes. Create a limited palette for cohesion, and use grayscale sketches to test values before adding color. Keep color harmony in mind: complementary, analogous, and triadic schemes offer different moods. Use the color wheel and swatch libraries provided by your app; many apps also support importing palettes from external sources.
Exporting and sharing your digital paintings
Export options depend on the intended use: screen display vs print. Save in high-resolution PNG or TIFF for prints, and export JPEG for web sharing to balance quality and size. Use organized folders and cloud backups to prevent data loss. For social sharing, export optimized versions sized for each platform to avoid heavy compression. Consider exporting a simple line-art version for accessibility checks and a color version for showcase.
Common mistakes and how to fix them
Common errors include over-editing on small screens, relying on smoothing too much, and losing layer organization. Start with a loose sketch, then lock in values before adding detail. If colors look off, recalibrate your display or sample from a reference image. Save frequently and back up to cloud storage; keep alternate file versions to compare progress over time. Finally, avoid filling every space with color; leave deliberate white or negative space to maintain balance. PaintQuickGuide’s approach emphasizes steady practice, not overnight mastery.
Tools & Materials
- iPad with iPadOS(Any model that supports Apple Pencil (1st or 2nd gen) and access to drawing apps.)
- Apple Pencil (2nd generation preferred)(For precise control and easy charging; compatible with many iPad models.)
- Drawing app access (Procreate, Adobe Fresco, or Clip Studio Paint)(Choose one or more; plan for a trial period to compare feels.)
- Screen protector with pen-friendly surface(Helpful to reduce glare and improve glide.)
- Stand or adjustable case(Keeps iPad at comfortable viewing angle.)
- Charging accessories (cable and adapter)(Ensure you can work without interruptions.)
- Drawing glove (optional)(Prevents accidental touches and improves glide.)
Steps
Estimated time: 60-90 minutes
- 1
Prepare your device
Power on the iPad, connect the Pencil, and ensure your drawing app is installed. Open the app and create a quick backup of any existing work. Calibrate screen brightness for comfortable viewing and adjust the Apple Pencil pairing if needed.
Tip: Enable Quick Menu access or custom gestures to speed up actions like undo or brush changes. - 2
Choose your painting app
Decide which app best matches your style and budget. Try Procreate for a fast, intuitive experience or Fresco for cross-device versatility. Install a backup option for testing its brush library and layer system.
Tip: Take advantage of free trials or starter tutorials to compare the brush feel before committing. - 3
Create a new canvas with the right size
Set canvas dimensions appropriate for your target output. For screen viewing, 2048 px on the long edge is a good baseline; for prints, go higher. Choose a color profile (sRGB for standard display) and enable layers from the start.
Tip: Name the file and create a layered structure so you can evolve the piece without losing the original sketch. - 4
Explore brushes and color palettes
Browse brush libraries and assign a primary palette. Test values on a grayscale layer to ensure contrast before adding color. Save a custom palette to reuse on other projects.
Tip: Avoid overloading with too many brushes; start with a core set you’re comfortable with. - 5
Sketch, ink, then paint with layers
Begin with a rough sketch on a separate layer, then ink or outline on a new layer. Build color on base layers and add shading on additional layers using appropriate blend modes.
Tip: Use clipping masks to protect areas you don’t want to edit. - 6
Save, export, and review
Export a high-resolution version for printing and a web-optimized version for sharing. Back up your work to cloud storage and keep multiple versions for progress tracking.
Tip: Keep a final render and a flat color version for easy sharing.
Your Questions Answered
What is the best app for beginners on iPad?
Procreate is widely favored for its intuitive interface and quick learning curve, while Fresco offers cross-device syncing and vector options. Try both during trials to see which aligns with your style.
Procreate is a popular choice for beginners; try it first and compare with Fresco if you need cross-device features.
Do I need an iPad Pro or Apple Pencil 2?
No, you can start with any compatible iPad and an Apple Pencil (1st or 2nd gen). Some features may vary by device, but basic painting works across models.
You don’t need an iPad Pro; any compatible iPad with an Apple Pencil will work for digital painting.
What canvas size should I start with for digital painting on iPad?
Begin with a canvas around 2048 px on the long edge for screen work, and go higher if you plan to print. Always keep an extra high-resolution version for future resizing.
Start with about 2048 pixels on the long side, and make a higher-res version if you plan to print later.
How do I export artwork from iPad for sharing or printing?
Export as PNG or TIFF for high-quality prints, or JPEG for web sharing. Save multiple versions and consider archiving the layered file for future edits.
Export in PNG or TIFF for prints and JPEG for online sharing; save the layered file too for edits later.
Can I paint on an iPad without internet access?
Yes. Most painting apps work offline, but you may want internet access for downloading brushes or syncing cloud backups.
Yes, you can paint offline; just plan ahead for any assets you might need to download later.
Is digital painting on iPad suitable for professional work?
Absolutely. With proper resolution, color management, and export settings, iPad paintings can be used for concept art, illustrations, and client-ready pieces.
Definitely—digital painting on iPad can produce professional-quality work with the right setup.
Watch Video
Quick Summary
- Start with a clear canvas setup and layered workflow
- Choose an app that matches your budget and needs
- Master brushes and color palettes before painting detailed scenes
- Export multiple formats and back up frequently
- Keep your workspace comfortable to sustain longer sessions