How to Paint in Photoshop: A Practical Digital Painting Guide
Learn to paint in Photoshop with a non-destructive workflow using layers, brushes, and color management. This step-by-step guide covers setup, tools, techniques, and tips for hobbyists and DIY artists.

You can paint in Photoshop using a non-destructive workflow with layers, masks, and custom brushes. Begin by configuring a clean workspace, setting color profiles, and choosing a pressure-sensitive brush. Paint on a dedicated layer with a layer mask, use clipping masks for local edits, and keep non-destructive adjustment layers for tweaks.
What digital painting in Photoshop aims to achieve and common workflows
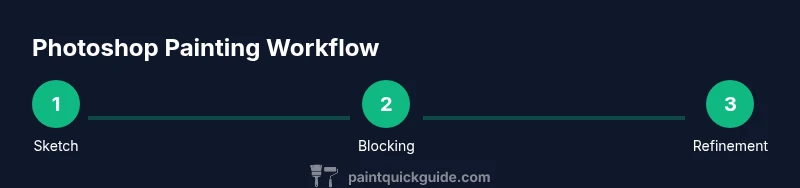
Digital painting in Photoshop blends traditional art instincts with non-destructive digital tools. The goal of how to paint in photoshop is not to mimic every brushstroke of oil or watercolor exactly, but to harness Photoshop's capabilities to iterate quickly, adjust color, and correct mistakes without starting over. A typical workflow starts with a clear concept, a rough sketch on a dedicated layer, and a plan for color and light that can be refined later. According to PaintQuickGuide, a solid digital painting workflow relies on a structured setup: a clean document, a sane brush library, and a layered architecture that keeps edits non-destructive. You’ll often begin with blocking in large shapes on a midtone, then gradually refine edges, values, and details on additional layers. As you paint, use layer masks to control visibility and clipping masks to confine edits to specific regions. Remember: the most flexible paintings come from a well-organized layer stack, not a single flattened image. This foundation makes it easier to experiment, adjust color harmony, and preserve original ideas for future revisions.
To master the concept of how to paint in photoshop, practice small studies that focus on light behavior, edge control, and color transitions before tackling complex subjects. Keep your file organized with named layers and folders so your workflow remains scalable as projects grow. This approach also makes it easier to share steps with friends or clients and to revisit ideas later in the process.
colorPaletteHintsHeader":"Color and Light Foundations","paletteNotes":"Start with a midtone base, then experiment with warm and cool edges to define depth. Always test color on a neutral background to judge hue balance accurately.",
],
toolsMaterialsRationaleNoteWithNullsForRenderingBlockFollowupPlaceholderForFormatConsistencyIfNeeded
Tools & Materials
- Computer with Photoshop(Ensure you have the latest version or a current subscription to access brush libraries and non-destructive features.)
- Graphics tablet (optional)(Wacom or similar; improves brush control and pressure sensitivity.)
- Calibrated monitor(Helpful for consistent color viewing; consider a basic calibration tool or built-in display color management.)
- Brush presets (soft round, textured, and hard edge)(Save a few go-to presets for blocking, detail, and edges.)
- Color swatches and reference images(Organize swatches for quick color matching; use a reference mood board.)
Steps
Estimated time: 45-75 minutes
- 1
Set up your canvas and workspace
Open a new document with a comfortable resolution and organize essential panels such as Layers, Brushes, and Swatches. Create separate layers for sketch, color blocks, shading, and detail. Establish a naming convention like Sketch, Color_Block, Value, and Highlights to keep things navigable.
Tip: Name layers clearly and group related layers to reduce clutter. - 2
Establish color and light direction
Decide the light source and establish a midtone baseline. Place a rough palette on a separate layer and block in large shapes to establish form without worrying about fine details.
Tip: Block in neutral values first to build accurate light relationships. - 3
Choose brushes and begin blocking
Select a soft round brush for initial shapes and a textured brush for surface variation. Block in major forms with low opacity and gradually increase opacity as you refine.
Tip: Use a separate layer for color blocking to keep edges clean. - 4
Refine edges and values
Switch to smaller brushes to define edges and adjust shadows and highlights on new layers. Use layer masks to refine shapes without erasing pixels.
Tip: Mask first, paint second to avoid overpainting. - 5
Introduce color and texture
Add color on a new layer using blending modes like Overlay or Soft Light to integrate tones. Layer textures with subtle opacity and mask to blend with the underlying painting.
Tip: Keep textures on separate layers for easier adjustments. - 6
Non-destructive color tweaks
Apply color corrections with adjustment layers (Curves, Color Balance, Hue/Saturation). Clip these adjustments to relevant layers so you never alter original pixels.
Tip: Adjustments should serve the painting, not redefine it. - 7
Finalize lighting and atmosphere
Add a dedicated highlights layer and a global glow pass if desired. Review the piece on neutral gray and adjust warmth or coolness to harmonize the scene.
Tip: Use a soft brush with low opacity for subtle highlights. - 8
Export and review iterations
Save iterative versions, export a web-appropriate preview, and note any areas for future revision. Archive the project with a clear naming scheme for easy retrieval later.
Tip: Keep a master file with all layers intact for future edits.
Your Questions Answered
What is the best brush setup for beginners in Photoshop?
Start with a soft round brush for coverage and a textured brush for surface variety. Keep brush dynamics moderate and adjust the hardness and opacity as you gain control over strokes.
Begin with a soft round brush and a textured brush to explore surface texture.
Should I work in 8-bit or 16-bit color for digital painting?
16-bit preserves smoother gradients and reduces banding when blending. Use 8-bit if you’re optimizing for quick web previews or limited resources.
If possible, work in 16-bit to keep gradients smooth.
How can I keep edits non-destructive while painting?
Paint on separate layers, use layer masks, and apply color and tonal changes with adjustment layers instead of direct edits on the painted pixels.
Use layers, masks, and adjustment layers to keep edits flexible.
What role do color palettes play in Photoshop painting?
A balanced palette supports believable lighting. Start with a midtone palette and adjust warm/cool balances as you refine.
Choose a balanced color palette and adjust it as your painting evolves.
How can I practice Photoshop painting efficiently?
Practice with small studies that focus on light, value, and edge control before attempting complex scenes. Review progress and repeat.
Practice small studies that emphasize light and edges, then scale up.
Watch Video
Quick Summary
- Paint non-destructively with layers and masks
- Keep a clean, organized layer structure
- Use adjustment layers for color tweaks
- Practice color harmony for realistic results