When Painting Stripes: Timing for Tape Removal
Learn the exact timing for removing painter's tape after painting stripes to achieve crisp, clean edges. Practical steps, tests, and tips for common surfaces and paint types.

Goal: achieve crisp stripe edges by timing tape removal correctly. Generally, remove painter's tape while the edge is still slightly tacky or after it has set enough to resist peeling; wait times depend on paint type, temperature, and surface. For most latex paints, test on a scrap area first—then remove tape in a smooth, steady motion.
Why timing matters for tape removal when painting stripes
According to PaintQuickGuide, the timing of when you remove masking tape is as important as the tape you choose. If you pull too early, fresh paint can smear or tear; if you wait too long, levels of dried paint may dry hard and peel away with the tape, leaving ragged edges. The goal is to remove the tape at a moment that preserves a sharp edge while minimizing damage to the fresh stripe. This timing depends on the paint type, surface, tape adhesive, and environmental conditions. By understanding these factors, you can consistently achieve clean, professional stripes on walls or automotive panels without costly touch-ups.
Key factors that influence tape removal timing
To nail the timing for removing tape after painting stripes, you need to weigh several variables. These include paint type (latex, acrylic, oil-based, enamel), surface texture (smooth drywall vs. textured plaster or car panels), and tape performance (low-tack vs. standard). Drying vs curing matters too: some paints become less prone to smearing when they cure, while others stay pliable for a longer period. Temperature and humidity also affect tape adhesion and paint set. When in doubt, run a quick test on a scrap edge or inconspicuous area to gauge the best removal moment before committing to the main surface. The combination of these factors will guide your timing for removing tape with minimal bleed.
How to determine the right moment to remove tape
Begin with a small diagnostic test to determine when to remove tape for painting stripes. Press a fingernail gently at the edge of a taped line in a scruffy corner or scrap panel. If the edge is still soft, wait a bit longer; if it’s hard to lift without pulling, it’s likely too late. A better approach is to perform a controlled test on a scrap piece or an inconspicuous area. If the tape resists lifting cleanly and the edge remains crisp after removal on test, you’re ready to proceed on the main surface. The goal is to have a seam that looks freshly painted and sharply defined after the tape is removed.
Timing guidelines by paint type
Different paints behave differently when it comes to tape removal. For latex paints, you often aim to remove the tape when the edge is just set to the touch and still slightly tacky to the touch; this helps avoid peeling while allowing a clean finish. For oil-based paints or enamels, you may need to wait longer for a proper cure to avoid smearing, yet still remove before full hardening to prevent flaking. Always consult the product label for recommended dry-to-touch and cure times, and perform a test on a scrap surface first. By tailoring removal timing to paint type, you protect the integrity of the crisp stripe lines.
Tape selection and surface prep
Choosing the right tape is as crucial as timing. Low-tack painter's tape minimizes risk on fresh coatings and delicate surfaces, while green or blue tapes may offer different adhesion levels. Always prepare the surface: clean, dry, and free of dust before applying tape. Lightly press the tape to ensure good edge adhesion along the masking line, then re-check for any loose corners. A clean surface helps tape removal go smoothly and preserves the stripe edges.
Techniques for clean edges during removal
When the moment is right to remove the tape, pull in a steady, slow, parallel motion to the edge you just painted. Keep the tape at about a 45-degree angle to the surface and avoid abrupt jerks. Use a smooth, continuous motion so the edge remains crisp. If you notice a slight bleed during removal, resist tinkering on the main stripe; instead, address it with touch-up paint after the edge has fully cured. For automotive stripes, use a soft microfiber cloth to wipe along the edge immediately after removal to catch any residual paint bleed.
Common mistakes and how to avoid them
Typical errors include removing tape too early, which causes smudging, or waiting too long, which leads to peeling and ragged lines. Applying new tape over a wet edge can trap moisture and cause worsened bleed. Always test on a scrap piece or inconspicuous area before committing to the whole stripe, and never rush the process. If you’re uncertain, err on the side of waiting a little longer (within the paint's guidelines) and perform a second test before final removal.
Special cases: stripes on challenging surfaces
Stripes over highly textured walls, curved surfaces, or dark/metallic paints require extra care. For textured walls, consider using a higher-contrast line and sealing the edge with a thin layer of touch-up paint after removal. On curved surfaces, mask with a flexible tape that conforms to the contour and remove slowly along the curve. When working with metallic or glossy finishes, extra patience during testing can prevent micro-bleeds that ruin the edge. In all cases, plan a quick cleanup pass after tape removal to catch any smudges and keep the stripe definition sharp.
Authority sources
For painting safety and best practices, see these credible references:
- https://www.osha.gov/SLTC/painting.html
- https://www.nist.gov/topics/paint-and-coatings
- https://www.cdc.gov/nceh/lead/prevention/default.htm
Tools & Materials
- Painter's tape (low-tack blue or green tape)(Choose low-tack for delicate surfaces; test adhesion on scrap before use)
- Scrap panels or painter's masking film(For test removal and edge checks)
- Lint-free cloths and mild cleaning solution(For cleaning surfaces before taping)
- Utility knife or plastic card(For burnishing tape edges if needed)
- Drop cloths or protective sheeting(To protect floors and adjacent surfaces)
- Pencil and level (for straight edges and alignment)(Helpful for precise masking lines)
- Smudge-resistant topcoat or touch-up paint(Keep handy for quick edge touches after tape removal)
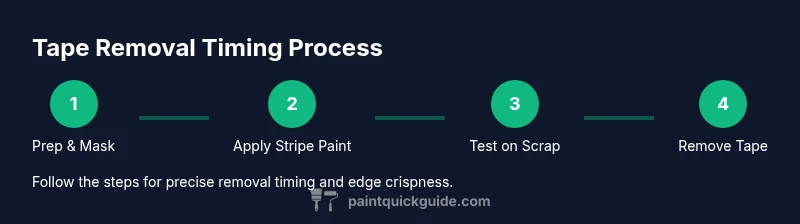
Steps
Estimated time: 40-60 minutes
- 1
Prepare workspace and tape selection
Clear the work area, lay down drop cloths, and clean surfaces. Choose the appropriate tape type based on surface and paint; for stripes, low-tack tape often yields crisper edges with less bleed. Confirm that edges align with your masking plan before applying.
Tip: Press the tape down firmly along the edge using a fingertip or a plastic card to ensure good adhesion. - 2
Apply masking with straight lines
Mask off the stripe area using straight lines and a level. Apply tape in smooth, consistent strokes, avoiding gaps at the edge. Seal the tape by burnishing along the edge to reduce air pockets that could cause bleed.
Tip: Mishaps happen at corners—re-check corners and re-seat tape if needed before painting. - 3
Paint stripes with even coats
Apply the stripe color in thin, even coats, allowing adequate drying time between coats per product directions. Avoid heavy coats that take longer to dry, increasing the risk of edge bleed when you remove the tape.
Tip: Use long, smooth strokes perpendicular to the taped edge to minimize brush marks near the tape line. - 4
Perform a test removal on scrap area
Wait for the recommended dry-to-touch state and then test tape removal on a scrap edge. Check for any bleed or texture transfer that would indicate timing is off. If the test edge looks clean, you’re ready to proceed; if not, wait longer and test again.
Tip: Document the test result so you can replicate the successful timing on the main surface. - 5
Remove tape with care
Carefully lift the tape in a steady, low-angle motion away from the edge. Do not pause mid-strip and avoid jerking the tape, which can pull fresh paint off the edge. If a minor bleed appears, correct it after the stripe dries fully.
Tip: Pull parallel to the edge at about a 45-degree angle for best results. - 6
Address any imperfections
If bleed or rough edges appear, wait for the stripe to cure and perform a light touch-up with the appropriate color. Remove any masking residue and clean the edge before applying a protective topcoat if needed.
Tip: Use a sharp utility knife to trim any tiny imperfections after the paint has set. - 7
Inspect and finalize
Carefully inspect both sides of the stripe for consistent edge definition. If everything looks sharp, remove all masking tape and protect the area with a clear topcoat or sealant as recommended for the paint type.
Tip: Take photos in good lighting to verify edge crispness from different angles.
Your Questions Answered
When should I remove painter's tape after painting stripes?
Remove tape once the edge is set to touch and not smudgy, or follow the paint's dry-to-touch guidance and perform a quick test on scrap first.
Remove the tape when the edge is set to touch but not fully cured, and always test on scrap first.
What if there is bleed after removal?
If bleed occurs, wait for the stripe to cure and perform a careful touch-up along the edge using the correct color.
If you see bleed, let it cure and fix with a precise touch-up.
Can I re-tape over a dried edge?
Yes, but wait for the edge to fully cure if you plan to apply another coat; otherwise you can risk peeling.
You can re-tape after the edge has cured to avoid peeling.
What tape type is best for stripes on walls?
Low-tack painter's tape is generally best for protecting edges on walls; test adhesion on a scrap piece first.
Low-tack painter's tape is usually best for stripes on walls.
Does temperature affect tape removal timing?
Yes. Higher temperatures can speed drying, so the edge may set faster; lower temperatures may slow down curing and extend removal timing.
Temperature changes can alter when the edge is ready for removal.
Is masking tape safe on automotive finishes?
Masking is common on cars, but use automotive-grade tape and test on a non-visible area first to avoid damage to clear coats.
Test on a hidden spot first; automotive tape helps, but testing is key.
Watch Video
Quick Summary
- Test edge removal on scrap before committing.
- Use low-tack tape for delicate surfaces to minimize bleed.
- Remove tape at the correct moment to preserve crisp lines.
- Inspect and touch up edges after removal if needed.