Complete Guide to Painting Cabinet Interiors
Learn how to paint cabinet interiors with durable finishes, careful prep, primer, and multiple thin coats. This practical guide covers safety, finishes, tools, and a step-by-step plan to achieve a professional look inside every cabinet.

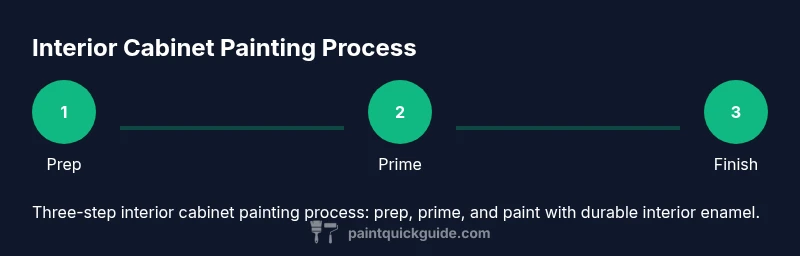
You can paint the inside of cabinets by thorough prep, priming, and applying a durable interior enamel. Key requirements are good ventilation, masking, clean surfaces, and a steady, dust-free environment. Remove doors, label parts, and plan coatings to avoid bleed-through and drips.
Why painting cabinet interiors matters
When painting cabinets what about inside, the interior surfaces deserve the same care as the exterior. The inside of a cabinet sets the tone for the entire room and affects future cleaning ease. According to PaintQuickGuide, interior finishes must resist humidity, kitchen oils, and fingerprints while staying color-stable over years. This is especially true in damp kitchens, where temperature swings can cause finishes to crack or peel if the surface isn’t properly prepared. A well-painted interior also helps light bounce around the cabinet box, making shelves feel more accessible and organized. Before you start, inspect for water damage, peeling finishes, or soft wood. Addressing damage now ensures the new paint adheres well and lasts longer. Plan your coats so you finish with the same color on the inside as the outside for a cohesive, long-lasting result. Ensure you have a clear plan for coats: degloss, prime, and paint in thin, even layers to avoid runs and uneven absorption.
Safety and prep planning
Safety and prep are the foundation of a durable finish inside cabinets. Ventilation matters: open windows or run a fan to move fumes away from living spaces. Wear a respirator or organic vapor mask, eye protection, and gloves. If your home is older, test for lingering lead paint and follow local guidance; if lead is possible, follow proper containment procedures. Clear the work area by removing all items from shelves and doors, and cover nearby surfaces with drop cloths. Work in a dry environment with stable temperatures to prevent rapid drying that can cause brush marks or lap lines. Create a labeling system for doors and shelves so you can reassemble correctly. Finally, plan coats and drying times realistically; interior enamel typically requires multiple thin coats and dry times between coats.
Choosing the right finishes for inside cabinets
Selecting the right finish is essential for interior cabinets. For most DIY projects, a high-quality water-based interior enamel offers durability, low odor, and easy cleanability. Oil-based enamels can provide a longer pot life and tougher film but release stronger fumes and longer cleanup. If your wood has tannin or knot bleed, pair your finish with a stain-blocking primer or shellac-based primer first. For cabinets that see frequent moisture (near sinks or in laundry rooms), a moisture-resistant finish or a satin or semi-gloss sheens provide easier cleaning. Consider compatibility with your cabinet material and existing hardware. Avoid bright color changes that could require multiple coats to achieve even saturation. Always test a small area before full application to ensure color and finish meet your expectations. In a busy kitchen, choose a finish that resists fingerprints and smudges for everyday practicality.
Surface prep inside cabinets
Proper surface prep is the difference between a smooth finish and a flawed one. Start by removing doors, drawers, and hardware. Thoroughly wash interior surfaces with a degreasing solution to remove oils from cooking and handling. Rinse and dry completely. Degloss the surface with a chemical deglosser or light sanding (220-grit) to create a mechanical bite for the primer. Fill any pits, dents, or nail holes with wood filler, then sand flush once dry. If shelves are removable, take them out and sand separately for even coverage. Tape off edges of adjacent walls or fronts to prevent bleed-through. Finally, wipe down with a tack cloth to remove dust before priming.
Priming interior surfaces
Primers create the bond that makes your finish last. Use a stain-blocking primer if you suspect tannin bleed or knots; shellac-based primers offer excellent bleed resistance. For most woods, a high-build latex or acrylic primer provides good coverage and sands smoothly. Apply primer in thin, even coats, following the wood grain, and let it dry fully between coats. Sand lightly with 320- or 400-grit sandpaper to knock down any raised grain or imperfections. Wipe away dust before applying your enamel. Priming inside cabinets is essential to prevent stains from transferring through the topcoat. If you expect moisture exposure, consider a primer that offers moisture resistance for added longevity.
Painting technique for inside cabinets
Inside cabinet painting is best done with thin, controlled coats. Use a high-quality synthetic brush for edges and a small foam roller for flat surfaces to minimize roller texture. Apply in long, even strokes following the grain, working back to front to avoid air pockets. For tight corners, use a high-quality angled brush or a small detail brush. Maintain a wet edge to prevent lap marks. If spraying is preferred, ensure proper ventilation and masking of surrounding areas; spray in a controlled, steady motion with consistent distance from the surface. Allow each coat to dry completely before the next; multiple thin coats produce a smoother, more durable finish than a single thick coat. Remember: patience is part of a professional-looking result.
Drying, curing and reassembly
Drying and curing are slow, but essential for durability. After the final coat, allow at least 24 hours of drying in a dust-free environment before handling doors or reinserting shelves. Full curing can take up to a week in cooler or humid conditions, so plan heavy use around this timeline. If you reassemble too soon, you risk marring the finish or trapping moisture. Reattach hardware after the surface is completely dry, and avoid heavy handling for several days. Keep cabinet interiors free from moisture exposure during curing by using fans and keeping humidity low. Label and organize reassembly to prevent mixing parts or misplacing fasteners.
Finish protection and maintenance
Protecting the interior finish extends the life of your project. After curing, consider applying a clear, water-resistant topcoat (such as a water-based polycrylic) on top of the enamel if you expect high humidity or frequent cleaning. If you choose a wax or polish, apply sparingly and follow product directions; some finishes may become slippery or attract dust. Regular light cleaning with a damp cloth is usually enough to keep interiors looking fresh. For added durability, inspect shelves and touch up any scuffs with a small brush and matching color. Periodic maintenance avoids buildup that can compromise counters or shelving. PaintQuickGuide Analysis shows that durable results come from matching primer, enamel, and topcoat combinations designed for interior use.
Common mistakes and troubleshooting
Even experienced DIYers encounter issues. Common mistakes include skipping deglossing, using heavy coats, and rushing through drying times. Brush marks and roller texture occur when coats are too thick or tools aren’t dressed properly. Dust in the finish from dirty work clothing or air movement will mar the surface; always use clean dust-free conditions and tack between coats. Bleed-through happens when tannins are not blocked or if the primer isn’t compatible with the topcoat. Fixes include sanding lightly and applying additional primer or stain-blocking primer before the final coat. If you see cloudy or milky film, ensure you aren’t using a incompatible topcoat with your primer or finish. Revisit steps for proper adhesion and surface preparation.
Cleaning up and maintenance
Cleanup is part of the job, not an afterthought. Clean brushes, rollers, and tools with the appropriate solvent or warm soapy water, depending on your finish. Wipe down interior surfaces with a damp cloth after the final coat to remove any dust or residues. Store leftover paint properly in a labeled container. Proper cleanup helps you maintain consistent color and finish on future touch-ups. Maintenance is simple: periodically inspect for chips or scratches, perform small repairs, and touch up with a matching color to preserve the interior look. This reduces the need for major refinishing later and keeps cabinets looking fresh.
Authority sources
For safety and best practices, consult authoritative sources. These guidelines support interior cabinet painting decisions and emphasize safe handling of finishes and ventilation:
- https://www.epa.gov/lead
- https://www.osha.gov/paint-spraying-safety
- https://extension.illinois.edu
Tools & Materials
- Drop cloths or plastic sheeting(Cover nearby countertops, floors, and shelves outside the work area)
- Masking tape (low-residue)(For edges and to protect hardware areas)
- Degreasing cleaner (like TSP) or mild dish soap(For thorough interior cleaning)
- Sponge, microfiber cloths, and tack cloth(For cleaning and dust removal)
- Deglossing agent or light sandpaper (220 grit)(Prepares surface for adhesion)
- Wood filler and putty knife(Fill dents or holes before priming)
- Putty knife and small scraper(Smooth openings and edges)
- Sanding block or sandpaper (320-400 grit)(Finish-sand surfaces for primer)
- Primer (stain-blocking recommended)(Choose oil-based or shellac-based if knot bleed is likely)
- Interior enamel or acrylic enamel paint (low odor)(Thin with water or solvent per product guidelines)
- Paint tray and liners(For even distribution of enamel)
- Foam rollers (3/8 inch) and angled brushes (1 inch)(Use high-quality tools to minimize texture)
- Paint thinner or water for cleanup(Follow manufacturer guidance for cleaning tools)
- Protective gloves and safety glasses(Protect hands and eyes from chemicals)
- Respirator or mask with organic vapor cartridge(Important for oil-based primers or heavy fumes)
- Vacuum with brush attachment(To remove dust before priming)
- Heat gun or hair dryer (optional)(Speeds up drying in cool conditions)
- Screwdriver or drill for hardware removal(Keep screws organized and labeled)
Steps
Estimated time: Estimated total time: 6-12 hours active plus 24-72 hours drying between coats; full cure may take up to a week depending on humidity
- 1
Remove doors and hardware
Detach doors, drawers, and all hardware. Label each piece and store in labeled bags to prevent mix-ups during reassembly.
Tip: Take photos of the hinge placements to ensure exact alignment later. - 2
Clear the interior and shelves
Remove debris and items from shelves. If shelves are fixed, cover them securely and clear the surrounding area to prevent contamination and drips.
Tip: Work from the top of the cabinet down to minimize dust settling on finished surfaces. - 3
Clean interior surfaces
Wipe all interior surfaces with a degreaser or mild detergent. Rinse, then dry thoroughly to ensure paint adheres properly.
Tip: Avoid soaking wood; use a damp cloth and dry immediately. - 4
Degloss the surface
Use a deglosser or light sanding to create a tooth for paint adhesion. Remove dust with a tack cloth before priming.
Tip: A deglosser is often faster and less dusty than heavy sanding. - 5
Repair and fill defects
Fill nail holes and dents with wood filler. Once dry, sand flush with the surface so the fill doesn’t show through the finish.
Tip: Choose a filler that sands easily and matches wood color. - 6
Mask off surrounding areas
Apply masking tape along edges and around the cabinet openings to protect adjacent surfaces from drips and overspray.
Tip: Remove tape while paint is still tack-free to prevent peeling. - 7
Prime interior surfaces
Apply a stain-blocking or high-build primer in thin coats. Let dry completely and sand lightly for a smooth base.
Tip: Use a primer compatible with your enamel to avoid adhesion issues. - 8
First enamel coat
Brush or roll a thin coat of interior enamel, following the grain to avoid brush marks. Work back to front for even coverage.
Tip: Keep coats thin to prevent drips and long dry times. - 9
Sand between coats
Lightly sand the first coat with 320-400 grit to achieve a smooth surface. Wipe clean before applying the next coat.
Tip: Always remove dust after sanding; dust causes imperfections. - 10
Second enamel coat
Apply a second thin coat in the same manner for depth and durability. Inspect for missed spots and touch up as needed.
Tip: Two thin coats deliver better durability than one thick coat. - 11
Reinstall shelves and hardware
Reattach shelves and hardware or replace with updated components. Handle carefully to avoid marring the new finish.
Tip: Check alignment before tightening hinges to prevent misfit. - 12
Final clean and cure
Wipe down cured interiors and store materials. Allow full cure per manufacturer’s guidelines before regular use.
Tip: Avoid heavy use for several days to allow full cure.
Your Questions Answered
Do I need to remove doors to paint the inside?
Removing doors gives you full access to all interior surfaces and reduces drips on door faces. If removal isn’t possible, protect door fronts and edges carefully with tape and shields. This helps achieve an even finish inside.
Yes. Remove the doors if you can so you can reach every interior surface without risking paint on the fronts.
What primer is best for cabinet interiors?
Use a stain-blocking primer to prevent bleed from knots or tannins. Shellac-based primers are especially good for problem woods; otherwise a high-build latex primer works well with water-based enamels.
A stain-blocking primer is usually best; shellac-based primers are great for knotty woods.
Can I spray paint interior cabinet surfaces?
Spraying can yield a very smooth finish but requires a controlled setup, proper ventilation, and masking. For DIY projects, brushing or rolling in thin coats is often simpler and safer indoors.
Spraying is possible with proper setup, but for beginners, brushing and rolling is typically safer indoors.
How long does interior cabinet paint take to dry between coats?
Most interior enamels dry to the touch within a few hours, but full cure can take several days. Follow the product’s label for exact times and avoid handling until dry to prevent dents and marks.
Dry times vary; check the can, but wait the recommended period before applying a new coat.
Can I paint over existing varnish or shellac?
Yes, with proper prep. Degloss or sand to create a mechanical bite, clean, and apply a compatible primer before painting. Skipping prep can lead to poor adhesion and early peeling.
You can, but you must degloss or sand first and use a good primer.
What finishes resist moisture best inside cabinets?
A durable water-based enamel with a satin or semi-gloss sheen is usually adequate. For extra moisture exposure, consider a protective topcoat and a high-build primer designed for interior damp areas.
Water-based enamel with a protective topcoat works well in moist spaces.
Watch Video
Quick Summary
- Plan interior prep with the same care as exteriors
- Choose primers and enamels compatible for interior use
- Thin coats and proper drying are essential
- Safety and ventilation cannot be skipped
- Label parts for easy reassembly