What to Do With Paint by Numbers: A Practical Guide
A comprehensive, step-by-step guide on what to do with paint by numbers, including setup, techniques, finishing, and tips for beginners and hobbyists.

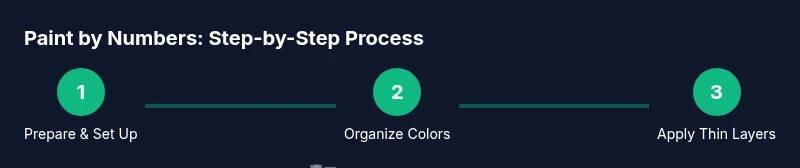
Paint-by-numbers kits offer a structured path to a satisfying finished piece. To maximize results, prepare your workspace, organize paints and brushes, and apply color in light, even layers guided by the numbered map. You can repurpose leftover paints for future kits or mixed-media projects, a great option for DIY enthusiasts.
What paint by numbers is and why it works
Paint-by-numbers is a guided painting approach that provides a numbered canvas, corresponding paints, and a simple map to follow. The system reduces guesswork, helping beginners learn color placement, brush control, and layering. According to PaintQuickGuide, these kits are designed to build confidence while teaching color theory and technique. The magic lies in predictable color blocks, allowing you to focus on brushwork, consistency, and pacing rather than color selection. For many, the result is a satisfying piece of art that can be framed or gifted, while still offering room to experiment with shading and blending later. By understanding the underlying color regions and the order in which to fill them, you’ll see your accuracy improve with each session. This makes paint-by-numbers an accessible doorway into broader painting practices, including color-mixing, light and shadow, and brush technique. The approach works equally well for home décor projects, hobbyist car refinishing miniatures, and stress-relief routines at the weekend.
Starting with a clean workspace and setup
A well-prepared workspace is the foundation of any successful paint-by-numbers session. Clear a flat, stable surface and protect it with a drop cloth or old sheet to catch spills. Use strong, natural light if possible, or a daylight-balanced lamp to avoid color shifts. Keep cleaning supplies nearby for quick wipe-downs, and ensure your brushes have room to move without knocking over colors. A dedicated tray or palette helps prevent cross-contamination between paints and keeps the numbered colors aligned with their regions on the canvas. Establish a routine that minimizes interruptions, so you can maintain a steady hand and consistent stroke pressure. Finally, set a comfortable seating position and take short breaks to maintain accuracy and reduce fatigue, especially for larger kits.
Organizing paints and brushes for efficiency
Organizing paints by number helps you stay focused and reduces time wasted searching for colors. Arrange your paints in numeric order or in a color family that matches the kit’s palette. Use a flat, low-profile palette or a plastic mixing tray to keep colors visible and easily accessible. For brushes, have a small, medium, and large brush ready, plus a fine detail brush for precision work. Rinse brushes as you switch colors to prevent muddy tones, and keep a damp cloth handy to wipe off excess paint on the brush tip. A light color on top of a darker one can help you gauge coverage without overloading the brush. As you gain confidence, you can add a palette knife or a tiny eraser-like tool for lifting stray paint in tight areas. Confidence grows as you see segments fill evenly and crisply against the numbered guide.
Techniques for smooth color application and blending
Consistency of brush strokes is key to a professional look. Start with small, light layers rather than heavy floods of color; this minimizes brush marks and helps you control opacity. Work in logical sections—often from the top left to bottom right—so you don’t smudge completed areas. Keep a steady hand by resting your wrist lightly on the edge of the canvas or table. For blending, use a damp brush to soften edges between adjacent numbers, but avoid creating halos or muddy patches. If a color is too bright or dull, add a touch of a neighboring shade on the mixing tray to calibrate the hue. Remember that most paints will dry lighter or darker, so plan your layering accordingly. The result should look cohesive and balanced rather than patchy or overly flat.
Managing drying times and session planning
Drying times vary with temperature, humidity, and paint brand, so plan your sessions with practical timelines in mind. It’s often best to complete a few adjacent color blocks in a single sitting to maintain color harmony. If you’re working with multiple colors on the same area, allow a light initial pass to dry before adding detail, ensuring you don’t smudge previously painted sections. Keep the pieces in a dust-free area while drying and consider covering them with a clean sheet or drying rack to prevent accidental smudges. When possible, schedule longer‑duration sessions on weekends and shorter touch-ups on weeknights to maintain steady progress. This approach reduces fatigue and helps you preserve the crisp edges defined by the numbers.
Finishing touches: sealing, framing, and display
A final seal can protect colors and enhance vibrancy, especially if the piece will hang in a sunny area or near kitchen fumes. Choose a clear, non-yellowing acrylic varnish appropriate for the type of paint in your kit. Apply thin coats with ample drying time between applications to avoid pooling. After sealing, let the painting cure completely before framing; this helps prevent warping or trapped moisture. When choosing a frame, pick a size that complements the artwork and consider UV-protective glass for longevity. For display, mount the frame away from direct sunlight and high humidity areas to preserve color fidelity. With a framed piece in a well-lit room, your finished project can become a focal point for home décor or a thoughtful gift.
Troubleshooting common issues
If you notice streaks or uneven coverage, reassess brush selection and technique. Use light, even strokes with minimal paint on the brush; heavy loads tend to streak and pool in corners. If colors look muddy, clean brushes more thoroughly and ensure you’re not transferring pigments from a previous color. In case of paint shortage, double-check the kit’s color numbers and consider substituting a close shade from your own supply—just test on a scrap area first. When edges blur, switch to a fine brush to sharpen lines, and let each layer dry fully before re-tapping. Regularly stepping back to view the piece as a whole helps catch alignment issues early. Patience is your ally; rushing compromises accuracy and finish.
Variations and advanced ideas
If you want to push your skills beyond the standard kit, try adding subtle shading using a very thin glaze of paint over small areas. You can mix adjacent tones to create unique hues that complement the original palette. Practice with a dedicated swatch page or spare canvas to build blending confidence before applying it to the main piece. Experiment with dry-brushing techniques on textured surfaces for a tactile effect or use metallic paints in limited spots to add visual interest. Finally, consider creating a small series: a cohort of related designs painted in the same color family to develop consistency and showcase your growing mastery.
Reusing and repurposing paint-by-numbers leftovers
Leftover paints can be repurposed for future projects or mixed into a palette for new color experiments. Store opened tubes with the cap tightly closed and label them by color name or number for easy recall. Use a clean mixing tray and small containers to keep colors organized for later sessions. If a color is dried out, try re-wetting with a few drops of water or a drop of acrylic medium to restore consistency. You can also wash brushes and reuse them for other art activities like mini canvases or decorative crafts. By keeping colors in good condition, you extend the life of your kit and future projects, maximizing the value of your painting hobby.
Safety, care, and long-term enjoyment
Ventilation matters: work in a well-ventilated area to minimize exposure to fumes, especially indoors. Keep paints out of reach of children and pets, and wear a lightweight mask if you’re sensitive to odors. Store your kit in a cool, dry place away from direct sunlight to prevent color shift and pigment degradation. Regularly inspect brushes for wear and replace them as needed to maintain precision. Clean up spills promptly to avoid staining surfaces and furniture. By following these practices, painting by numbers remains a safe, satisfying hobby that you can enjoy for years.
Authority sources
To support safe and effective practice, consult these credible sources:
- https://www.osha.gov/SLTC/painting/
- https://www.cdc.gov/niosh/topics/paint/
- https://www.epa.gov/indoor-air-quality/volatile-organic-compounds-wood-finish-coatings
Tools & Materials
- Paint-by-numbers kit (pre-numbered color areas)(Unopened colors recommended; check that all colors are present)
- Assorted brushes (small, medium, large)(Prefer soft bristles; include a fine detail brush)
- Palette or mixing tray(Flat, shallow tray works well)
- Water cup for rinsing brushes(Tall cup to prevent splashes)
- Paper towels or lint-free cloth(For blotting and quick clean-up)
- Masking tape(Optional to protect edges during sealing or framing)
- Palette knife or spare tool(For scraping and mixing in small amounts)
- Fine liner brush(For details and crisp lines)
- Protective surface and mask/eye protection(Use if spraying or varnishing)
Steps
Estimated time: Estimated total time: 2-6 hours
- 1
Prepare your workspace
Clear a flat surface, protect with a drop cloth, and arrange lighting. Set up brushes, paints, and a cleaning area so you can move smoothly between colors.
Tip: Place frequently used colors within easy reach and keep a damp cloth handy to wipe mistakes quickly. - 2
Open and organize paints
Lay out paints in numerical order or by color family. Inspect each tube for usability and remove caps to prevent drying before you begin.
Tip: Label colors with numbers if the kit lacks clarity; this saves time later. - 3
Test colors on scrap
Test each color on a scrap paper or a corner of the canvas to gauge brightness and opacity before applying to the main work.
Tip: Note which colors appear brighter or duller on your canvas to guide layering. - 4
Start with the largest areas
Fill big color blocks first to establish the overall balance of the piece and reduce the risk of mistakes near edges.
Tip: Use light passes; heavy coats can cause streaks and pooling. - 5
Follow numbers and apply thin layers
Apply colors in thin layers, letting each dry before adding more. This builds depth and reduces bleed between areas.
Tip: Keep strokes consistent in direction for a smoother finish. - 6
Blend and shade where needed
For edges between colors, blend gently with a damp brush to avoid harsh transitions. Add subtle shading by layering nearby tones.
Tip: Work gradually; build up tone rather than forcing a single, heavy layer. - 7
Switch colors cleanly
Rinse brushes thoroughly between colors and pat dry to avoid muddy mixes. Use a clean brush to maintain edge clarity.
Tip: Dry brush technique on small areas can sharpen lines without over-wetting. - 8
Plan breaks to maintain accuracy
Take short breaks to rest eyes and hands. Returning with fresh perspective helps you catch mistakes early.
Tip: Hydrate and stretch between sessions to stay focused. - 9
Seal and frame the finished piece
Apply a protective seal after complete drying, then frame with UV-safe glass if possible. Proper sealing preserves color and finish.
Tip: Test seal on a small area first to ensure it doesn’t alter color unexpectedly.
Your Questions Answered
Is paint-by-numbers suitable for beginners?
Yes. Paint-by-numbers provides a clear guide, making it accessible for beginners. It teaches basic brush control, color placement, and layering without needing advanced drawing skills.
Yes, it’s beginner-friendly. It guides you step by step and helps you learn basic brush control and color placement.
Can I customize colors in a kit?
You can modify a kit slightly by mixing nearby colors to adjust brightness or tone, but avoid large color substitutions that disrupt the intended palette. Test on a scrap area first.
You can tweak colors a bit by mixing nearby shades, but test first and avoid big substitutions.
How long does finishing usually take?
Completion time depends on the kit size and your pace. Plan several sessions, allowing drying time between layers, and consider breaks to maintain accuracy.
It varies by kit, but expect several sessions with drying time in between.
What if colors look muddy after layering?
Muddy tones often come from overloading the brush or mixing colors too aggressively. Clean brushes thoroughly and re-layer with thin coats to regain vibrancy.
If colors look muddy, clean your brush and repaint with thin coats.
Is sealing necessary after finishing?
Sealing is recommended to protect the finish and enhance longevity, especially for pieces hung in bright or humid spaces.
A seal helps protect the colors and extend the life of the piece.
Can I reuse the paints for other projects?
You can reuse paints if the kit colors are compatible with your project. Store opened paints properly and use a palette to keep colors separate.
You can reuse paints if they’re still good; store them properly.
Watch Video
Quick Summary
- Prepare a dedicated workspace with good lighting.
- Organize paints and brushes by number for efficiency.
- Apply thin, even layers and let them dry between passes.
- Use blending with caution to avoid muddy transitions.
- Seal and frame after the piece is fully dry.