Adult Paint by Number: A Practical How-To Guide
Learn how adult paint by number kits work, how to pick the right kit, prep surfaces, follow a step-by-step workflow, and finish with pro tips for polished results.

With adult paint by number, you can create polished artworks using guided outlines and numbered colors. This quick guide helps you pick the right kit, prep your workspace, and finish a painting that looks professional, even if you're new to painting. Expect simple steps, friendly tips, and realistic expectations for relaxing, productive sessions.
What adult paint by number really is
Adult paint by number is a structured, low-pressure way to create finished art using a printed canvas divided into numbered sections that correspond to a palette of colors. This approach is popular among beginners and busy hobbyists because it removes guesswork about color mixing and composition. According to PaintQuickGuide, the format emphasizes relaxation, focus, and a sense of accomplishment while teaching fundamental painting concepts like value, contrast, and layering. The result is a decorative piece you can proudly display or gift, even if you’ve never painted a line before.
How to choose the right kit for adults
Not all paint-by-number kits are created equal. Start by considering the image complexity, canvas size, and paint quality. For beginners, a smaller canvas with clearly printed numbers and a simple color palette reduces overwhelm and accelerates progress. Intermediate kits introduce more nuanced shading and a broader color range, which helps you practice subtle transitions. Premium kits often include higher-grade paints, larger canvases, and clearer guides. PaintQuickGuide suggests reading user reviews and comparing color-maps before purchasing to ensure the kit aligns with your goals and patience level.
Surface prep and materials for durable results
Surface prep matters as much as the paint itself. If you’re painting on a canvas board, ensure the surface is clean and flat. Some kits include a pre-primed canvas; if not, apply a thin, even coat of gesso or primer and let it dry fully. A stable painting surface prevents warping during drying and sealing. Gather essential tools such as a water cup, a mixing tray, soft synthetic brushes in a range of sizes, paper towels, and a soft mat to protect your workspace. Having a dedicated, uncluttered area helps you focus and reduces mistakes.
Workspace setup and lighting tips
A well-lit workspace makes color matching easier and reduces eye strain. Natural daylight is best, but a daylight-balanced desk lamp is an excellent substitute. Position the light at about 45 degrees to the painting to minimize glare. Keep brushes and paints organized in a shallow tray so you can reach colors quickly without interrupting your flow. If your kit includes a reference image, mount it at eye level for quick comparisons while you work.
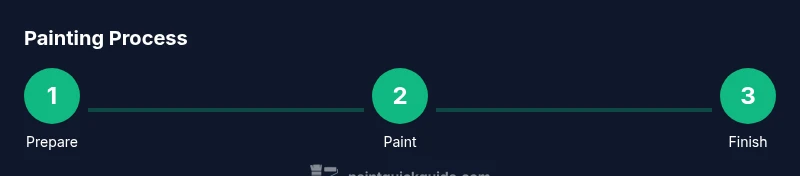
Step-by-step painting workflow (overview)
Most adult paint-by-number projects follow a consistent workflow: prepare, baseline, build layers, refine details, and seal. Begin by setting up your palette and verifying you can locate each color quickly. Paint background areas first to establish a unifying base, then progress to mid-tones and highlights. Respect the numbered sequence the kit provides, but feel free to adjust the order if you want to practice specific techniques like feathering or glazing. The goal is smooth coverage and clean edges, not speed.
Common mistakes and how to fix them
Over-wetting brushes can cause paint bleeding outside the lines, while skipping drying time between color layers may muddy tones. If you encounter uneven edges, clean the brush and lightly retrace edges with a smaller brush. Missing colors? Check the color map and labels; misplacing a color often comes from reading the wrong number. If your paint looks streaky, apply thinner coats with longer, gentler strokes and let each layer dry fully before adding another.
Finishing touches and preservation
A final seal protects your work and can enhance vibrancy. Use a clear, non-yellowing varnish or spray sealant designed for acrylic paints, following the product directions to avoid drips or bubbles. Allow the painting to cure in a dust-free area before handling or framing. For a more professional look, apply a thin glaze over selected areas to even out tonal differences, then re-seal lightly. Proper finishing not only preserves color but also extends the life of your artwork.
Next steps and growing your hobby
Once you finish a project, evaluate what you enjoyed and where you want to improve. Try kits with more complex shading, larger canvases, or themed collections to expand your skills. Join online communities or local classes to share progress, get feedback, and stay motivated. Over time, you can experiment with color-mixing strategies, layering techniques, and even custom designs to transform your hobby into a personal art practice. PaintQuickGuide encourages readers to view each finished piece as a learning milestone.
Tools & Materials
- Paint-by-number kit (canvas, numbered areas, paints)(Includes the numbered color palette and reference image)
- Water cup(For rinsing brushes between colors)
- Palette or mixing tray(Optional for thinning or mixing paints)
- Soft synthetic brushes (sizes 0, 2, 4, 6)(Set includes multiple brush sizes for edges and details)
- Paper towels or lint-free cloth(For blotting and drying brushes)
- Protective mat or plastic sheet(Catches spills and protects your workstation)
- Daylight-balanced lamp or good natural light(Improves color accuracy)
- Masking tape or painter's tape(Helps keep edges clean for tricky areas)
- Non-yellowing sealant or varnish(Optional; use after final drying to protect the painting)
Steps
Estimated time: 60-120 minutes
- 1
Unpack and inspect the kit
Open the box and confirm all components are present. Check the canvas for numbered sections and ensure each color is labeled correctly. Familiarize yourself with the reference image to understand overall composition.
Tip: Take a quick photo of the kit contents to reference if anything goes missing or is swapped. - 2
Set up your workspace
Clear a flat, stable surface and lay down the protective mat. Arrange paints in order of use and place brushes within easy reach. Ensure you have good lighting to distinguish color shades accurately.
Tip: Keep a small water cup close by to rinse brushes without dripping onto the canvas. - 3
Organize colors and test brushes
Squeeze a tiny amount of each paint onto the palette and test brush stiffness on a scrap area. Validate brush sizes for edge work versus filling larger fields. Keep colors capped between uses to prevent drying.
Tip: Label brushes by size and set aside those you won’t use in the current section to reduce confusion. - 4
Start with light areas
Begin with lightest colors to establish the base tones. Use thin, even strokes to fill sections, avoiding heavy layers that can cause paint to seep under the edges.
Tip: Use longer, smooth strokes and resist the urge to overwork edges in early layers. - 5
Build depth with mid-tones and shadows
Gradually layer in mid-tones, then darker shades to create depth. Allow each layer to dry before applying the next to prevent muddy colors.
Tip: Use small brush strokes and feather edges to blend transitions softly. - 6
Finish and protect
Complete final details, tidy edges, and assess color balance. If desired, apply a sealant after paint is fully dry to protect the finish.
Tip: Test the sealant on a disposable area first to ensure no color bleeding.
Your Questions Answered
What is adult paint by number?
Adult paint by number is a guided painting method that uses numbered sections and colors to produce a finished artwork. It’s designed to be approachable for beginners while teaching core painting concepts like color placement and layering.
Adult paint by number uses numbered sections and colors to create an artwork; it’s beginner-friendly and teaches basic painting concepts.
Do you need artistic skill to start?
No advanced artistic skill is required. The numbers guide you, and practice helps you improve eye-hand coordination and color understanding over time.
You don’t need prior art skills—the numbers guide you, and practice improves your technique.
How long does a typical kit take?
Most projects take from 60 to 120 minutes depending on canvas size and detail. Breaks between sessions can help maintain accuracy and enjoyment.
Most kits take about one to two hours, depending on size and detail.
Can you mix colors beyond the kit’s palette?
Yes. You can mix colors on a palette if you want to create custom shades for shading or highlights, but be mindful of color matching with the numbers.
You can mix extra colors if you want more shading variety, just keep the numbers as a guide.
Is sealant necessary after finishing?
Sealant is optional but recommended for longevity and protection against dust and moisture. Ensure the painting is completely dry before sealing.
Sealing is optional but helps protect your artwork over time.
Watch Video
Quick Summary
- Choose kits with clear maps and a comfortable size.
- Prep your workspace to prevent spills and glare.
- Follow a light-to-dark workflow for clean layering.
- Finish with a protective sealant to preserve color.